To make a postcard, we need:
• Kraft cardboard 15 * 30 cm in size;
• Paper for scrapbooking green-brown tones in the form of different male patterns, take three sheets of 15 * 15 cm;
• The picture is round for hours;
• Cutting down a beige feather;
• Suede brown cord;
• The key is bronze metal;
• Black rep pea ribbon;
• Stamp "Happy Holiday" and black ink;
• Half-beads pearl brown;
• Watercolor paper;
• Curb hole punch;
• Double-sided tape;
• Wooden button;
• Ruler, pencil, scissors;
• Lighter, glue gun.


Kraft cardboard is quite dense, so it’s very suitable for the base of the postcard. A sheet of just the right shape 15 * 30 cm, we divide it in half along the large side and fold it.


We get the base 15 * 15 cm closed. We put the bending line up, take the ruler and measure 3 cm from the top on both sides, put marks.


Starting from the sides and towards the center, we measure out 5 cm each. We make cuts on the top of the postcard, until the bottom we touch.


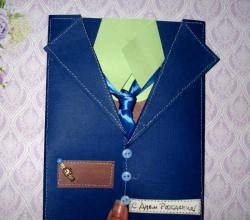
We bend both incisions to the center to make a collar. On the back, draw the necessary lines for the cut with a simple pencil and cut off the back of the base.


We unfold and get just such a base from Kraft cardboard. Immediately take the watercolor paper and cut out a rectangle from it for the inside of the card.


A watercolor rectangle of 11.8 * 14.8 cm, glue it with a strip of tape inside the card.


From the scrapbook paper, cut out two different rectangles, also 11.8 * 14.8 cm.


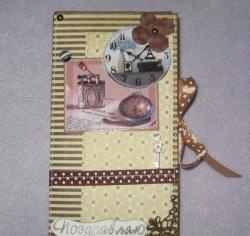
From the cropping of the back of the base, Kraft cardboard remained, we cut out two small rectangles for pockets. From the third coloring of the scrapbook paper, we also cut out two rectangles and a paper tie. Glue the picture on one rectangle. With a stamp we make a congratulatory inscription on a white sheet and cut it out.


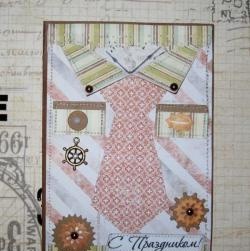
Cut off a piece of the cord, pass the key, attach the cord to the workpiece, and glue the pocket on top. On the other hand, we also stick a pocket, in the center there is a tie at the top, and at the bottom there is a round picture of a clock and an inscription on it. Cut off and two quadrangles for the collar. We flash all the pockets, tie, pictures, collar and inscription on the machine.


Now we glue the feather below, and from the rep ribbon we cut two segments to the width of the pocket, we burn the edges and glue them on the pockets. We glue the rectangles ourselves onto the base and sew each one.Inside the card, on watercolor paper, we glue strips of paper lace stripes that we punch from the remnants of scrapbook paper.


Glue the button and beads, done! Thank you all for your attention!