You will need:
• A pair of felt insoles of the required size (we have it 38th);
• Awl;
• Yarn - 100gr / 300m, wool mixture;
• Hooks - No. 3 and No. 2;
• Needle.

At the first stage, we need - insoles, an awl and a hook No. 2. Insoles must be tied with columns without a crochet (Art. B.N.). To do this, pierce holes in the insole with an awl, backing 5 mm from the edge. The distance between the holes should also be 5 mm. In order to avoid contraction of the edge and uniformity of the strapping, between the posts, perform 1 air loop (vp).
Tip: In order not to lose holes, due to the peculiarities of the structure of the felt, it is better to tie together with the holes. That is, pierce and then do St. BN ..

For greater aesthetics of the product and a light massage effect, as well as so that the legs are not too hot from the felt sole, we perform a duplicate insole. She repeats the shape of the insole and is executed as follows:
For 38 feet, we pick a braid of 38 vp already the main hook number 3 and knit in a spiral:
1st p. - from art. b. n, in the first and last loop knitting 3 columns.
2 p. - again Art. b. n., but 3 end posts turn into 6, thanks to increases.
3 p. - give the shape of the insole. The narrow part fits art. b. n., in the place of its expansion 2 half-columns with a crochet, and wide - with columns with 1 crochet. We continue to carry out increases.
4 p. performed by analogy with 3 p. The only difference is that now 2 p / s with n. shifted 2 loops closer to the narrow part of the insole, relative to 3 p.
5 and subsequent rows - We knit st.B.s. along the contour of the sample. Constantly applying a sample to the insole, the moment of completion of knitting is determined.
Tip: It is better to make a knitted pattern 3-5 mm smaller than the felt along the contour. Sewed a little "pull" he will not puff. In addition, the felt insole “sits down” a little when worn.
We sew a knitted insole with a large needle to the felt with frequent stitches “over the edge”.

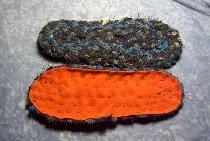
It looks like a fully finished sole slipper on the back:

For the upper part slipper we type 5 vp Flip over knitting when switching to each new row, performing 1 vp lifting before knitting a new row.
1. Double the number of loops by knitting 2 tbsp. b. n from one loop.
2. We knit without changes 10 tbsp. b. n
3. Double (= 20 loops).
4. No change 20 Art. b. n
5. The increase at the beginning and at the end, as well as on the central 2 tbsp. b. n (= 24 p.).
6.24 Art. b. n
7. Increases (28 tbsp. N.).
8.28 Art. b. n
At this point, the end of the additions can be marked by tying a colored thread, or by putting on a marker or pin. Next, we knit on 28 loops of st. in straight and reverse rows before the start of the rise of the foot - 11 "stripes" of the canvas.
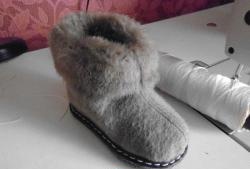
It turned out the top slipper - "shell":

For a more comfortable fit and reliable attachment of the top of the slipper to the sole, we carry out "sides". At the extreme 8 st. Starting from the edge, we perform a gradual decrease in the number of columns. Decreases are made through the row, only on the front side of the sample on one side, starting from the 2nd row, until 1 loop remains, which we close and break the thread. Similarly, on the other hand.

It looks like the resulting sample, folded in half:

Sew it to the sole, marking the midpoints and aligning them. It is more convenient to sew in two stages - separately from the middle.

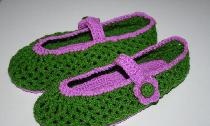
We tie the finished slippers with the help of a small hook No. 2, alternating Art. b. n and “seashells” from art. double crocheted with pico.

To decorate the slipper, you need to make a pompom. It is carried out by simple winding of yarn on the fingers (the more turns, the denser the pompom):

Without removing the turns from the fingers, we put a piece of thread between the fingers and tightly bandage it:

The ends of the thread are not cut, they are useful in order to attach the pompom to the product. Having tied, you can leave it like this:

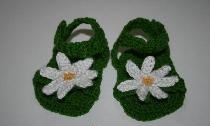
But nevertheless, we carefully cut the loops and straighten the ends of the threads. Slippers acquired a finished look: