Anyone can make such a bouquet, and most importantly, the most affordable materials will be used for the work.
Here is the list:
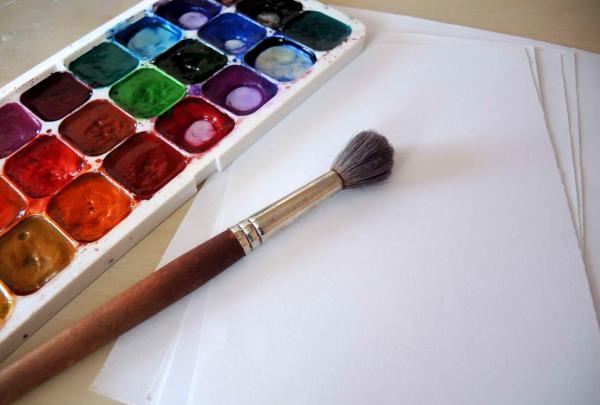
- White paper (such as printer paper).
- Watercolor.
- Container with water.
- Brushes: large for filling and thin for small details.
- Scissors.
- Glue stick.
- Pencil.
- Ruler.
- Hole puncher (if available).
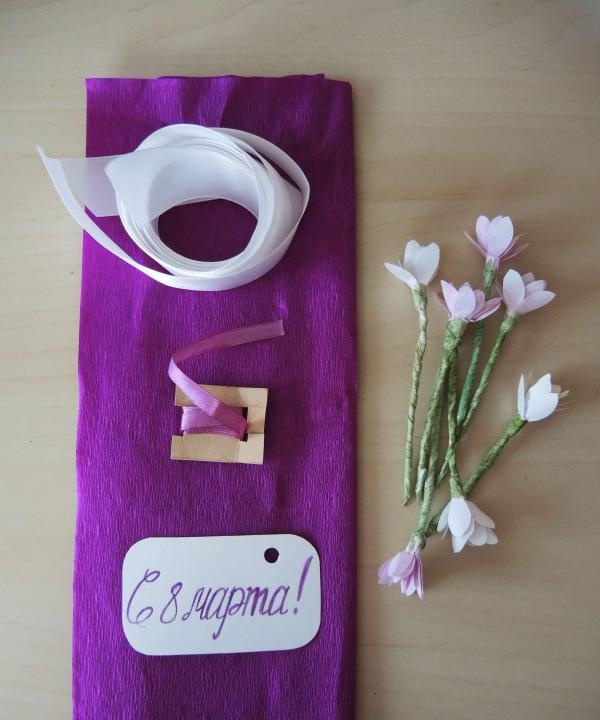
- Satin ribbon.
- Corrugated paper.
So let's get down to business. First of all, take several sheets of white paper and, taking a little paint and water onto a large brush, paint the surface unevenly. You can choose delicate and pale colors or, conversely, bright and catchy - depending on what flowers you want to see in the bouquet.
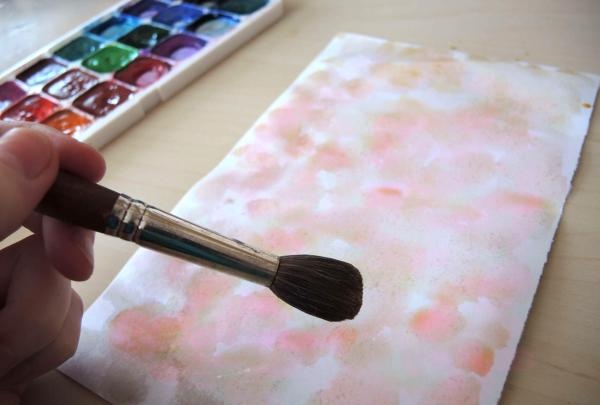
Leave the sheets to dry.
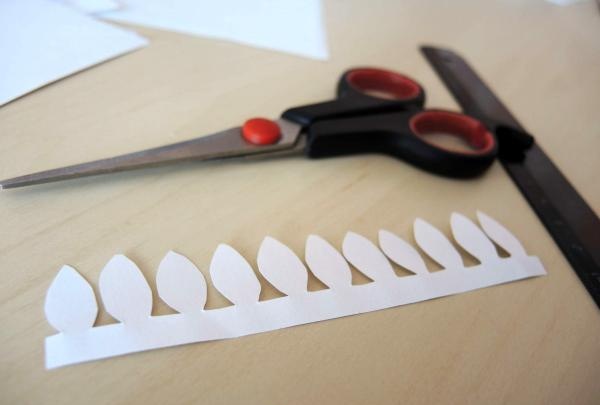
In the meantime, take a blank sheet of paper, draw a rectangle measuring approximately 11x2.5 cm and draw the petals of the future flower by hand.
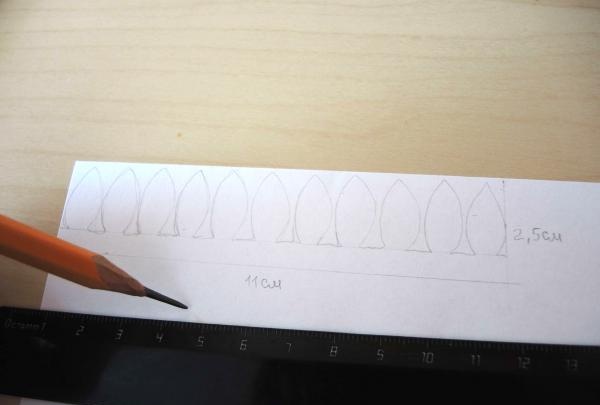
We also need a rectangle measuring 3x1.5 cm.
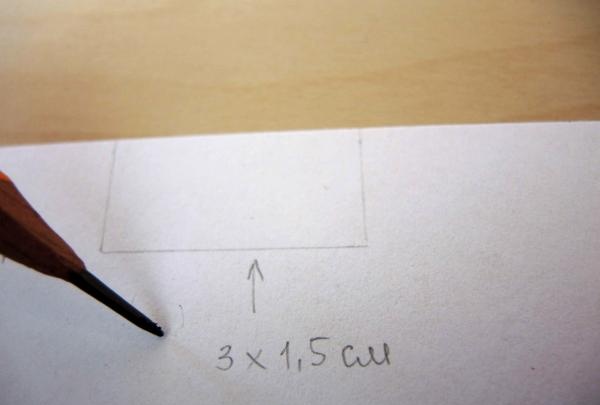
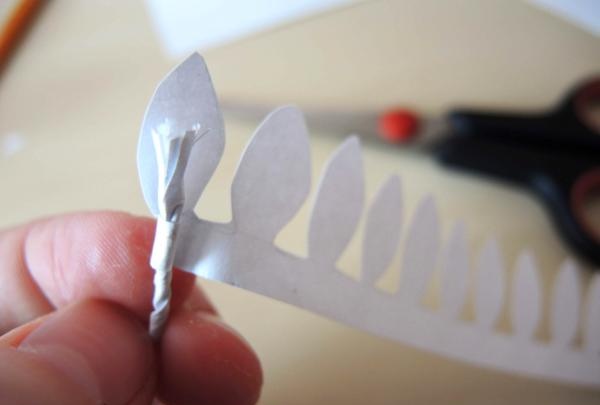
Let me remind you that the dimensions are approximate, you can change them depending on the size of the flower you want to get in the end. Use scissors to twist a small rectangle and make cuts on the smaller side.
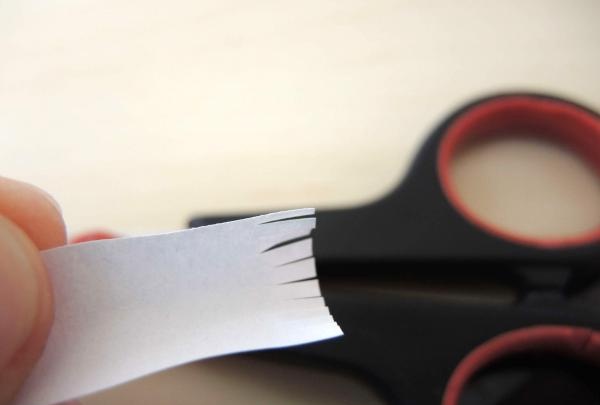
Then we twist it into a tube and secure it with glue.
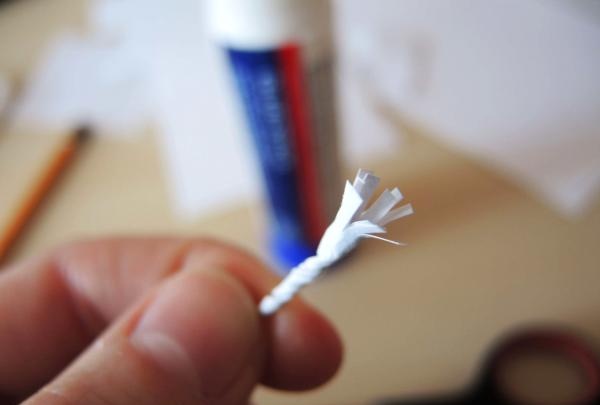
Cut out a rectangle on which the petals are drawn.
Now, using glue, we begin to wind the petals onto the tube made earlier. If necessary, you can bend the paper, reducing the distance between the petals, thereby distributing them evenly.
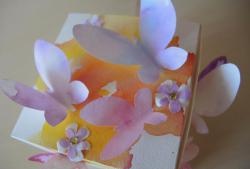
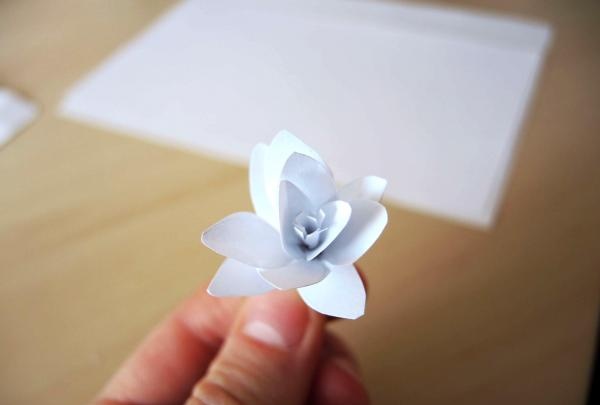
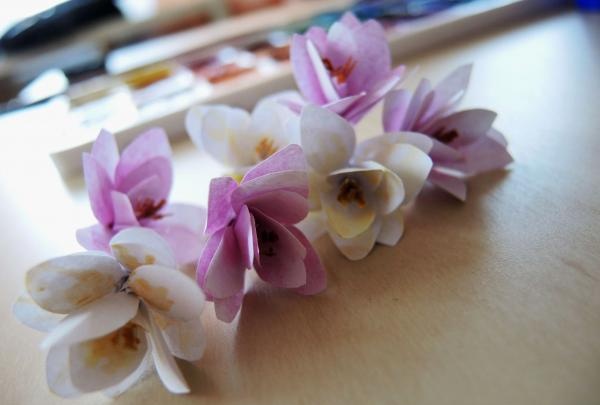
The end result is a flower like this.
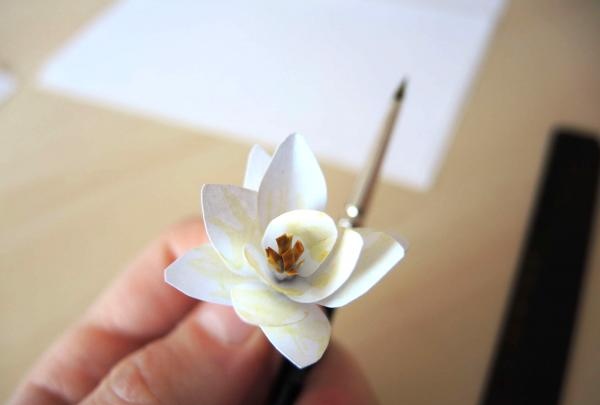
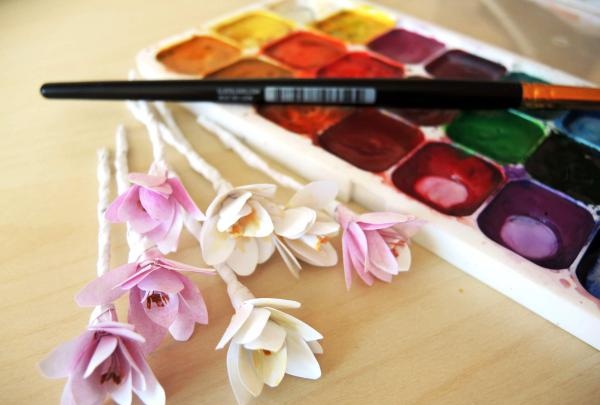
Let's give it some color. Using a thin brush, draw the stamens and add a drop of pale paint to the petals.
From the paper, which has probably already dried by this time, we make a few more flowers by analogy.
Next, we will make flower stems from cut strips of paper. To do this, you just need to apply glue to the strip and, securing one edge diagonally, twist it into a spiral.
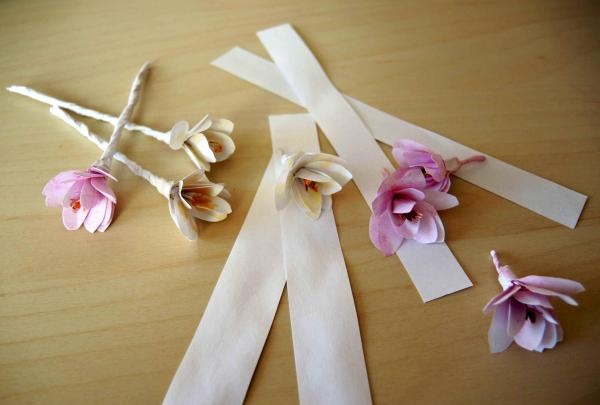
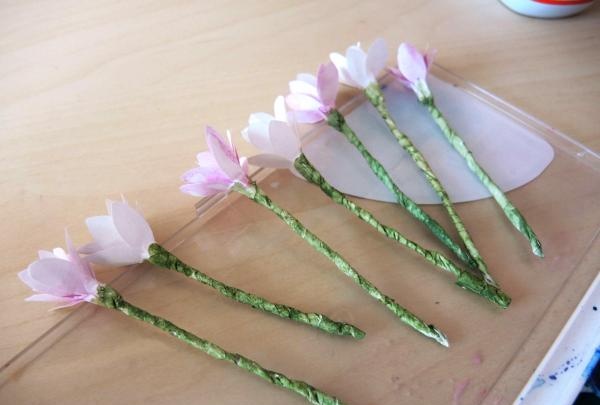
When all the flowers are ready, paint the stems and leave until completely dry.
And in order not to waste time, we will prepare a tag with a congratulatory inscription.
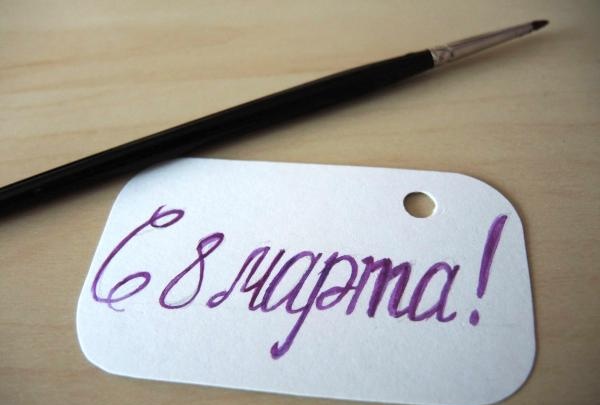
If you do not have a hole punch on hand, you can replace it with a stationery knife. The flowers have dried, the inscription is ready - move on to the next step.
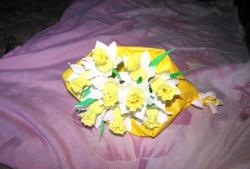
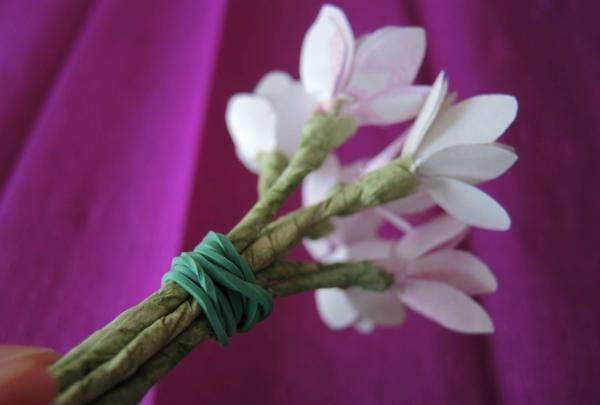
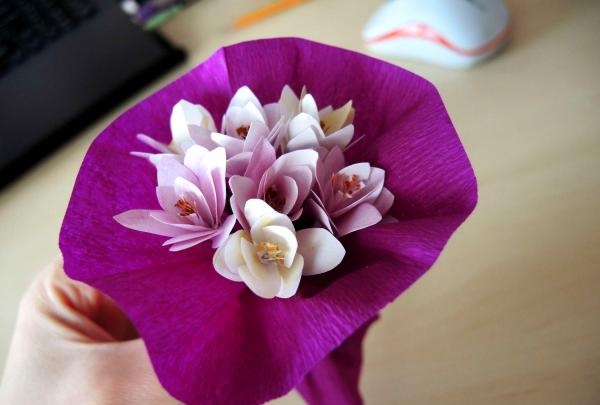
We collect the flowers in a single bunch and tie them with thread or an elastic band - this will make it much more convenient to work with them further.
Having measured out the required amount of corrugated paper, we apply glue along the edge of the smaller side and connect it to the opposite side. It turns out something like a cylinder.
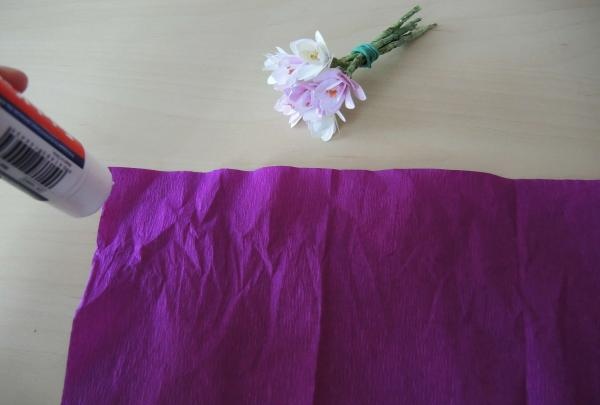
We insert the bouquet into it and evenly distribute the paper, forming a bouquet.
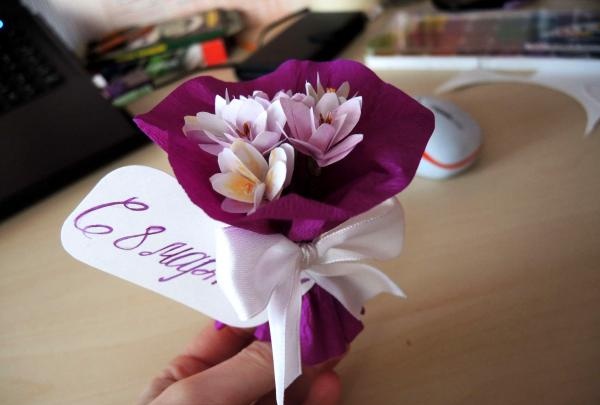
We tie it with a ribbon with a congratulatory tag.
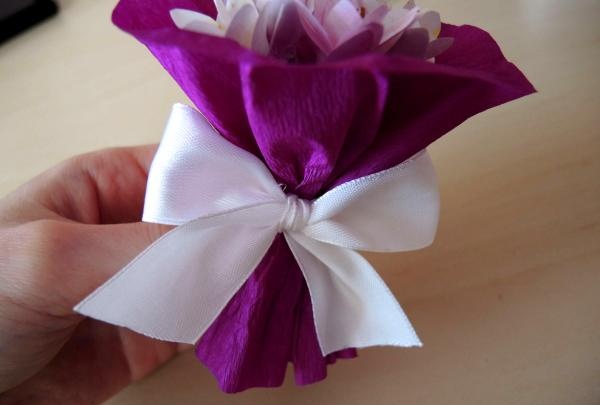
There you go! Easy, accessible and original.
Best wishes!