So, let's start with the most difficult thing - with tying out a hand and three fingers. The threads I had were BABY, the length of which was 100 g - 360 m, crocheted No. 3, quite tightly. We form an open loop, we knit 6 single crochet into it in the center, and connect them. In the second row, double the number of loops and knit a hand about 8 cm long. Increase the number of loops by 6 and knit 3 rows, then add 3 loops and knit another 3 rows. We divide the loops into about 3 parts, it should turn out 7 for each finger and knit each finger separately. We hide the threads inside. The upper part of our hand remained on the open loop, it is not necessary to tighten it. Hide the thread inside, and in each loop knit two and knit 4 rows. This is our shirt. I tied it in yellow, but, in fact, it should be white.

We knit the legs in the same way as handles with yellow threads of 8 cm by 6 loops. Then we knit white socks down 5 rows, then we increase the number of loops by 2 times and we also knit 3 rows. Above, with blue threads (in the cartoon, though, the pants are brown) we knit a shirt as well as at the hands. We knit with black thread a heel for 12 loops (1st row - 6, then an increase) somewhere around 8 rows. But the shoes themselves are knitted on 9 loops in the first circle, then 18 loops in the 2nd, only 14 rows, considering the expansion and narrowing of the canvas. Before closing the loops, we stuff the shoes with synthetic winterizer. We sew in heels, we sew in the center (the beginning of knitting) inside, then they turn out dense and like real ones.

We connect the shoes with the legs, embroider the lacing.

We start knitting the Sponge Bob itself. According to the size of the washcloth, and I have it 12 * 17 * 3 cm, we begin to knit the fabric with crochets. I started with yellow. Knitted enough to start knitting clothes. We knit a shirt with white threads 6 rows, panties with blue threads 20 rows, then again 6 rows with white. Then we continue to knit with yellow threads until the fabric closes on the back of our sponge.

Now we begin to knit eyes. In the first row we collect 6 loops with blue threads, the second row with blue, expanding the fabric 2 times, and the third, last row we knit with white threads. Increasing the number of loops to 18.

Now we embroider cilia, we make glare on the eyes. Sew on the eyes. We knit out 2 teeth - these are two squares for 5 loops 4 rows. Sew them and embroider the mouth. The nose fits 6 loops in a circular 8 rows. Do not forget about the tie and collar of the shirt.

Sew the legs to the pants and put on a sponge.

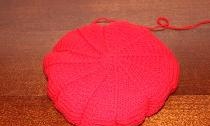
Now we just have to knit the side part according to the same principle, the main thing is that the color of the shirt and pants match.

Sew hands immediately.

We note the sidewall to the main canvas.

And we tie around the perimeter with ordinary columns, at the corners do not forget to knit 3 columns for expansion.

Our SpongeBob in all its glory at the computer.

Oh! He’s going to work tomorrow! How is he without his signature hat? She fits simply.

Well, now you can go to work! Spongebob is ready to play with your kids!