- cardboard.
- scissors.
- glue gun.
- compass.
- purple beads.
- tweezers.
- ribbon for decorating flower bouquets in two different shades: orange and lilac.
- transparent tape.
- large silver beads.
- stapler.
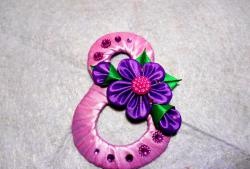
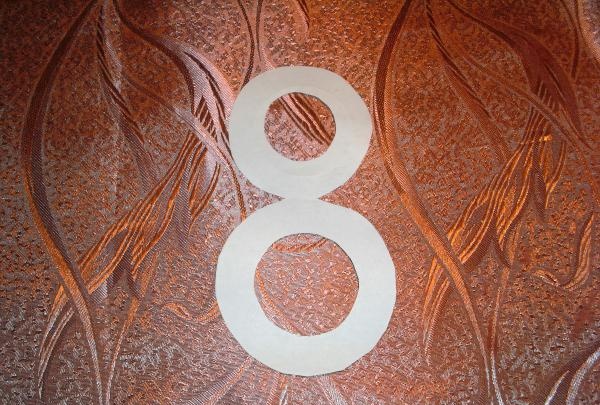
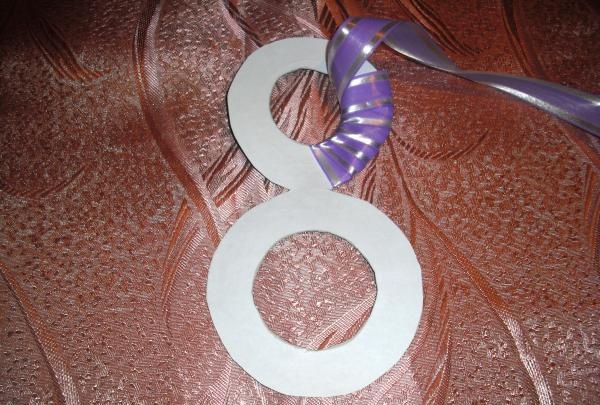
The sequence of making a postcard. On a sheet of cardboard, using a compass, draw the number 8, which will consist of circles. In this case, the radius of the outer circles is 4 and 4.5 cm. The diameter of the internal figures is 1.3 cm. Next, the resulting drawing must be cut out.
The base for the card has been prepared; now it should be wrapped with ribbon for decorating bouquets of a lilac shade. The edge of the ribbon should be attached with tape, and the free part should be gradually wrapped around the cardboard, starting from the top circle.
After wrapping the top of the card, you need to make a transition to the bottom circle without cutting off the ribbon.
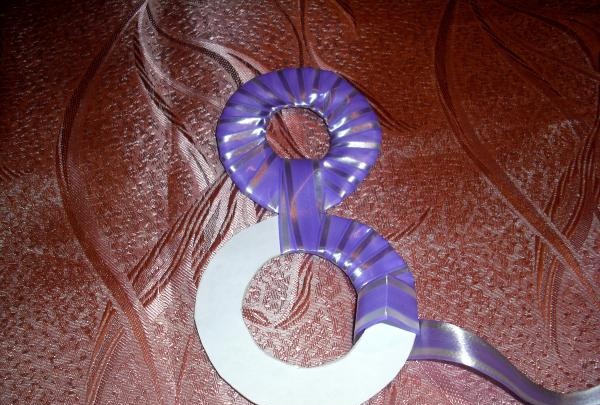
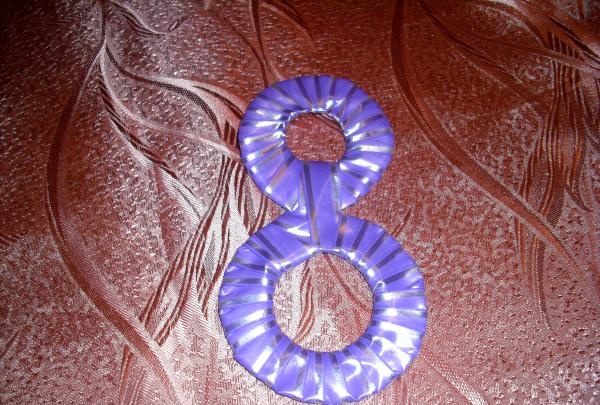
Upon completion of the wrapping, the ribbon should be cut off, leaving a small tail, which must be carefully secured.
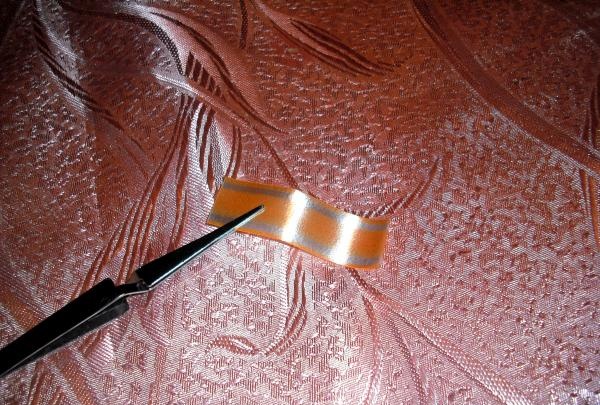
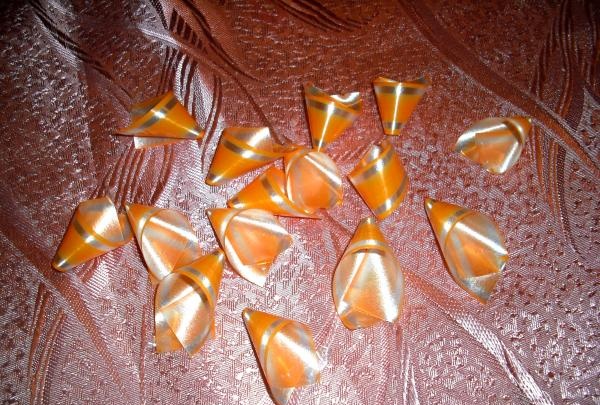
Now you will need flowers, which are created from the same type of ribbon 1.5 cm wide, only orange. You need to use a ruler and scissors to cut 24 pieces 7 cm long.
From each such segment it is necessary to make petals, folding the edges together, overlapping each other, creating a loop.
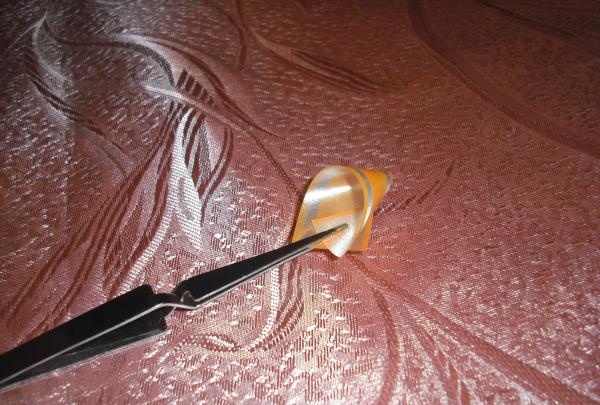
In this position, the part must be secured with transparent tape.
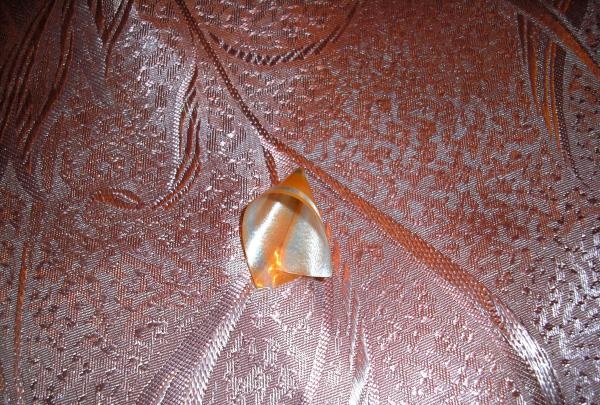
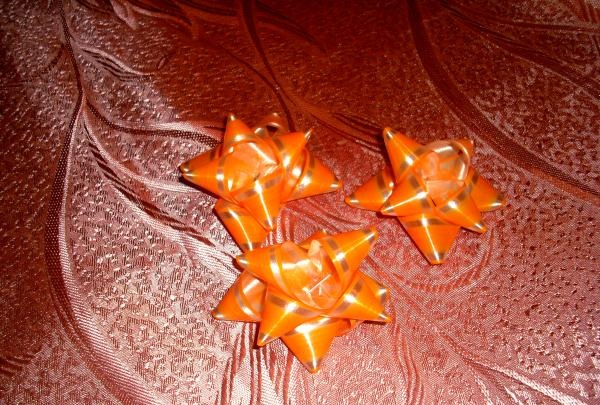
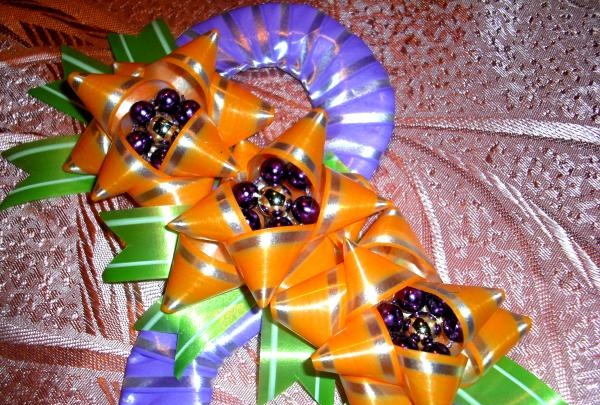
From the orange segments you should get these flower petals.
Next, all the petals should be combined 4 pieces into a circle, fastening them at one point using tape.
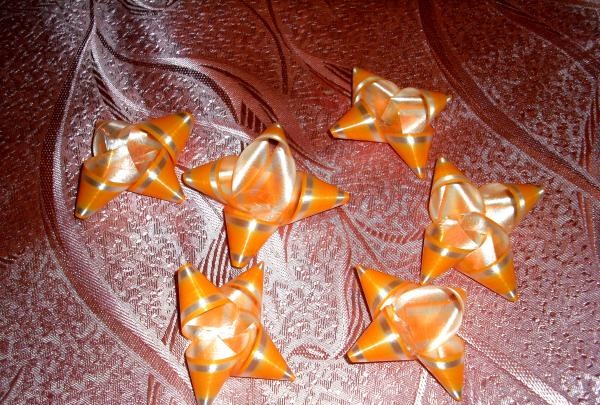
You will get 6 blanks that need to be fastened together in pairs to make three flowers. To connect the circles you must use a stapler.
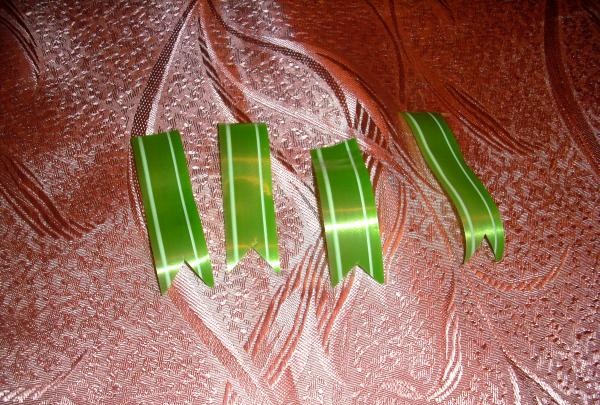
To complement the flowers, you will need leaves of green ribbon, which are created from pieces 6 cm long. You need 9 of them, on one edge of which a recess should be cut.
The resulting parts need to be combined in three pieces together and attached to the flowers.
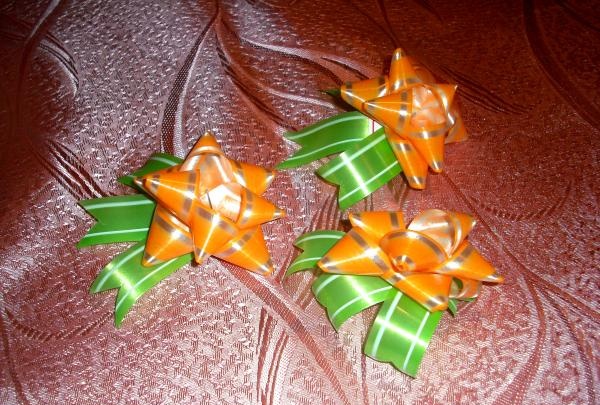
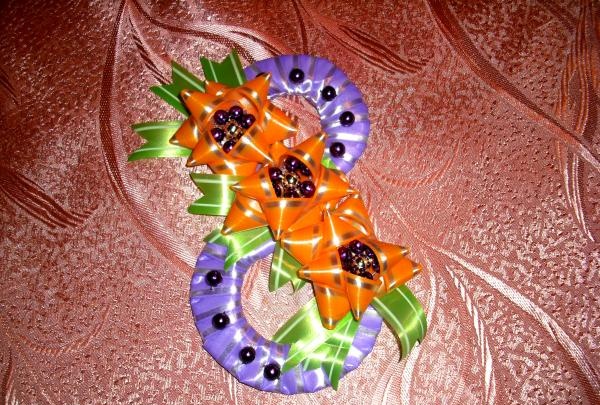
The resulting buds now need to be attached to a piece of cardboard using a stapler for fastening.
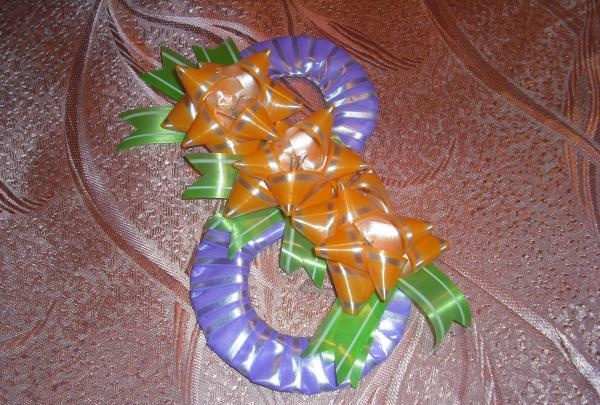
To fill the center of the flowers and close the staples from the stapler, you need to glue one large silver bead, surrounding it with 6 purple beads.
All that remains is to supplement the card with individual purple beads, placing them at a short distance.
The postcard is ready!