- Wire (which bends well).
- Wire cutters.
- Bottle or jar cap.
- Red and green polyethylene.
- Scissors.
- Felt pen.
- Glue.
- File.
- Scotch.
- Green corrugated paper.
- Green sisal.
- Cement or plaster.
- Lighter.
- Gold colored beads.
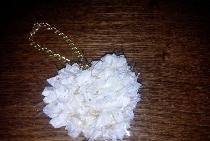
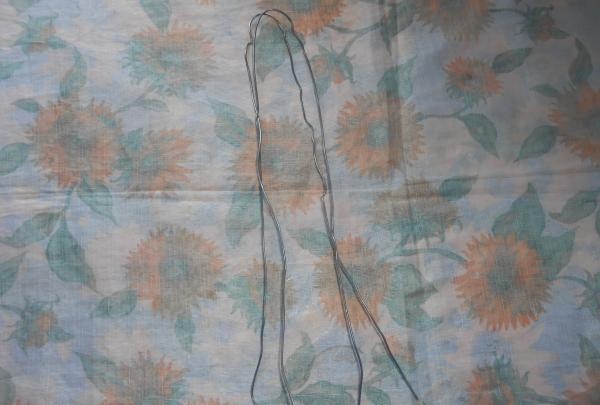
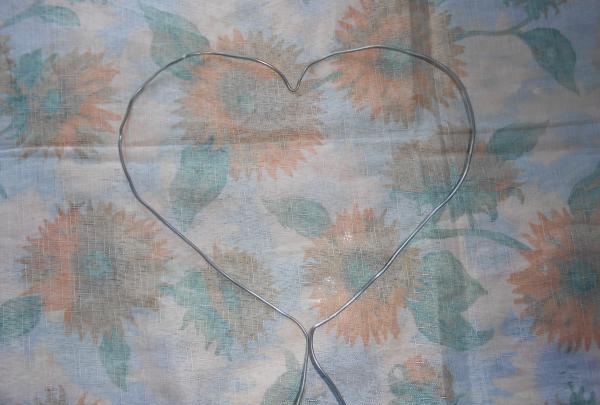
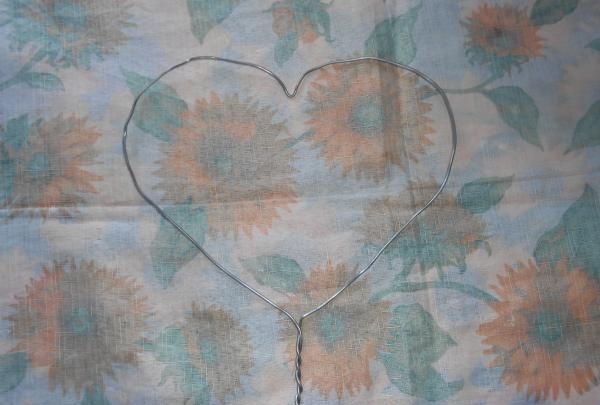
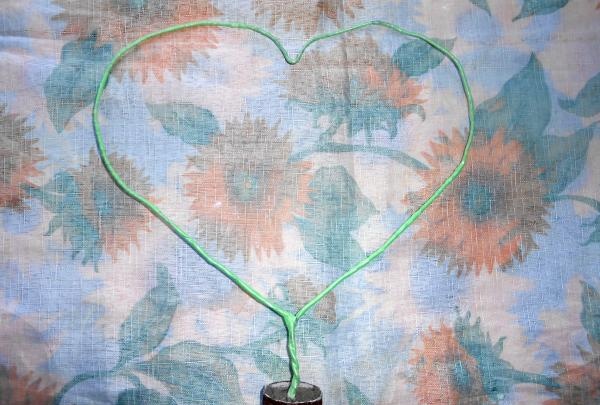
Take the wire and use wire cutters to cut off a piece of the required length. Bend it in the shape of a heart, twisting the ends together.
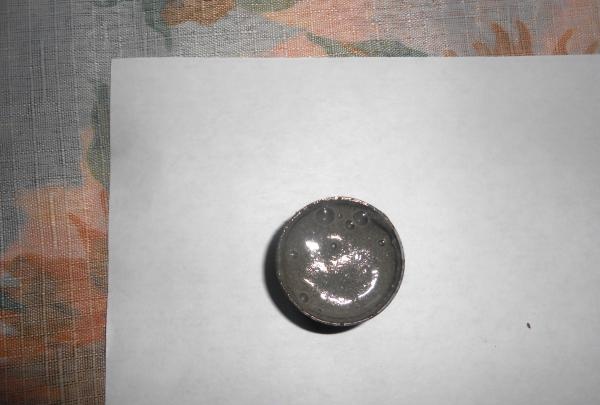
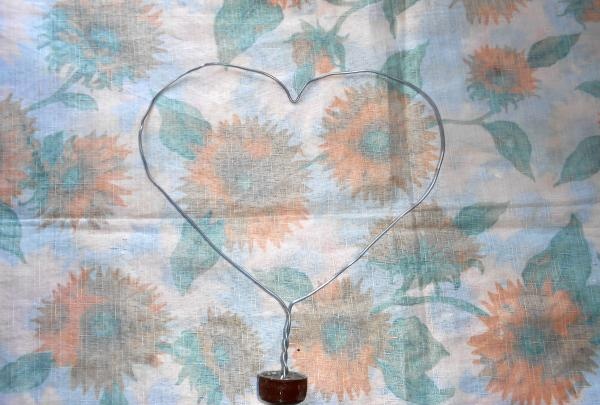
Then take a lid and pour a solution of gypsum or cement into it. Using beads, secure the twisted ends of the wire in the center of the lid. You can bend the ends slightly, so the wire will stay in the lid more securely. To be honest, initially I took a small lid and my heart didn’t want to stand upright. It kept falling. I solved this problem quickly. I just took a lid of a larger diameter, put the craft there and filled it with plaster again.In general, why am I saying all this? The larger your heart, the larger the diameter of the lid you will need.

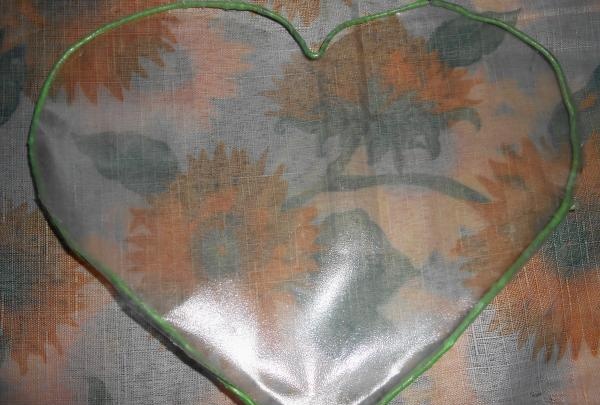
Let's set the heart aside until the solution hardens. For now, you can take green polyethylene and cut strips 0.5 centimeters wide.

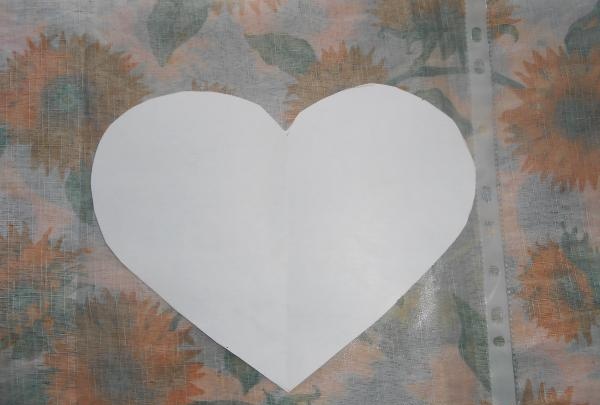
As soon as the solution hardens, take a sheet of paper and circle the outside of the heart. I'll tell you why this is needed a little later.
In the meantime, let's start decorating the heart. Let's take the strips that we have already cut in advance and wrap our heart.
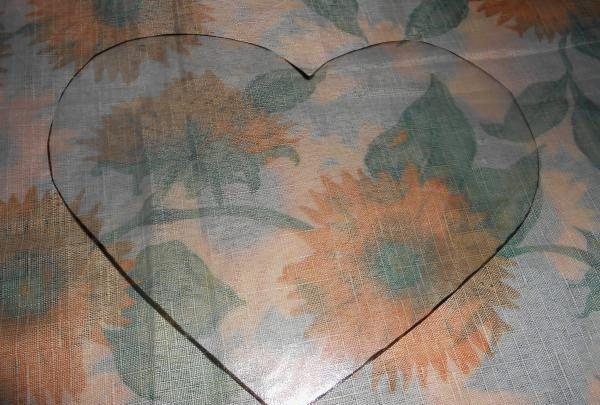
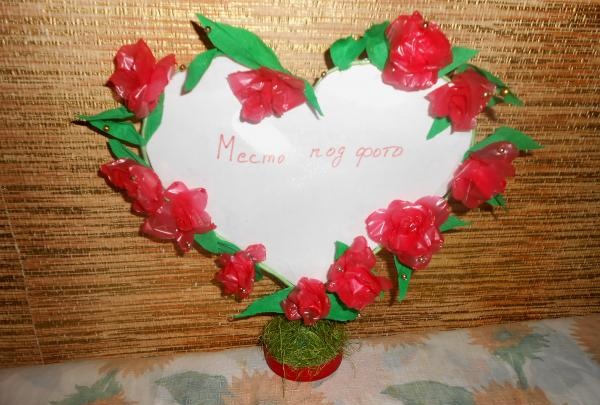
Now we need a file and a heart that we cut out of paper. Place the pattern on the file, trace the heart and cut it out. It is better to outline with a felt-tip pen; it will be easily erased later. After we cut out the heart, you will need to carefully fasten the edges of the file with thin tape. Just don’t need to fasten the top, because... then we will insert a photo into this file.
Now you can glue the heart from the file to the wire heart. Glue will help us with this. You just need to make sure that only one layer of the file sticks to the heart on top.
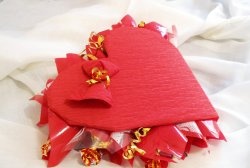
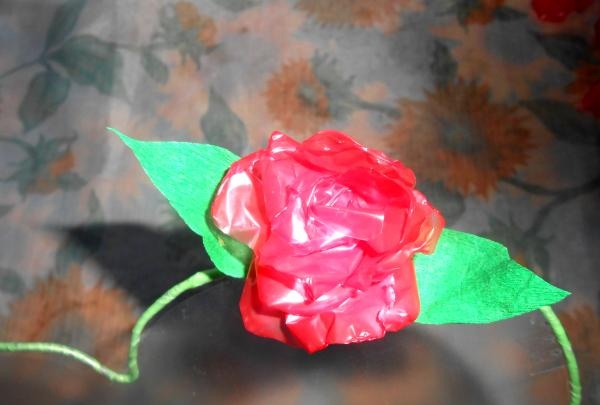
Let's leave the heart aside and make flowers from red polyethylene. First you need to cut out the petals.
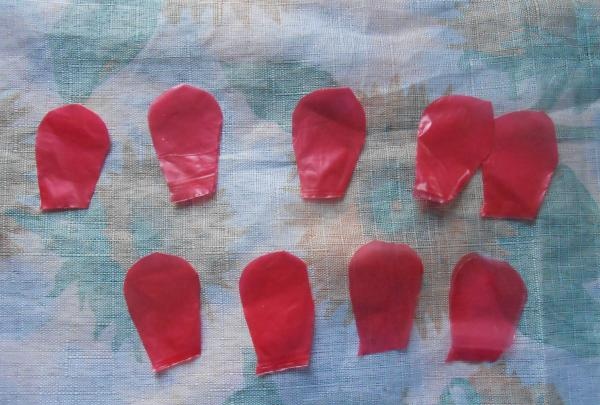
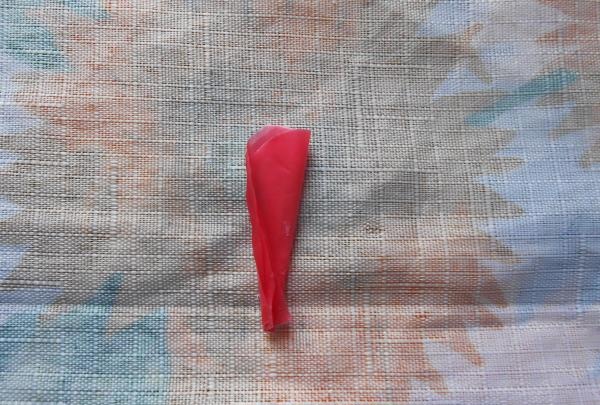
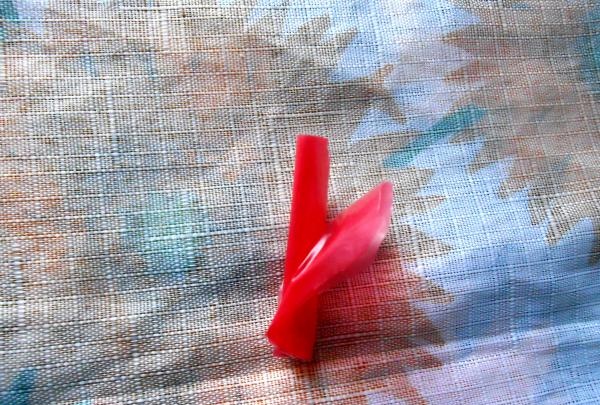
Now let's collect the flower. Take one petal, coat the bottom edges with glue and roll it into a tube. Then we glue the second petal. The edges need to be slightly bent from the previous petal. We do the same with other petals. One flower will require 8-9 leaves.
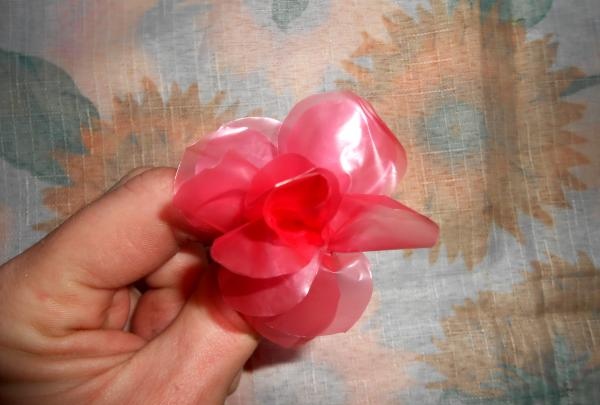
The flower is almost ready. Now we need a lighter, with the help of fire we will bend the leaves of the flower. Polyethylene melts easily, so you should not bring the lighter close to the petals. This is what you should get.
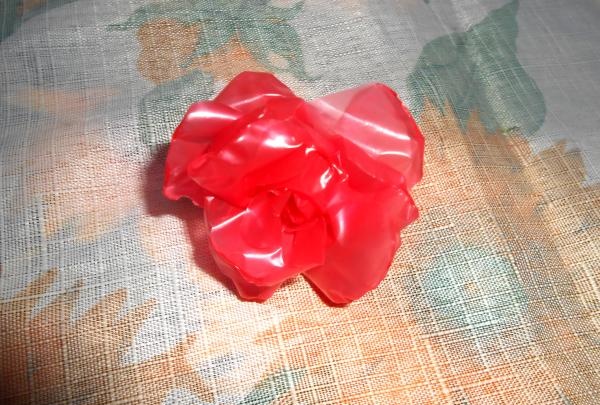
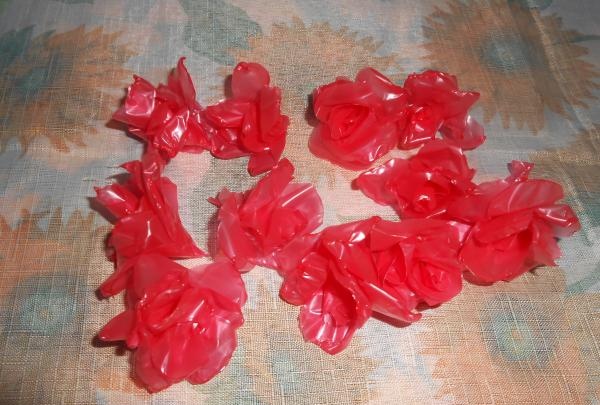
I advise you to immediately make as many flowers as you need, but the main thing is an odd number.I made eleven of them.
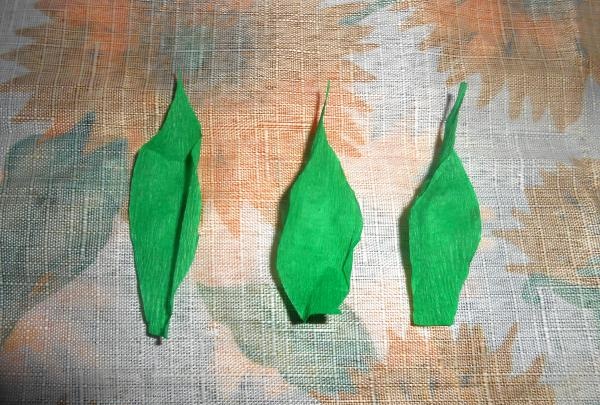
We need to make leaves for the flowers. Take green corrugated paper and cut out leaves from it. On average, two or three per flower. Then in the middle of each leaf we will make a depression using our thumbs, stretching slightly, straightening the paper to the sides to give volume and shape.

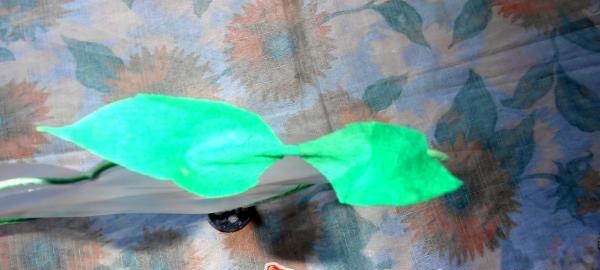
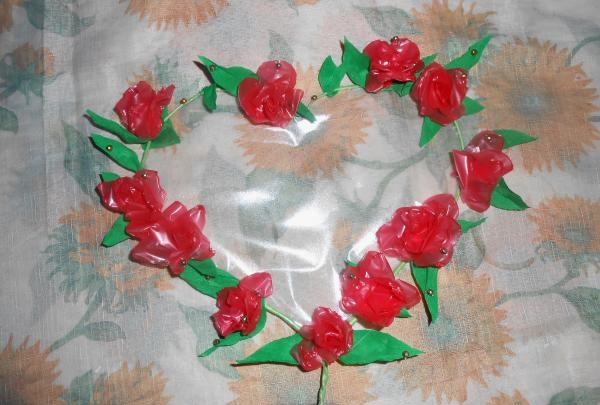
The blanks are ready, you can glue everything. First we glue the leaves, and then we glue the flower.
In this way we will glue all the flowers.
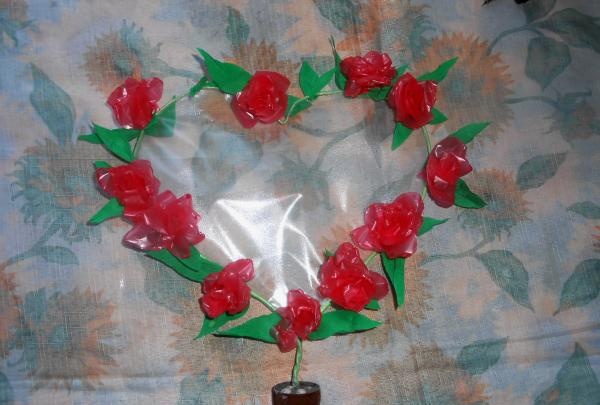
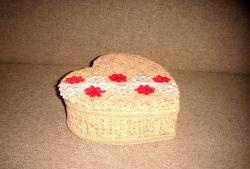
When all the flowers and leaves are in place, take the beads and glue them in a chaotic order.
Now we can start decorating the base of our crafts. We take green sisal, tear it slightly and glue it. That's it, the Valentine is ready, all that remains is to attach a photo of your loved one or a postcard with a declaration of love.
Don’t forget that by giving a Valentine card made with your own hands, you are also giving a drop of your warmth. Goodbye.