To create a picture you will need:
- wallpaper (burlap, fabric may come up);
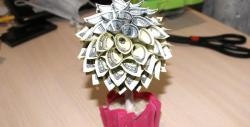
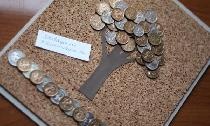
-coins;
- three-layer napkins 3-4 pieces or toilet paper;
-water;
-acrylic paints (black, gold, silver);
- foam sponge;
-pencil;
-scissors;
- foam sponge;
Glitter Glitter (can be found in cosmetic stores);
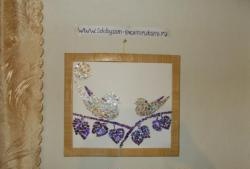
-frame for photographs (or for a picture);
- PVA glue (quick-drying or thermal gun is also suitable).

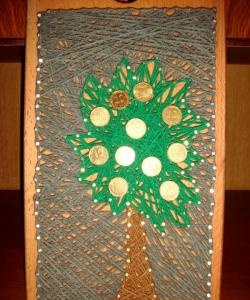
Step-by-step job description. First step. It is necessary to cut the base blank for the future picture. Having disassembled the photo frame, attach the back of the plywood to the wallpaper (burlap or fabric), circle it with a pencil and cut it out. Glue the blank onto the front of the plywood with glue. When the wallpaper has dried, draw a sample of the tree.
Second phase. In a plate of water you need to add a little PVA glue (approximately 1: 1). Three-layer napkins must be cut into pieces of different widths of 2-3 cm.

When the strips are cut, take one at a time and carefully dip in a plate with liquid, but you should not wet it much, because the napkin can creep out. At an angle of 45 degrees, carefully with your palms, begin to twist them in the form of tubes. If possible, twist better tightly. Different widths of strips are needed in the future to form the crown of the tree (thicker for the crown, thinner for the twigs). When wrapped a sufficient number of flagella, leave them to dry completely.
The third stage. On the blank, in the place where the crown of the future tree is painted, apply PVA glue in a small layer. On a damp surface, lay out twisted paper flagella alternately, giving a bend to the tree, forming branches, roots and a crown.

The fourth stage. Before gluing coins, they must be degreased. It is best to degrease with alcohol or detergents (for glass or for washing dishes). The crown of the tree is ready and dried.

Glue coins with quick-drying glue (if not possible with glue gun).

The fifth stage. The tree is fully assembled. It remains to paint it.

Sprinkle all black with acrylic spray paint. Allow time for the paint to dry; if necessary, open it with an additional layer of gold spray paint. Dry foam sponge, dipping in silver acrylic paint, you need to walk through the whole picture.

Do not press strongly on the canvas, gently, as if rubbing the color. Allow time to dry again.
Sixth stage. Dry with a foam sponge, dipping it in an acrylic paint already golden in color, blend only on the coins.

While the paint is not dry, apply glitter - glitter (optional). Leave the entire product to dry completely.

After all the layers have dried, insert the wood blank into the frame and enjoy the beauty. The author’s idea, like the work itself, is not comparable with anything.