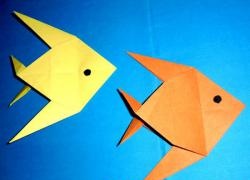
Do it yourself
Life hacks, master classes, useful tips, recipes.
This fish is so quick and easy to put together that even a junior high school student can make it. Preferably with the help of an adult. Someone should show the child how to carefully fold a piece of paper and bend the corners. Such a fish can be hung by a thin, inconspicuous thread from a chandelier or taped to the wall. And then she can become a talisman for the child. After all, she looks so much like the Golden Fish from a fairy tale!

Sequence of work.
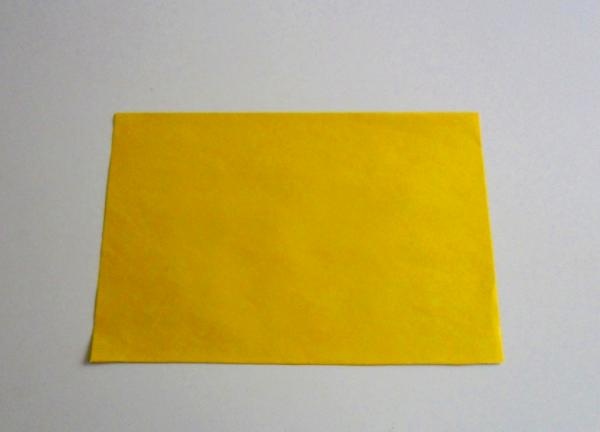
To fold such a fish, prepare a sheet of yellow paper. The reverse side of the paper should be white.

Simple paper fish


Fold the top right corner of the sheet diagonally in half with the wrong side inward. Cut off the part of the sheet that remains on the left.

Simple paper fish


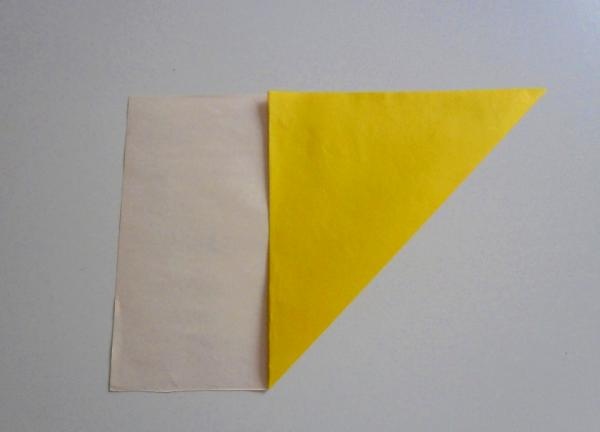
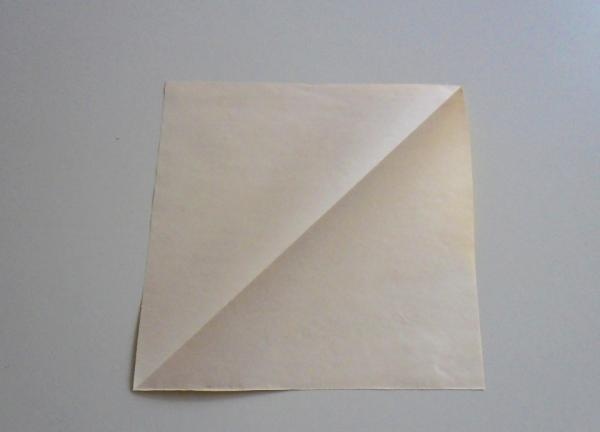
Unfold the sheet. You have a square with one diagonal fold.

Simple paper fish


Fold the square along the other diagonal. The fold should be at the top.

Simple paper fish


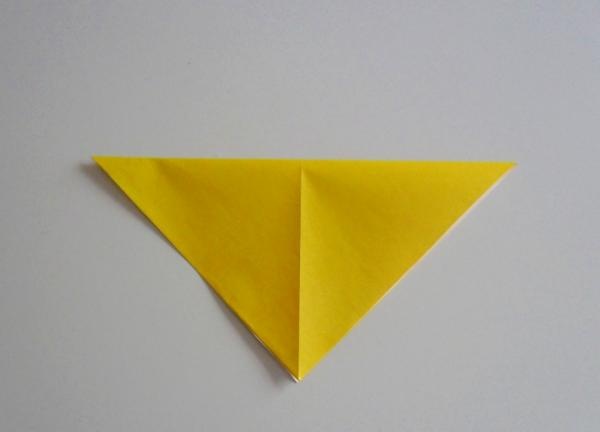
Fold the sides of the triangle downwards, aligning the side corners with the bottom. The result is two movable triangles.

Simple paper fish


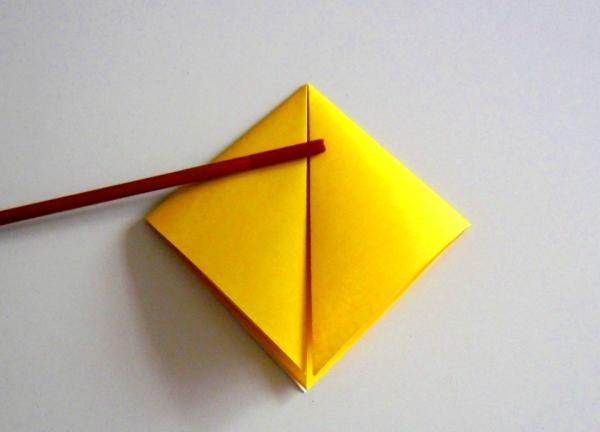
Fold these triangles in half horizontally.

Simple paper fish


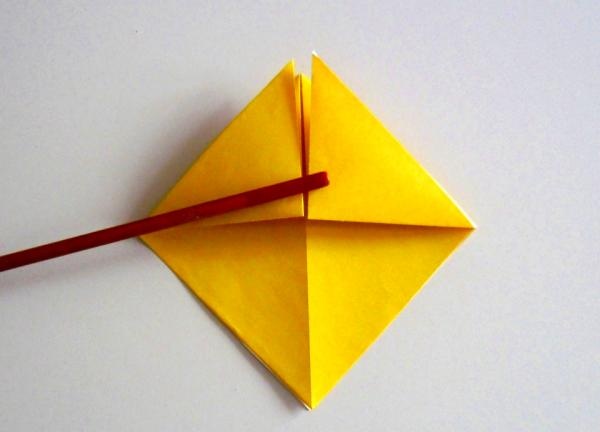
There are two triangles at the top again. Bend them in half and straighten them again. The folds defined their middle.

Simple paper fish


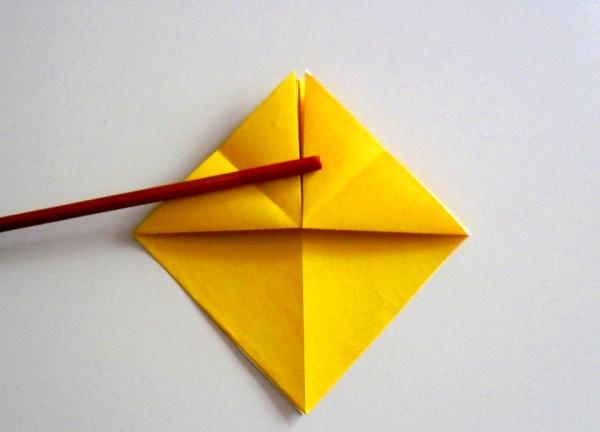
Fold the upper parts of the triangles in half again, aligning their sides with the midline.

Simple paper fish


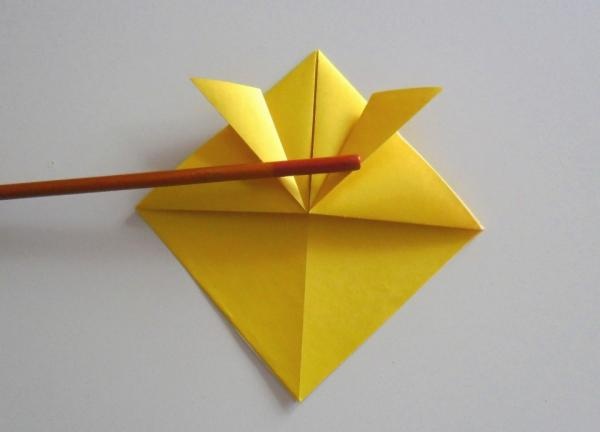
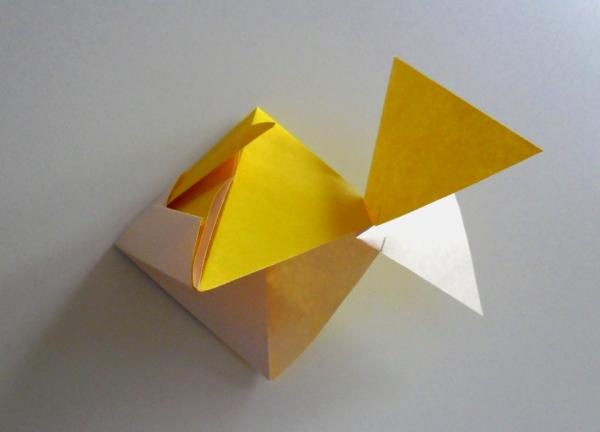
In the lower part crafts It turned out two sheets in the form of triangles. Bend one of the triangles up 3/4 of its height. Iron the fold.

Simple paper fish


Take this fold and bend it upward again, making a fold exactly in the center of the craft.

Simple paper fish


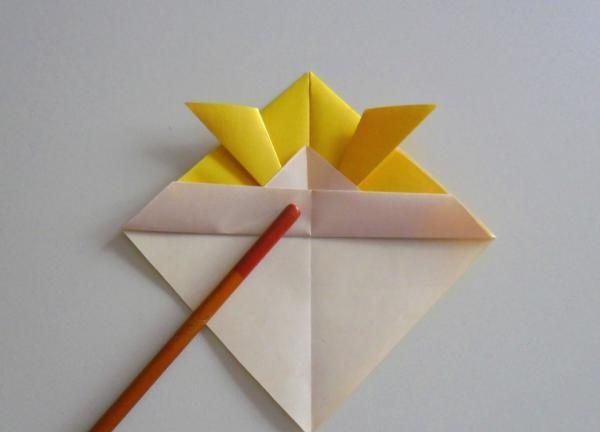
You now have a square where all the work you have done is at the top. And at the bottom there was a single triangular leaf. In the middle of the workpiece on this triangle, make marks on both sides at a distance of 1 cm from the center. Make cuts on both sides up to the marks.

Simple paper fish


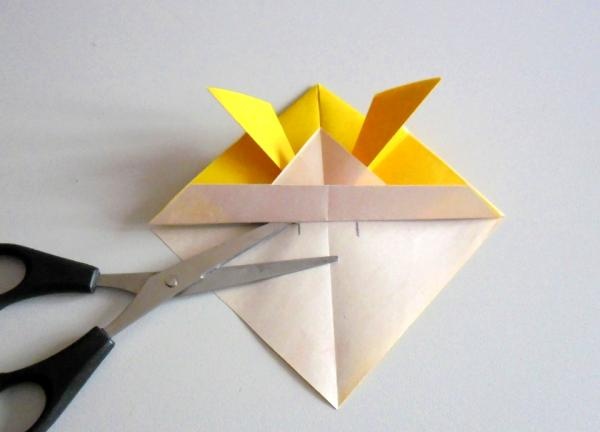
Fold the lower triangle behind the craft. You will get such a cap.
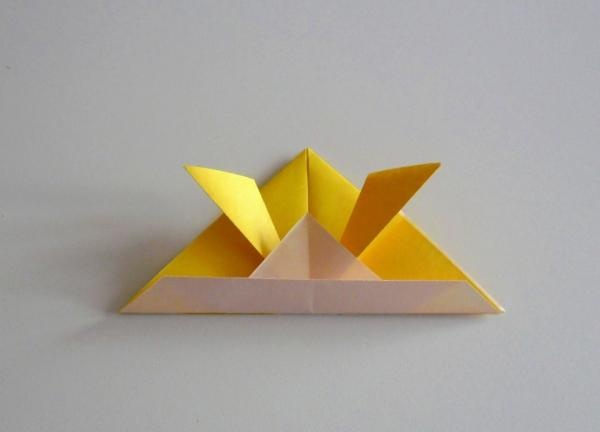
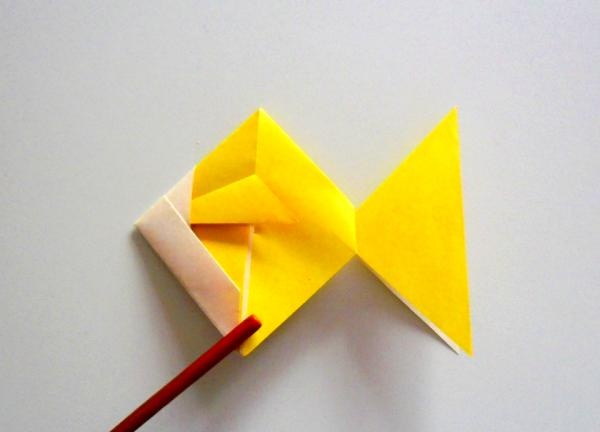
Simple paper fish


Open it wider.

Simple paper fish


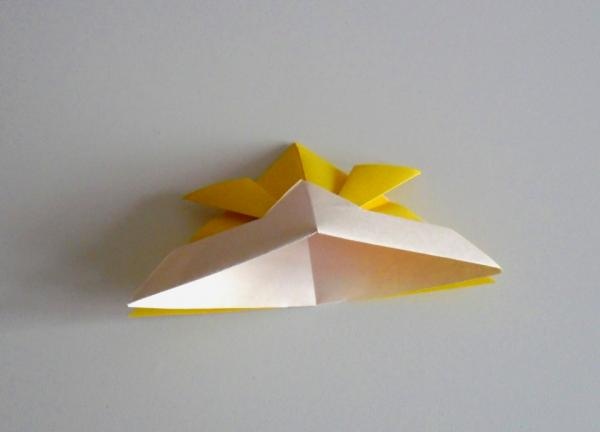
Grasp the side corners from below and connect the right side of the cap with its left side, while bending the cut part of the craft to the right.

Simple paper fish


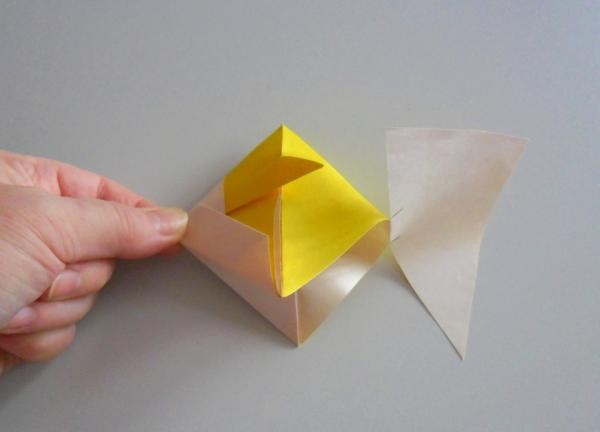
Holding the craft in a half-opened form, fold its tail part along the fold with the white side inward. Rotate the right triangle (tail) 90 degrees upward so that its base is vertical. Lightly press the top in the area of ​​the cut into the craft.

Simple paper fish


And only now iron all the folds. Since the fish's tail is movable, give it the correct position.

Simple paper fish


Cut out two small circles from black paper and glue. Now the fish has eyes.
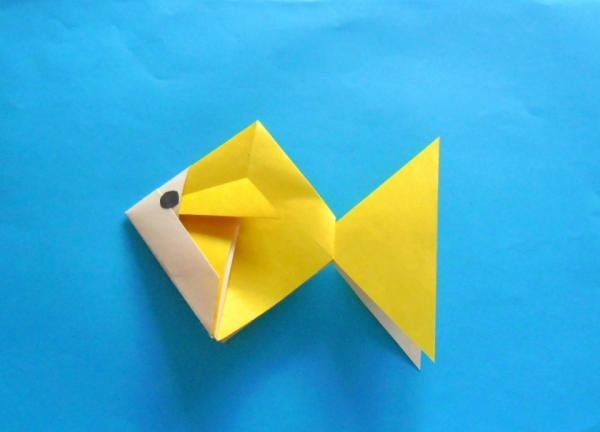
Simple paper fish


The fish is ready.
come back
Comment
  • bowtiesmilelaughingblushsmileyrelaxed relaxedsmirk
    heart_eyeskissing_heartkissing_closed_eyesflushedrelievedsatisfiedgrin
    winkstuck_out_tongue_winking_eyestuck_out_tongue_closed_eyesgrinningkissingstuck_out_tonguesleeping
    worriedfrowninganguishedopen_mouthgrimacingconfusedhushed
    expressionlessunamusedsweat_smilesweatdisappointed_relievedwearypassive
    disappointedconfoundedfearfulcold_sweatperseverecrysob
    joyastonishedscreamtired_faceangryragetriumph
    sleepyyummasksunglassesdizzy_faceimpsmiling_imp
    neutral_faceno_mouthinnocent
3+three=
Comments (0)

Fragrant basturma on the festive table

Repairing aquarium lighting | Do it yourself

Original pendant from an old key | Do it yourself

How to make tabletop metal shears from a file

«Do it yourself - with your own hands» - a site of interesting homemade products made from scrap materials and items at home. Step-by-step master classes with photos and descriptions, technologies, life hacks - everything a real master or just a craftsman needs for needlework. Crafts of any complexity, a large selection of directions and ideas for creativity.

We recommend reading

Washing machine error codes