We will need:
- crepe paper
- quilling paper,
- two-color paper
- cardboard,
- pencil,
- glue,
- scissors,
- special fixture for quilling.

Crepe paper, quilling paper, and a double-edged wand are sold in an office supply store. If desired, crepe paper can be replaced with simple multi-colored napkins, cut thin strips of two-color paper, and use an awl, a toothpick or knitting needle instead of a quilling tool.
We cut out the base of our valentine’s heart - from the cardboard - and draw on it a second, smaller one.

From crepe paper, cut strips 1 cm wide.

We cut squares of approximately 1x1 cm in size from strips. From two-color paper, cut out three strips about 1 cm wide. Select green quilling paper.

Tightly wrap a square of paper around the blunt end of the pencil and grease the end with glue.

Firmly press the leaflets smeared with glue to the workpiece.

We glue both hearts around the perimeter.

We wind strips for quilling on the fixture or knitting needle.

Carefully remove the workpiece, slightly dissolve, glue the tip and squeeze on one or two sides.

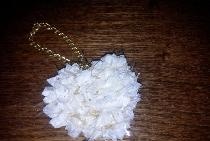
Fill a big heart with pieces of crepe paper.

We randomly fill the shape of a small heart with green blanks - these are the leaves of our bouquet.

Now the hardest part is making roses from strips of two-color paper. Bend the tip of the strip inward.

Wrap a strip around the stick two or three times.

Remove the workpiece and bend the strip out.

We continue to fold the strip to the end of the lapel.

Again, turn the strip out and turn the tube further. At this stage, it is not necessary to compress the workpiece strongly.

We glue the tip of the formed rose with glue and drip a drop of glue in the center to hold the petals together.

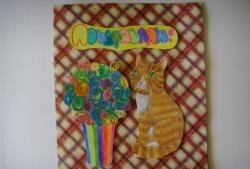
We make three such roses. To give completeness to the composition, buds of roses can be formed from color matching quilling paper. We finally form our valentine.

We got a bright and original postcard, a wonderful gift for Valentine's Day ..