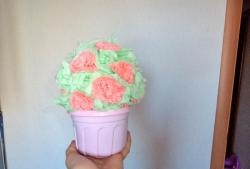
Instead of a basket, you can use a regular plastic flower pot or any other vase that is not used for its intended purpose.
1. Inflate a regular balloon to the size you need. We dilute PVA glue with water (about 1 teaspoon of glue per half a glass of water). We dip the napkins into the resulting solution and glue the balloon over them. The more layers, the stronger the bouquet will be. The tail of the ball must be left free in order to subsequently pull it out of there.

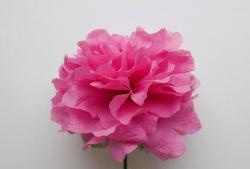
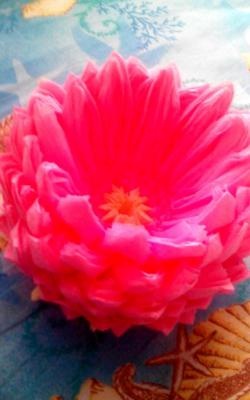
2. While the ball is completely dry, there is time to cut flowers and leaves. To do this, take a four-layer napkin and fold it in half, then again in half.


3. Cut a circle and make a lot of cuts around the edge. If a flower is needed lush, then the incisions must be made thinner and more often. Leaves are cut in exactly the same way. The only difference is the larger diameter of the circle. Green can be much brighter. For example, the color is not saturated enough.


4. Next, straighten the circle and snap the stapler in the middle. If the flower is planned to be made together with greenery, then we snap both circles at once: put green below, yellow from above.


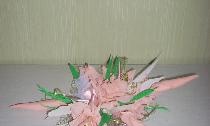
5. The next step is the collection of inflorescences. For this, each layer of the napkin, starting from the top, is pressed to the center. Here, the main thing is accuracy, since thin wipes can tear. Leaves can also be bent, but not necessarily. So the flowers will appear more magnificent.


The number of colors depends on the size of the balloon. Do not be upset if there are a lot of flowers and it seems to you that not everyone has enough space. They all fit easily. For this inflorescence, it is necessary to press tightly to the middle. If there are fewer colors, then on the contrary they need to be smoothed out more strongly and not glued tightly to each other or cut out additional new ones.
6. When the wipes on the balloon are completely dry - gently blow the balloon out and remove it. If desired, a few more layers of napkins can be glued to the place from where they pulled the ball so that there is no hole. In this case, you will again have to wait until the tissues are completely dry. If the hole is small, you can leave it as it is.
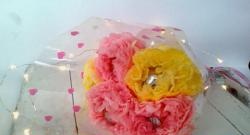
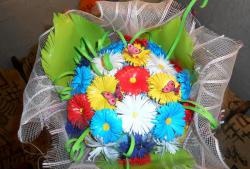
7. Using super glue, glue the ball to the basket and begin to glue the flowers already prepared before. You need to start from the highest point of the ball and gradually go down to the bottom. Try not to press hard so as not to push the ball, because the inside is empty. Of course, work on the bouquet can be continued. It can be decorated with beads, various satin ribbons. In this example, red glitters are applied in the center of the colors. To do this, apply a drop of glue with a thin brush, and then sprinkle with another brush with sparkles. As a result, the bouquet will look as follows.