Do it yourself
Life hacks, master classes, useful tips, recipes.
home » Present » Paintings » Painting “Owls” using nitcography technique
Nitography is an interesting technique of drawing with threads. Often everyone draws with pencils or felt-tip pens and ends up with lines on a sheet of paper. In this technique, lines are formed after gluing the threads. Glue is applied to the base and the selected image is filled step by step with layers of threads. It is better to use a wooden skewer in your work so that the lines are even and adjacent to each other. The stick is also great for lubricating some hard-to-reach areas of work. This is an incredibly exciting technique. If you take a base of 50x40 cm, you will be busy for several weeks with an interesting activity. You can make a painting measuring 15x20 cm in a couple of days. Such painstaking work requires concentration and perseverance. But the result justifies the time spent. Today you will learn how to make a picture of five owls sitting on a large tree with a spider web.

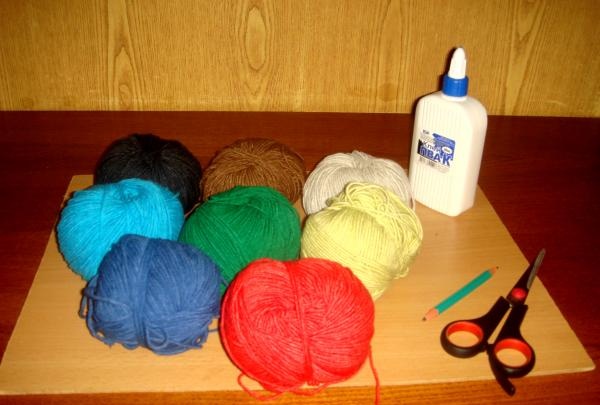
To create it you need to prepare the following items:
- a sheet of chipboard measuring 30x40 cm (you can purchase a ready-made frame with a dense base);
- knitting threads of various colors (it is better to take all of the same thickness);
- PVA glue or any waterproof polymer glue;
- scissors;
- wooden skewer;
- pencil;
- images of owls.

Owl painting using nitcography technique


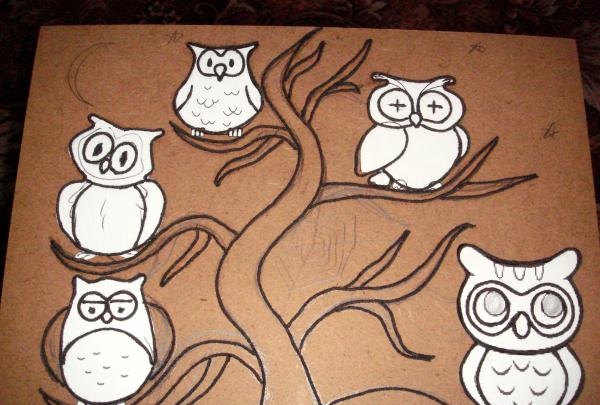
Step 1. First, you need to draw a large tree with branches using a pencil. Select images of owls on the Internet (it is better to take more cartoonish coloring pages), print them on a sheet so that the height of each does not exceed 8 cm. After that, cut out the pictures and glue them onto the background sheet of the work. You can transfer the image (draw it with a pencil), but why if nothing will be visible under the threads. Step 2: Now take some black thread, glue and a wooden skewer. Apply glue to the places where you drew the image with a pencil and glue the thread. Now you are creating the outlines of the drawings. Adjust the thread with a stick so that it lies evenly and tightly to the base. On the owls you also need to glue black thread in those places where there are main (bold) lines.

Owl painting using nitcography technique


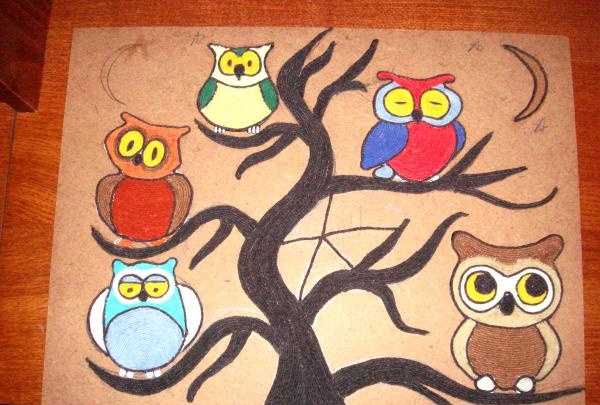
Step 3. Once the outlines of the drawing are dry, you can start drawing. You need to fill in the middles of the images. To do this, you need to lubricate part of the work (tree trunk) with glue and start gluing the threads. It is important to apply each one very tightly to the previous one, trying not to leave unfilled spaces. It is better not to wrap the threads at the base, but to cut them. Also start drawing on pictures of owls. It is better to make the birds bright and colorful to make the picture more interesting. At the same stage, it would be logical to make a web, a month and stars.

Owl painting using nitcography technique


Step 4. Now you should make the background of the work. It is better to take a dark blue thread. This stage is the most painstaking and lengthy. It is necessary to fill all the free space of the base. Proceed gradually, it is better to smear individual areas with glue and fill them one by one with threads.

Owl painting using nitcography technique


If you try really hard, you will end up with such interesting work.For her, you can come up with some kind of verbal description based on the well-known saying: “At night all cats are gray, but owls are bright!”

Owl painting using nitcography technique


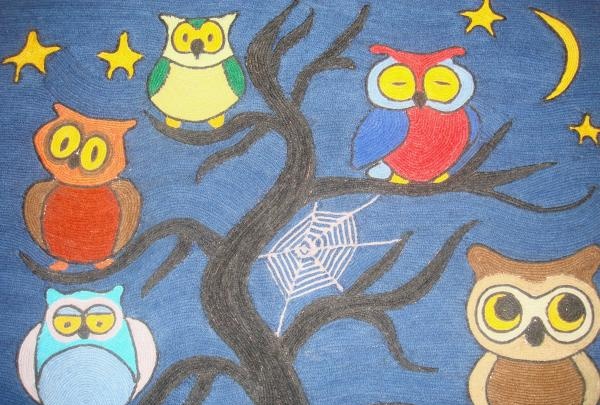
All you have to do is wait until all the threads dry well, insert the work into the frame, hang it in the most visible place and admire your work.
come back
Comment
  • bowtiesmilelaughingblushsmileyrelaxed relaxedsmirk
    heart_eyeskissing_heartkissing_closed_eyesflushedrelievedsatisfiedgrin
    winkstuck_out_tongue_winking_eyestuck_out_tongue_closed_eyesgrinningkissingstuck_out_tonguesleeping
    worriedfrowninganguishedopen_mouthgrimacingconfusedhushed
    expressionlessunamusedsweat_smilesweatdisappointed_relievedwearypassive
    disappointedconfoundedfearfulcold_sweatperseverecrysob
    joyastonishedscreamtired_faceangryragetriumph
    sleepyyummasksunglassesdizzy_faceimpsmiling_imp
    neutral_faceno_mouthinnocent
4 minus one =
Comments (0)

How to make a grinder from a sharpening machine

Do it yourself - crafts and master classes | Page 276

Earrings made from plastic bottles | Do it yourself

How to make a simple and unusual box from alder and burl

«Do it yourself - with your own hands» - a site of interesting homemade products made from scrap materials and items at home. Step-by-step master classes with photos and descriptions, technologies, life hacks - everything a real master or just a craftsman needs for needlework. Crafts of any complexity, a large selection of directions and ideas for creativity.

We recommend reading

Washing machine error codes