The following materials and tools will be required for work: cold porcelain of white, red, yellow, green, beige, PVA glue, furniture or epoxy glue, stack, stack with a ball, chamomile plunger, daisy center mold, leaf mold, floral wire, scissors, sponge, bezel, nippers.

A piece of red porcelain is measured, and an oval is rolled out of it, about the size of a natural rosehip berry.

PVA glue should be applied to the floristic wire and an oval should be put on it.

Beige porcelain creates a small “tortilla”. It needs to be stuck on the tip of the stack, then stuck to the red oval, on which PVA glue is applied in advance.


A stack of white porcelain, about 2 mm thick, is rolled out using a stack. A plunger cuts a flower. Next, the stack should give shape to the petals, making them wider and thinner. Then, cuts on the petals are made with nail scissors. To make the chamomile look more natural, you should let the flower dry before cutting.


From the yellow ball, the middle of the chamomile is formed with the help of mold. If the mold is not available, you can make a lot of small recesses on the ball with a toothpick.
The finished center is also worn on the floristic wire.


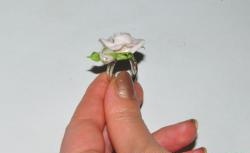
Each daisy will consist of two flowers, one superimposed on the other, making sure that the petals of the upper flower overlap the voids of the lower. Between them, PVA glue is applied. Using a stack with a ball, a small indentation is made in the middle of the flower. This will add realism and volume to the flower.


The dried core is threaded into the middle of the flower. First, PVA glue should be applied to its base.

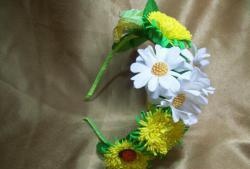
This is such a cute daisy.

Further leaves are molded. A ball is rolled from green porcelain, a droplet is formed from it, it should be put on the mold and put the shape of a leaf with your fingers. About 20 leaves were needed on the rim. In this case, they have more binding function than decorative. For one rim, you will need 10-11 medium-sized daisies and 24 rosehip berries.


A wire is cut from chamomile flowers. In this case, the wire is used only for the convenience of creating a flower.

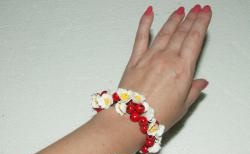
The rim is degreased with alcohol and furniture glue or epoxy is applied to it.

Leaves stick together a little wet. Each leaf covers 1-2 berries. Chamomiles are glued with PVA glue to the leaves.


The sequence may be different, it all depends on desire and idea.

The rim should be left to dry for a day, after which it can be worn with pleasure or given to a loved one with pride.