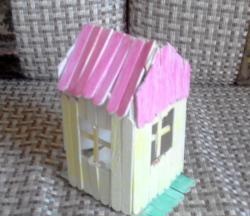
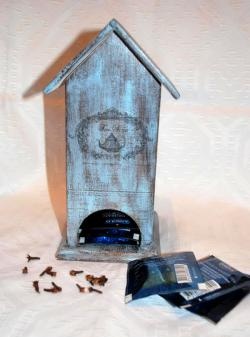
For making a tea house using technology decoupage we will need the following materials:
- wooden blank "Tea House";
- napkin;
- art acrylic primer;
- acrylic paints for creativity (blue, yellow, green (green foliage, brown);
- bitumen (or burnt umber);
- PVA stationery glue (or acrylic varnish);
- paraffin candle;
- facet varnish;
- acrylic varnish for the finish coating of the product;
- brushes, foam sponges, masking tape, sandpaper, stationery, stencil "TEA".

The first step in decorating a wooden billet is sanding all side surfaces with sandpaper - bringing to a smooth state. We remove all small chips and flaws so that our workpiece is as smooth as possible. After sanding, we coat the outer surfaces with acrylic artistic primer.

If you are not going to decorate the internal surfaces they can not be primed. After the primer dries, you can go again with fine sandpaper to even out the thickness of the coating if the primer has been applied unevenly. To give the effect of "time", the place of future "scuffs" we paint with brown acrylic paint, which in the future will appear through the main color and create the very effect of antiquity.

After the brown paint has completely dried up, we rub some places with an ordinary wax candle, the excess and large crumbs must be removed with a sponge or a soft cloth.

We cover our house with the main blue paint.

If brown paint comes through, you can cover with a second layer of blue paint. After drying completely in the places that we rubbed with a candle, we carefully pass with sandpaper - we create scuffs.

The element of the napkin pattern that we will glue is quite large. In order to stick it without wrinkles, we will use the so-called trick. "Sticking by file method".

On a regular stationery file, lay out the napkin with the front side (do not forget to remove the lower white layers of the napkin). Gently pour water evenly onto the center of the napkin.

Distributing water over the entire surface, we level our napkin with a brush or fingers, we expel all the bubbles. We drain excess water. We attach the file with a napkin to the side surface of the house, smooth it, gently pressing the picture, and slowly remove the file from the edge of the napkin - voila, and not a single fold! Without waiting for drying, glue on top with decoupage varnish or PVA glue (diluted 1: 1 with water).

While our house is drying, we will decorate the roof. Primed and browned, we mark the roof into strips by gluing masking tape. On top evenly, with a not very thick layer, apply a one-component facet varnish, which, when dried, will give us beautiful small cracks and imitate “traces of time”.

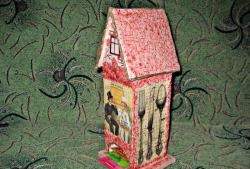
Without waiting for the varnish to dry - remove the masking tape. Using a stencil on the front surface, we put the inscription "Tea". To prevent the stencil from moving, we attach it with masking tape and, using a sponge, drive the paint (burnt umber) into the stencil with “clapping” movements.


To smooth the edges of the napkin and smooth the transition, we beat off the edges of the picture with light blue paint.

With the same paint we make small splashes with a toothbrush.

We beat off all the facets of our house with “smacking” movements using a sponge with bitumen (or burnt umber).

After complete drying, we cover the house with several layers of acrylic finish matte varnish.