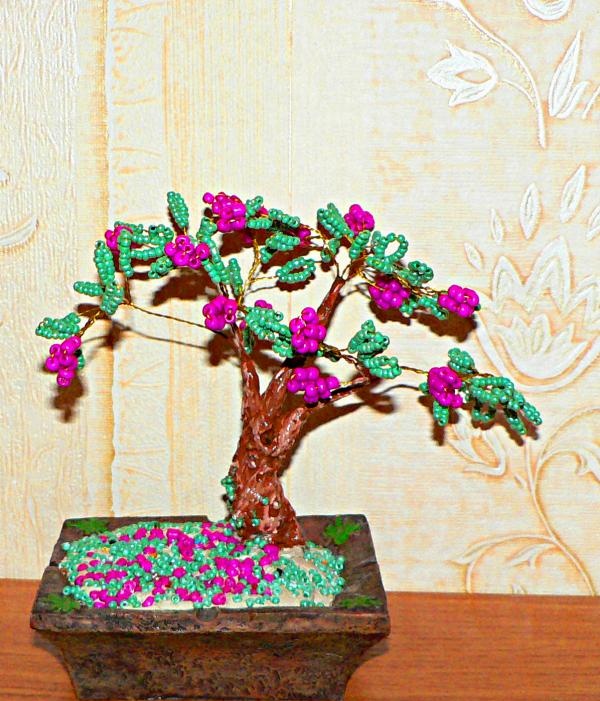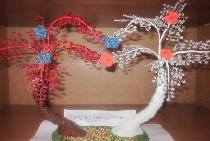
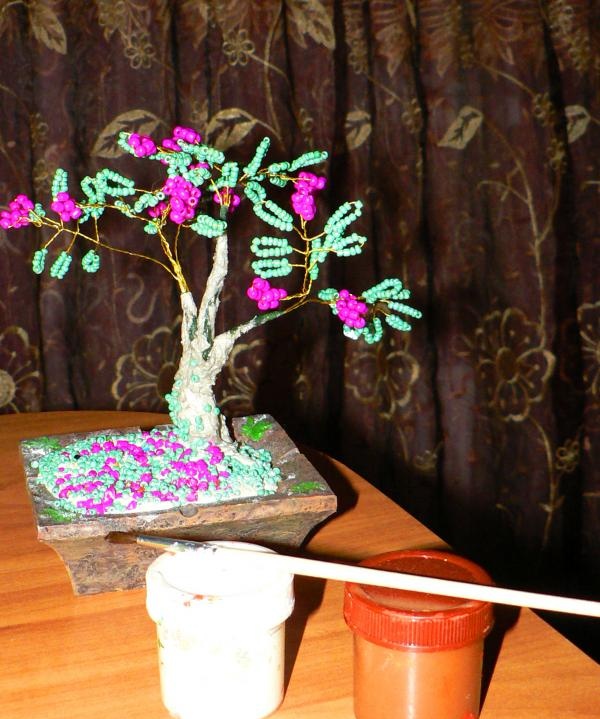
Making souvenirs gives double joy - to those who create beauty with their own hands and to those who receive this souvenir in present. Of course, it is not so easy to create something truly worthwhile, but perseverance, the ability to notice the beautiful and patience work wonders. Such a capricious material as beads can be used in different ways, for example, to create beaded trees.

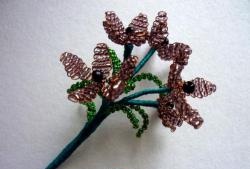
Today we will try to make a berry tree, for which we will need the following:
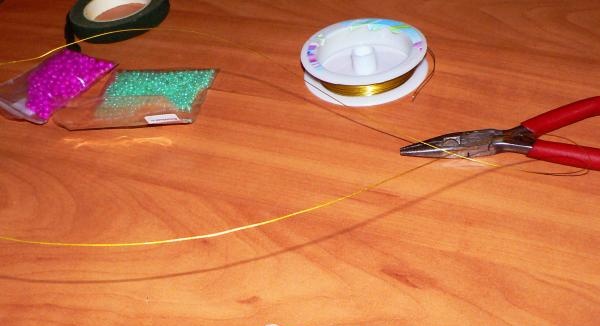
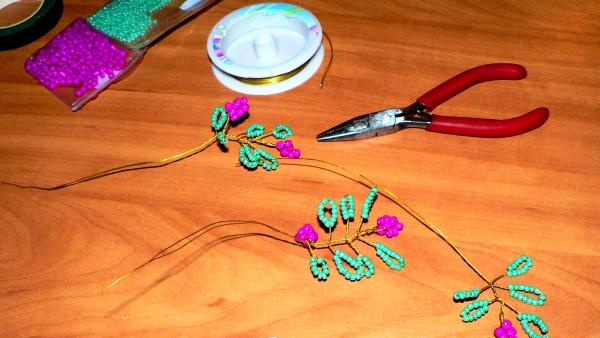
- two types of beads: number 11 red or cherry for berries and number 8 green for leaves;
- wire No. 0.3;
- small pliers;
- green or brown floral tape;
- construction gypsum and water;
- a vase or ashtray in which the tree will “grow”;
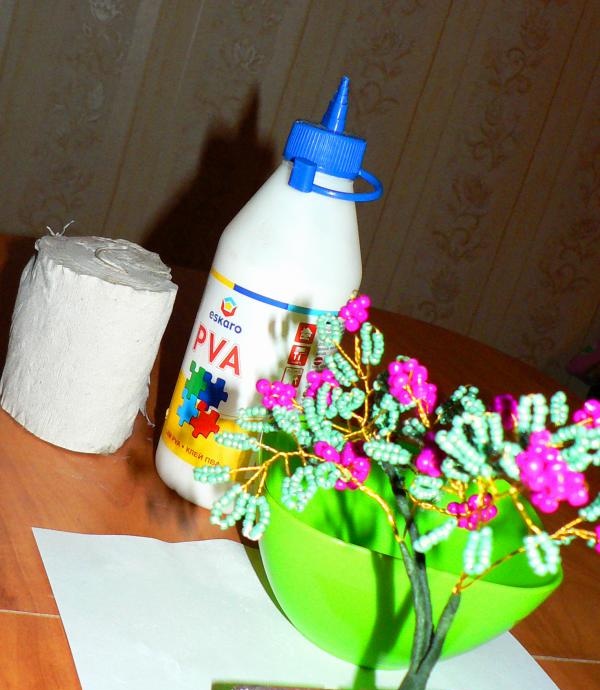
- PVA glue and toilet paper to create tree bark, a toothpick or needle to draw the bark;
- paints (acrylic, gouache), brush, transparent varnish.
Let's start by cutting about twenty pieces of wire up to 30 cm long with wire cutters.
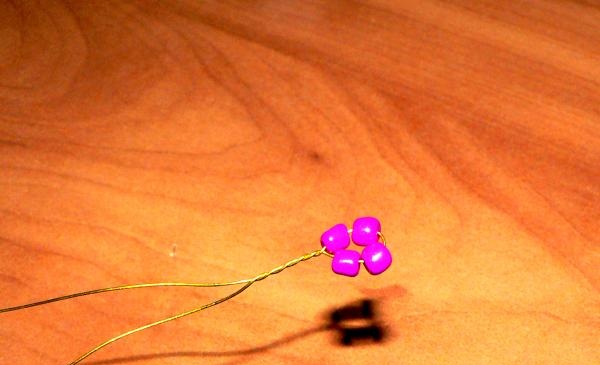
We fold each wire in half and collect 3-4 pieces. red beads.
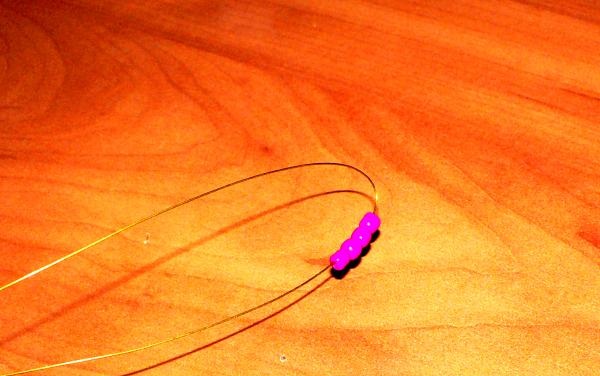
We twist it so that a loop of beads and wire is formed.
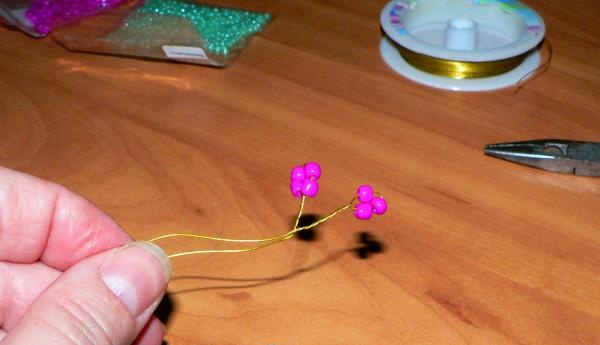
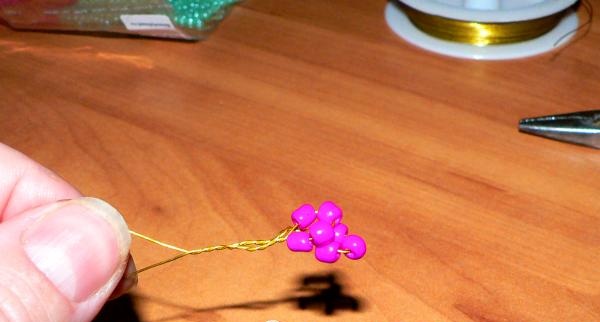
We collect more beads and make two or three loops, twist them together and get a bunch.
Now we collect six to eight green beads and make leaves in the same way. But without twisting the loops together. There should be five or six leaves on the branch.
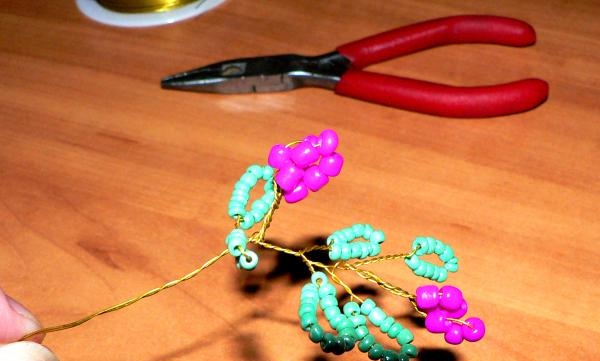
We make three branches and wind them into one large branch.
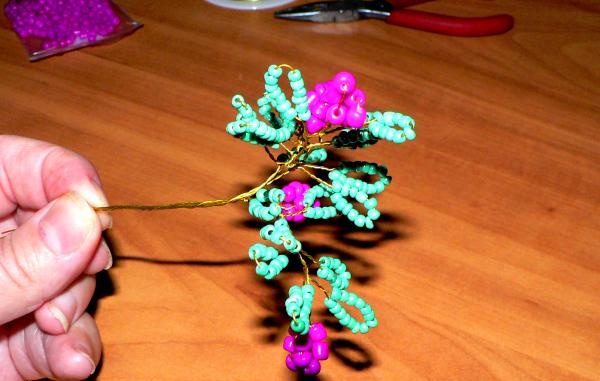
In the same way, we make three to five branches, if desired, we wrap each of them with tape.
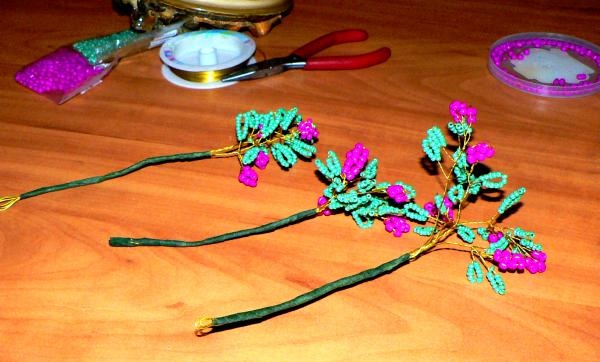
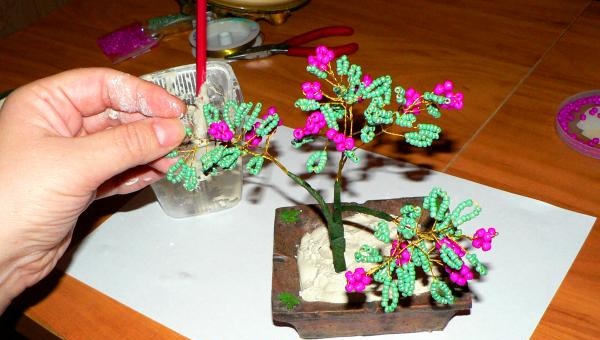
We twist the resulting branches into a tree, make the trunk thicker, wrapping it with tape.
We prepare the gypsum mixture, dilute the gypsum with water in an unnecessary jar and pour it into the prepared vase. The consistency of gypsum is like very thick sour cream.
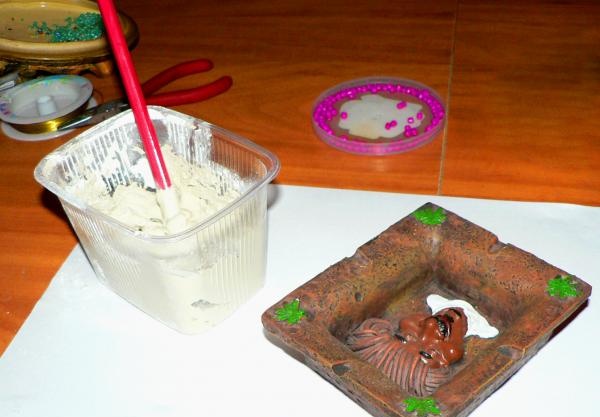
We place the tree in a vase and support it on several sides so that the tree does not fall while the plaster hardens.
Decorate the surface of the plaster with the remaining beads. After the plaster has hardened, take PVA glue and toilet paper and wrap small strips of paper, well soaked in glue, around the branches and trunk of the tree, straightening and drawing the bark with a toothpick.
We put the tree in a warm place for five to six hours, and then paint the bark with paints.
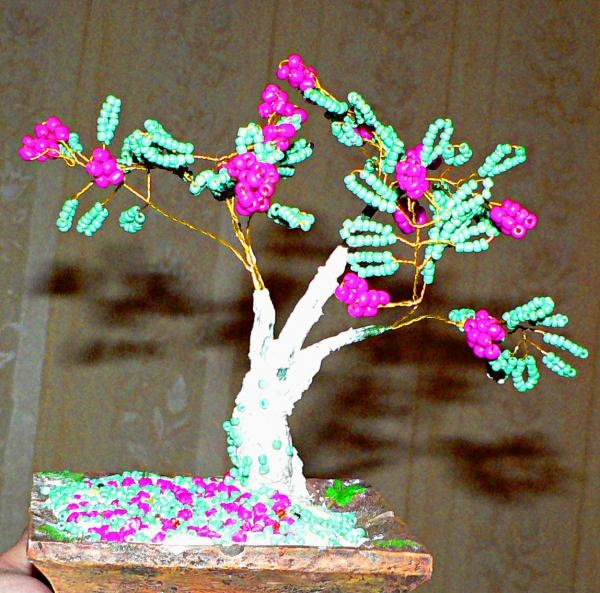
After the paint has dried, coat the wood with any transparent varnish, maybe nail polish.
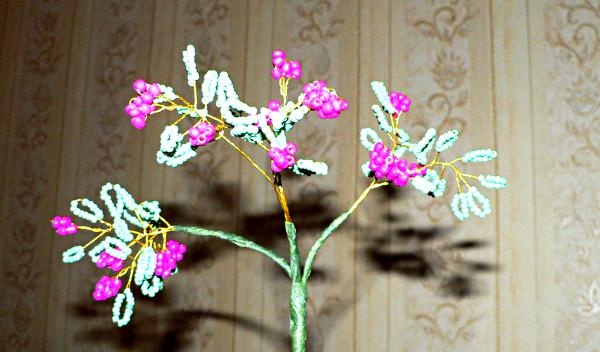
The tree is ready and can be a great gift!