Do it yourself
Life hacks, master classes, useful tips, recipes.
home » Handicraft techniques » Modeling » From cold porcelain » Cold porcelain ring with orchid
It’s always a pleasure to create beauty with your own hands, surprising and delighting your loved ones with original gifts. Modeling from cold porcelain is a pleasant experience, since the material is very plastic and easy to work with. Cold porcelain can be used purchased, or you can prepare it at home. To do this you will need a mug of corn starch, a mug of PVA glue, 1 tbsp. l glycerin, 1 tbsp. l fatty baby cream. All ingredients are mixed and cooked on the stove or in the microwave, stirring occasionally until the mixture comes together. Then the mass must be kneaded well and placed in an airtight container or bag. After a few hours you can start creating.
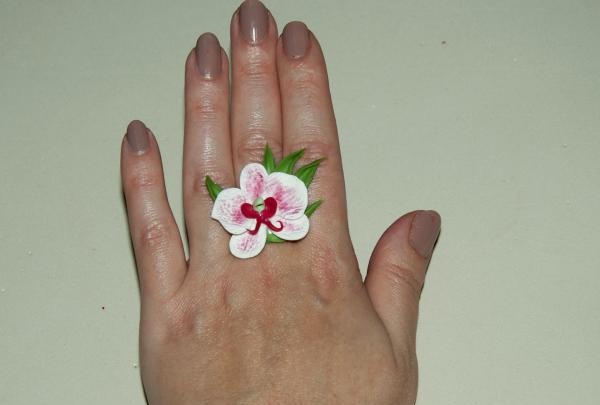
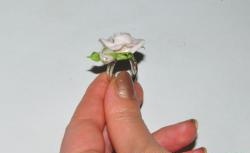
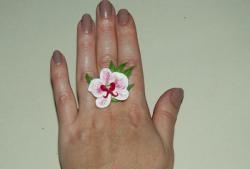
Below is a master class on sculpting a ring in the shape of an orchid flower.
Tools materials:

Materials tools


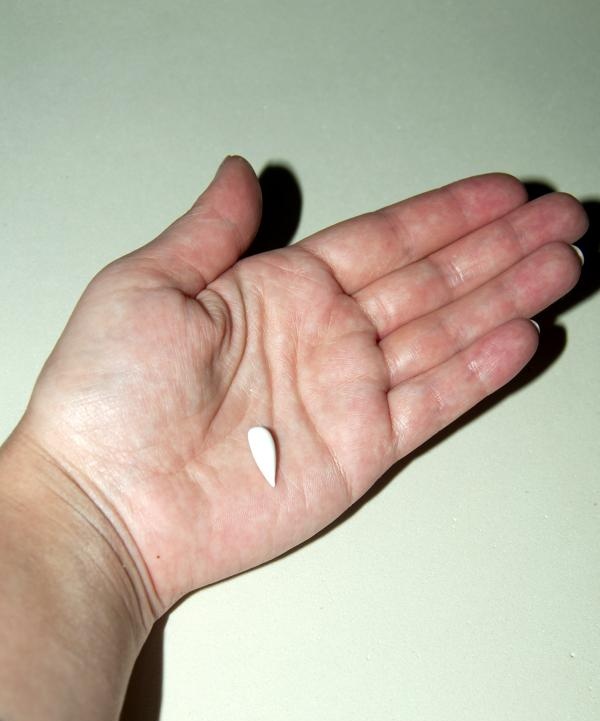
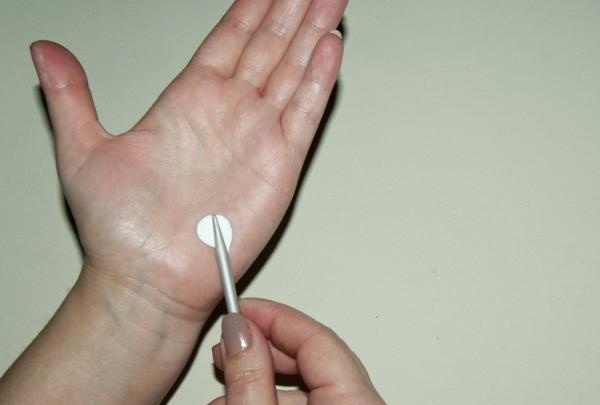
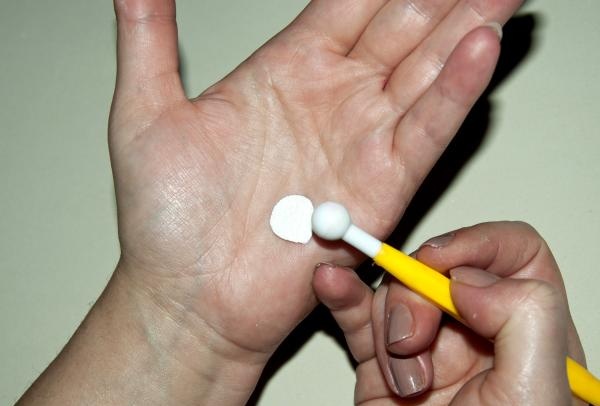
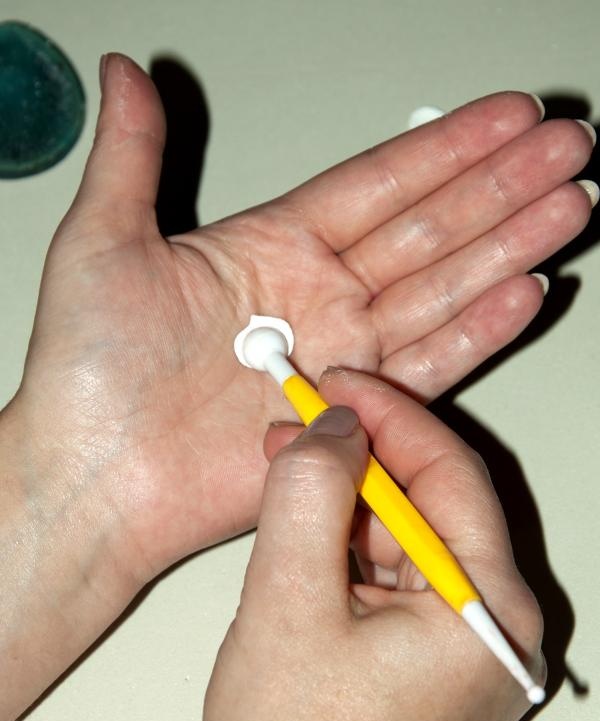
A stack with balls, a simple stack, a tassel, an orchid texture mold, a base for a ring, cold porcelain in white, green and fuchsia. You will also need PVA glue to glue the parts together. Cold porcelain is painted in the desired colors with oil paints, pigments, food coloring, etc.We roll out a ball from white porcelain, form a droplet from the ball and flatten it on the palm, giving the shape of a petal using a simple stack.

roll out the ball

roll out the ball


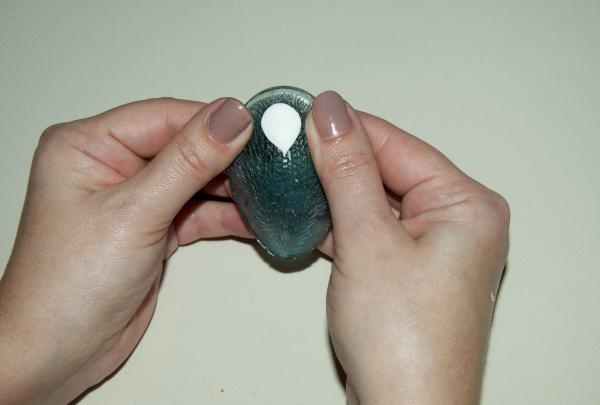
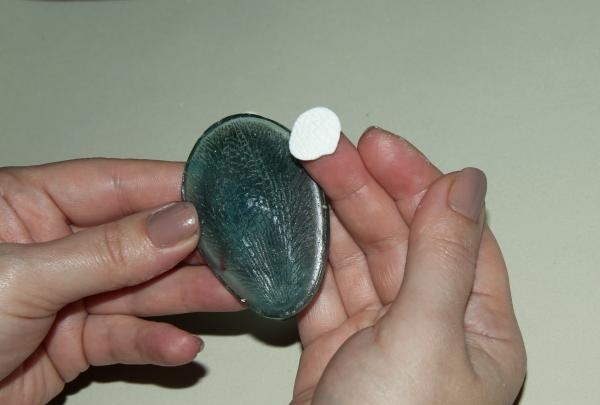
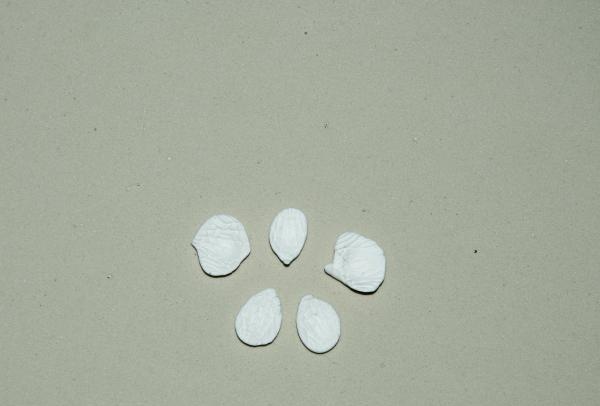
Place the petal on the mold and lightly press to create the texture of an orchid.

creating the texture of an orchid


Using a stack with a ball, we give the petal a curved shape. There should be 3 such petals.

give the petal a curved shape

give the petal a curved shape


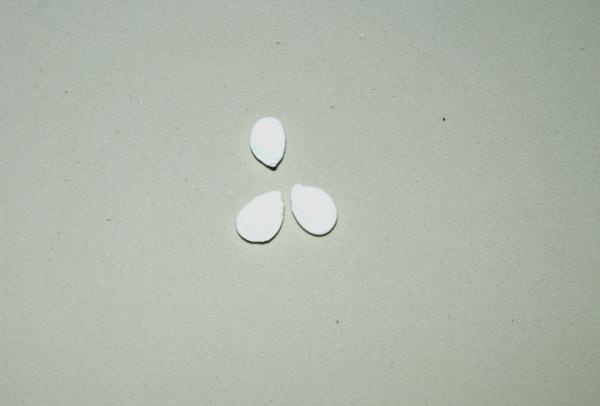
Roll out two more balls and form them into large flower petals. Next we deal with them as with the previous ones.

form large petals

form large petals

form large petals


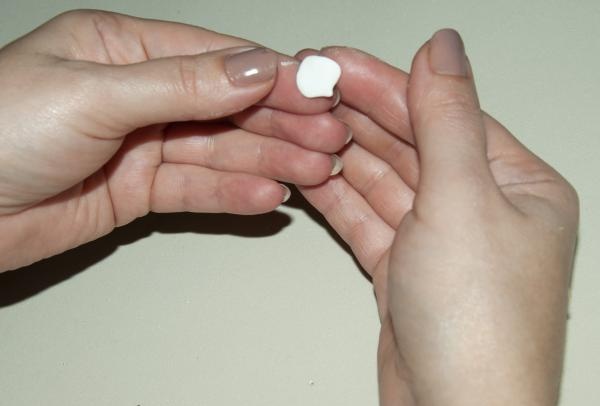
We get three narrow petals and two wide ones.

three narrow petals


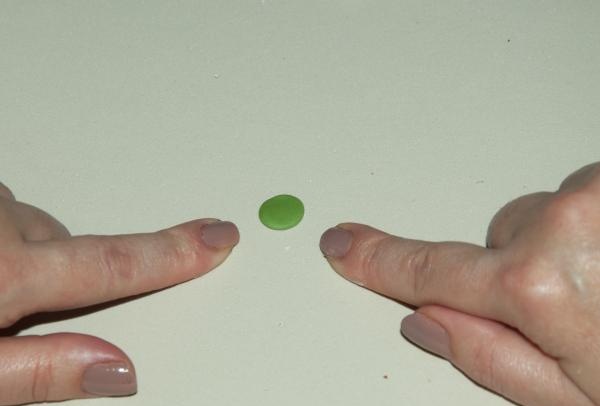
Next we proceed to assembling the flower. We form a cake from green porcelain and place it on a flat surface, after applying baby cream to it.

form a flat cake


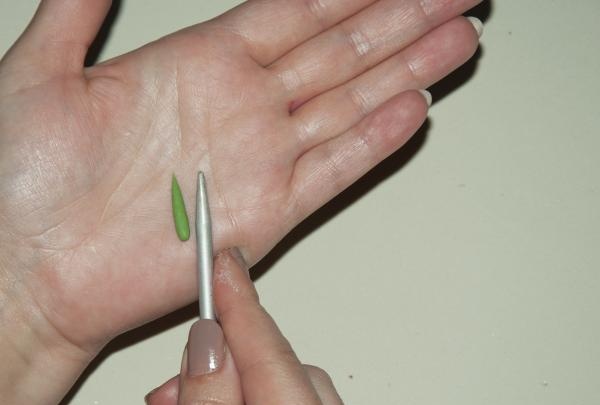
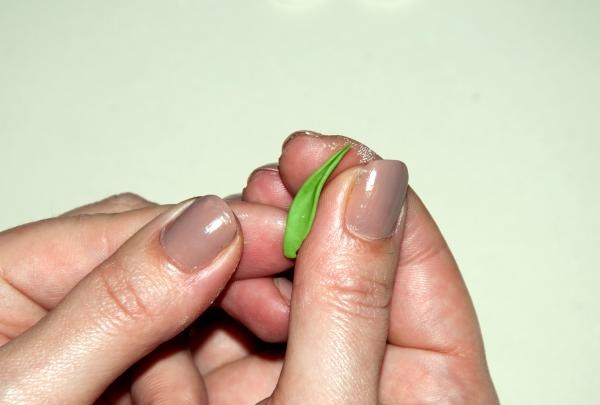
To make the ring look more natural and richer, add leaves to the flower. We form an oblong droplet and press it with a stack, making it thinner, then with our fingers we give the sheet a curved shape. There can be one, 3, or 5 leaves, it all depends on the idea.

add leaves to the flower

add leaves to the flower


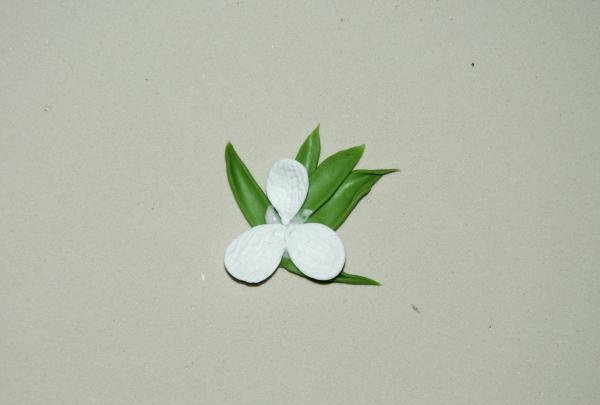
Apply PVA glue to the green cake with a brush and place the leaves on it.

apply PVA glue


We again apply glue to the leaves and begin to collect the flower. The first three narrow petals are placed first, then the remaining two.

apply glue

apply glue


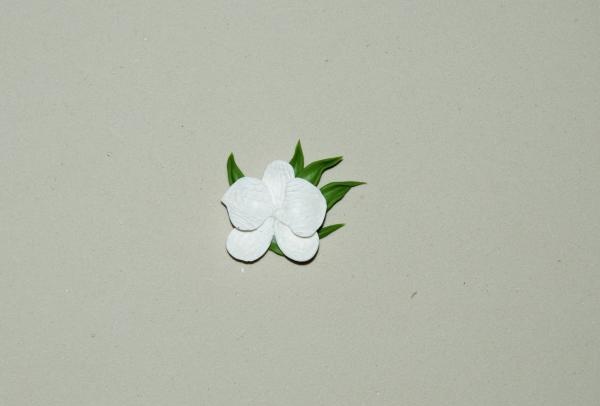
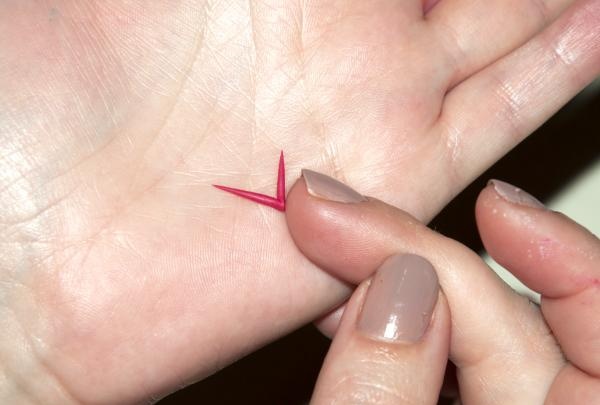
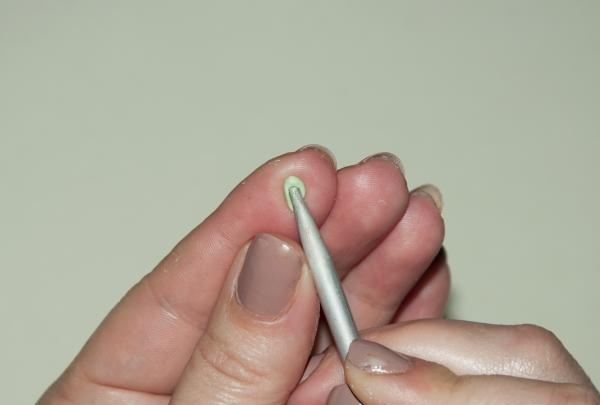
Next we sculpt the center of the orchid. Since the flower is small, the middle will be a little stylized. We make two small balls, flatten them and, using a stack with a small ball, give them a curved shape. Then we roll out a thin strip, about 1 cm long, bend it in half, these will be the “antennae” of the middle.

sculpt the center of the orchid

sculpt the center of the orchid


Apply glue to the middle of the flower and arrange the parts of the middle.

arrange the details of the middle

make a small drop


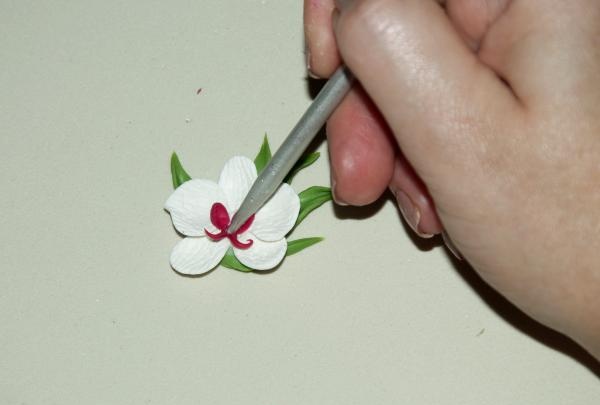
It remains to mold one more small detail. We make a small droplet from green porcelain, press it in the middle with a stack and place it a little above the middle of the flower.

make a small drop

the flower is already ready


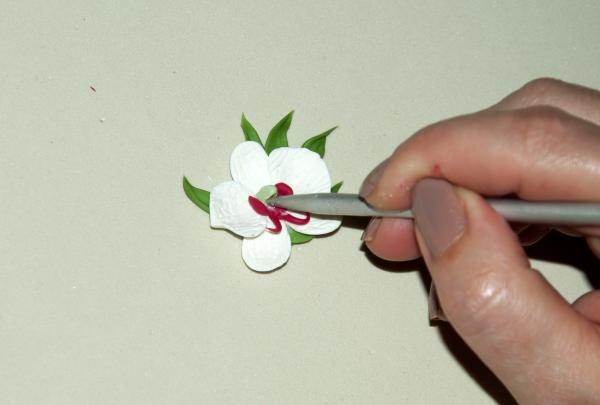
You can stop at this stage, since the flower is already ready.

the flower is already ready


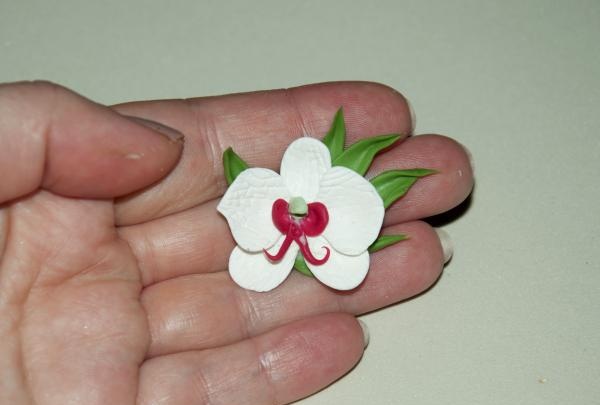
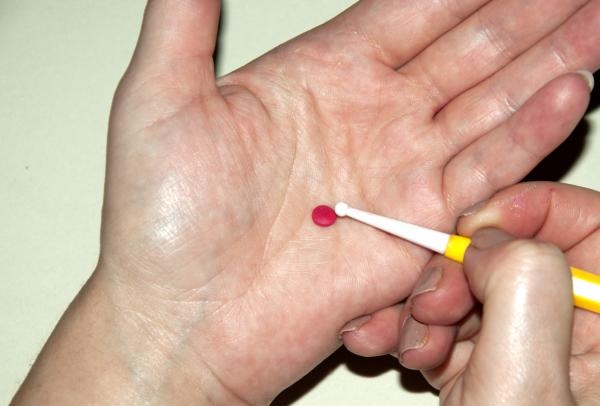
But to make it brighter, the petals can be tinted.Tinting can be done with oil paints, eye shadows, and pigments.

Carry out tinting


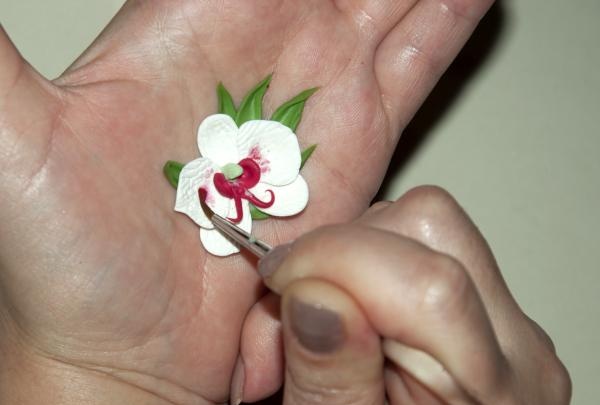
After the flower has completely dried for 24 hours, you can attach it to the ring base. It is best attached with epoxy glue or Moment Crystal glue. After the glue has dried, the decoration can be worn with pleasure or made someone nice present.

cold porcelain rings
come back
Comment
  • bowtiesmilelaughingblushsmileyrelaxed relaxedsmirk
    heart_eyeskissing_heartkissing_closed_eyesflushedrelievedsatisfiedgrin
    winkstuck_out_tongue_winking_eyestuck_out_tongue_closed_eyesgrinningkissingstuck_out_tonguesleeping
    worriedfrowninganguishedopen_mouthgrimacingconfusedhushed
    expressionlessunamusedsweat_smilesweatdisappointed_relievedwearypassive
    disappointedconfoundedfearfulcold_sweatperseverecrysob
    joyastonishedscreamtired_faceangryragetriumph
    sleepyyummasksunglassesdizzy_faceimpsmiling_imp
    neutral_faceno_mouthinnocent
5+two=
Comments (0)

Bouquet of flowers from sweets | Do it yourself

DIY wooden furniture | Page 4

How to make a pipe hoe

Homemade flange for electric motor shaft

«Do it yourself - with your own hands» - a site of interesting homemade products made from scrap materials and items at home. Step-by-step master classes with photos and descriptions, technologies, life hacks - everything a real master or just a craftsman needs for needlework. Crafts of any complexity, a large selection of directions and ideas for creativity.

We recommend reading

Washing machine error codes