So, to start creating a bow, we will prepare the following materials and tools:
- tapes:
light pink polka dots - length - 50 cm, width - 25mm
dark pink polka dots - length - 40 cm, width - 25mm
two white ribbons - length - 30 cm, width - 10 mm
two pink ribbons - length - 27 cm, width - 10mm
three light pink polka dots - length - 13 cm, width - 25mm
two dark pink polka dots - length - 13 cm, width - 25mm
two white ones - length - 13 cm, width - 25mm; - thread, needle;
- strong fix glue;
- pins
- scissors;
- matches (lighter);
- scrunchy;
- rhinestones or beads.

1. Immediately after cutting, all ribbons with matches or a lighter should be scorched so as not to crumble.

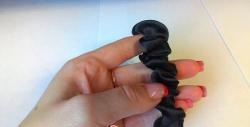
2. We take the two longest ribbons: light pink polka dots and dark pink polka dots. Fold the ribbons with an eight. To do this, put the edges in the middle of the tape and fix them with a pin.

3. Fold the edges of the eights into the middle, slightly overlapping each other, and again pin them off with a pin.

4. In the middle, sew manually and tighten, for strength, you can not cut the thread, but wrap the thread several more times. It turns out two bows.


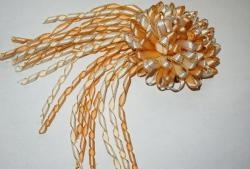
5. We take the narrowest four ribbons, white and pink, 10 mm wide. We fold their ends to the middle as in the photo. It looks like loops. We fasten with pins.

6. We put on top of each other blanks and sew them by hand, you can glue them together. Two more bows came out.

7. Now we begin to work with short ribbons. Trim their ends at an angle to make a dovetail. The ends immediately singe.

8. Fold the ribbons, alternating in color or as you like. Stitch exactly in the middle, tighten. Again in the center we wrap a couple of times with thread. This is the base of the bow.


9. All the components are ready, proceed to the assembly of the bow. We put light pink bows on the base, first from thin ribbons, then polka dots, straighten.

10. Then we put white from thin ribbons and a dark pink polka dot bow. Sew all bows to the base, for reliability, wrap with thread, fasten.

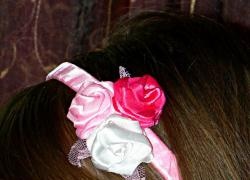
11. Turn over the almost finished bow and glue (or sew on) an elastic band for the hair. Gum choose a small one.

12. Now we need to cover the seams. We wrap a narrow tape around the seam and elastic, so that the end of the tape is on the front side, we fix a drop of glue.

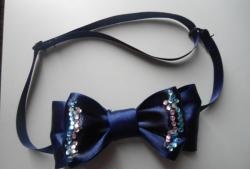
13. Glue in the middle of a rhinestone or bead. The American bow is ready!

As you can see, there is nothing difficult in making this bow. If you are doing it for the first time, then spend about an hour on work. Experienced craftswomen make this jewelry in 30 minutes.