The bracelet itself is a wonderful detail that can complement any look. Be it a holiday event when you just need to look your best. Or, an ordinary day, crowded with daily activities. All girls and women every day need to look neat, attractive and unusual. To have in the external image some interesting nuance that sets off the mood and emphasizes individuality. It would seem that this is especially so in the thing that is worn on the wrist and does not carry a special functional load? But no, a bracelet is always beautiful and feminine.
Massive accessories that attract attention and create contrast with other things are especially relevant this season. For example, a wide vintage bracelet is perfect for textile ballet flats from the same category. Where to start, how to turn a long-worn market bracelet that has already begun to smack of bad taste into a pretty handmade item? You will need a little: yarn of different colors that you just want to take (floss thread, nylon threads, suede or leather threads, burlap braid, braid, etc. are also suitable), a little scotch tape and an old wide bracelet (in this case, a 3 cm wide bracelet is taken. )


In order for the thread not to slide to the sides and not slide on the surface of the bracelet, its end must be attached with a small piece of adhesive tape.

Further, everything is simple: you need to take the thread of the first color and carefully, so that each next skein fits snugly on the previous one to wrap the bracelet. Hold the threads with your fingers so that they lie close to each other, covering the surface of the old bracelet without gaps.

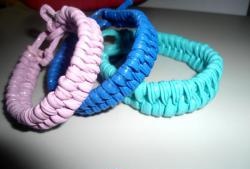
Alternate colors as desired (in this case, three muted colors were taken: beige, olive, lilac). You can use floss thread in order to get a smooth transition of shades. Or a burlap tourniquet to make a rough bracelet in a fashionable casual style (that is, for any everyday look)


The ends of the yarn can be connected to each other with a regular knot, and to prevent it from untying, use colorless nail polish (a drop of varnish will prevent the ends of the threads from untying). It is also easy to make one massive one from several thin bracelets. To do this, you can take the braid and 3-5 old worn thin bracelets.

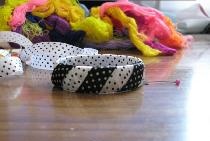
Through simple manipulations, the once old bracelets turn into a handmade accessory. They just need to be braided, thus combining everything together into one (I got one massive 3 cm wide out of four thin bracelets.)


It turns out such an unpretentious, but at the same time attractive massive bracelet that will complement the everyday look well.