For work you will need:
• Burlap, or dense canvas.
• Cloth for clothes. It can be colored hb fabric or silk.
• Tow.
• Twine.
• Synthetic filler.
• Eyes for dolls.
• Threads, needles, buttons, scissors, hook number 3, paper, all kinds of ribbons and decor.
• Glue gun.

Working process:
1. First you need to make patterns.
Transfer the doll elements to paper and cut them out. Then place these elements on burlap fabric. Circle with chalk (pencil or marker) given the allowance of 5 mm to the side. To cut.
- head - 1 pc.
- nose - 1 pc.
- elements of arms and legs - 8 pcs.
- elements of the sole - 4 pcs.
Patterns (little house 1-2).


2. We collect the elements of the doll.
To collect the head, you must step back from the edge of the pattern 1 cm and use a needle to collect the stitch along the entire diameter. Pull off, leaving a small filling hole. Fill the doll’s head with a synthetic winterizer, evenly distribute it. Pull the hole and lock the thread.

We collect the nose in the same way as the head.
Fasten the nose in the middle of the face with a needle or glue gun. We outline the location of the eyes and glue them.

We collect elements of arms and legs. In this case, leave a hole for stuffing. We fill the elements. We attach the sole to the elements of the legs. Sew holes.


We form the body. Fill it with padding polyester and sew it up.

Create the arms and legs of the doll. Using the buttons we form the joints. We fasten them to the body. Sew on the head.


3. We sew clothes to the little house.
Patterns (little house 3-4).
Transfer the patterns to paper. Then onto the fabric with allowance for 5 mm seam allowances.

We collect the shirt from the shoulder seams. Insert the sleeves. We sew the side seams. Decorate the sleeves, bottom and top of the shirt with a contrasting hem. We collect panties at the seams. We bend the top, retract the gum.
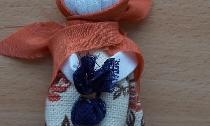
Dress up the doll.


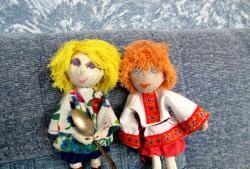
4. We knit bast shoes and a hat from twine. They can be purchased at hardware or gift stores. Dress them in the house.


5. We form hair from tow. To do this, take a sheaf of tow and bandage it in half. Fasten with glue on the back of the head. We evenly distribute glue on the head of the housebird, if necessary. Carefully cut off the excess. We put on a hat.


6. Form a beard. In the same way as hair, evenly distribute the beard around the nose. Fasten with glue. We cut the excess.


Here is the little house ready. It remains to sew a bag. In which to pour a little rice or buckwheat. Thus we will appease the creature and it will begin to help us. It is also necessary to give it the appropriate attributes. For example: the key to the home, so that the world is in the house, money - to always be found, a spoon - the owners will always be full.