In this workshop you will learn how to combine scrapbooking and quillingcreating a volumetric postcard. Quilling involves twisting thin and multi-colored stripes of paper that turn into various patterns, flowers, etc.
To create such an original postcard you need glue, scissors, paper strips for quilling, a blank for a postcard and decor (at your discretion).

You also need a tool for twisting strips, which can be found in any store for creativity. As you can see, it has a forked tip.

We will make tulips and a butterfly using the quilling technique. The master class uses 5 leaves, 9 stems and 9 tulip heads in three shades. Consider how to create each detail in stages.
1) Insert a paper strip in the middle. Well fixing the strip at the beginning, we wind it to the end. When you twist, do not tighten too much - the leaves should be voluminous.


2) We take out the tool, scrolling it a little in the opposite direction. We leave the blank on the table and let it bloom as much as possible.

3) Making it so that the end is at the bottom of the fold, create the shape of a leaf. We fix the end with glue. We create 5 pieces of such leaves.

4) It is necessary to prepare the stems. Mode paper strip into segments of different lengths. We cut each segment so that one edge is sharp. On the sharp edge will be attached to the head of the tulip.

5) We will make flower blanks. There are special rulers for quilling, where the holes allow you to create rolls of the desired size, but you can use the usual ruler or by eye, if not.
We make rolls of the same size (9 pcs.). We give them the shape of a flower. First we squeeze the base, and then the top, imitating the opened tulip.

6) Before assembling the entire composition, glue the stems to the leaves. It is important that the sharp ends are at the top, and blunt at the base of the leaves. Just imagine where your composition will be on the card, how best to arrange the leaves and tulips.
When the leaves are glued, we glue the stems to the blank for the postcard. We smear the side that will be glued with glue. If the glue is visible - it's okay, it will dry out and will not be noticeable.

7) Now glue the tulip flower blanks to the edges of the stem. If necessary, bend the edges to give a beautiful shape and glue them to the flower.

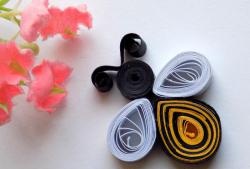
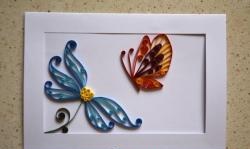
8) Let's make a butterfly to complete the composition. We twist two ordinary rolls of the same size and two more slightly larger, only at the same time glue two strips of different sizes. In this master class, spin the light one first so that it is centered. We also twist the regular roll tightly, not dissolving it, but immediately gluing it - this is the head of a butterfly. And make a mustache, twisting the ends.

We form the wings of a butterfly. First, create a droplet shape, then create the shape of a volumetric triangle for each wing.

We collect the butterfly parts by gluing them to the card.

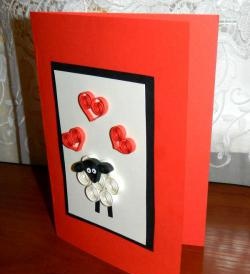
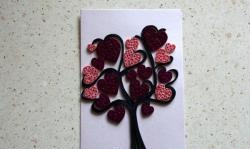
9) Add the rest of the decor and the card is ready!