In addition, mothers and fathers can make such toys themselves and introduce their children in a playful way to wild and domestic animals. Also, older children, following step by step and relying on photo material, with their own hands can make a teddy bear and give younger friends friends.
For the manufacture you will need the following material:
- sheets of colored paper in blue, red and orange;
- white cardboard (1 sheet);
- PVA glue or pencil;
- scissors;
- a coil of wire with a diameter of 0.45 mm;
- a simple pencil;
- awl;
- stand for making holes with an awl in the places of fastening the details of the bear cub;
- spool of thread;
- black thin marker for drawing the eyes and nose of a teddy bear (can be replaced with black paper);
- toy template - teddy bear: toy base, rear and front legs (movement elements), washers in the amount of 12 pcs.


Work description
Step No. 1. According to a pre-prepared template of a teddy bear, it is necessary to cut out “clothes” from colored paper to make the toy bright.
To do this, mark the decoration elements for the teddy bear on colored paper. From orange paper - the bear’s nose, a blouse (upper torso), from blue - a tie and panties (lower torso).

Step number 2. Now we cut out all the details with scissors.

Step number 3. Glue with a pencil and glue the orange details onto the little bear (nose, blouse).

Step No. 4. Then we glue the blue details in the same way: panties, a tie, draw a black eye marker and draw a contour around the nose.

Step number 5. We take an awl and a stand to make holes in the details - the legs of the toy and on the main part of the bear cub.

Step No. 6. Take a spool of thread and cut 4 parts from it, each up to 20 cm, then fold it in half (for strength). We pass through the upper holes into the teddy bear's paws and tie it with a knot.

Step number 7. To fasten the parts we need a wire, scissors and awl.

Step number 8. It is necessary to cut a piece of wire about 10 cm. Then pass it in this way: washer, main part (body), washer, foot, washer. Twist the ends of the wire with a spring using an awl.

Step number 9. It turned out in this way to attach the upper and lower legs to the body.

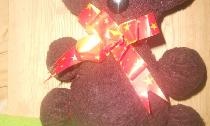
Step number 10. On the back of the toy we connect the threads of the upper and lower legs. We cut off excess threads.

Step No. 11. Now it is necessary to connect the upper thread fastener connecting the front paws with the lower thread fastener, connecting the teddy bear’s hind legs to make movements for it, pulling it down.

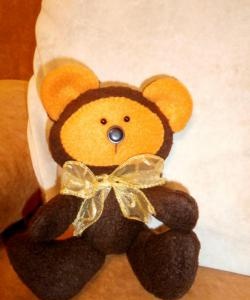
Step number 12. Toy - the teddy bear is ready to start the game!