For the envelope we need:
• thick paper
• designer paper
• long line ruler
• scissors
• pencil
• crochet hook
• glue moment crystal
• double stationery tape
• satin ribbon 2.5cm and 1cm wide.

First you need to get a thick paper 200g / m. It is dense enough to hold its shape, but it can be easily bent, cut, glued. You can purchase such paper at any art store or order it online. It can be of different sizes from A4 to A1. It’s more profitable to take the A1 format after all. Color can be all kinds. We chose white leather texture.
We mark with a pencil and a ruler a piece of paper 30 cm long with notes 1 * 13 * 13 * 3cm and a width of 15cm with notes 1 * 13 * 1cm. Next, we hook along the fold lines so that they bend evenly. And cut off the unnecessary parts. In the photo they are shaded.


After the paper is bent, glue double-sided tape on 3 sides. Keep in mind that on the short side the adhesive tape must be glued from the inside, and on the long sides from the front.

Remove the tape, drip a few drops of glue and press. Make sure that there is not much glue, otherwise it will need to be removed. The glue moment crystal is good in that after drying it forms a rubber film, which is easily removed from the paper. For durability, you can put an envelope under the press.

While our envelope is glued together, we are preparing the front side. We take a piece of designer paper 13 * 8cm. You can buy it again in the store, or you can do it yourself using a color laser printer and high-quality white paper. Just select an ornament, set the best print value on the printer and you will have exclusive paper. On the front side, glue 2 rows of double-sided tape 1.25 cm wide.

We attach a satin ribbon to the tape, and from the wrong side, strengthen the ends.

Next, from the wrong side around the perimeter, glue it with tape and drip a little glue again for strength. Keep in mind that the double adhesive tape immediately grasps, so if the first time you put the part crookedly, it will be difficult to tear it off.


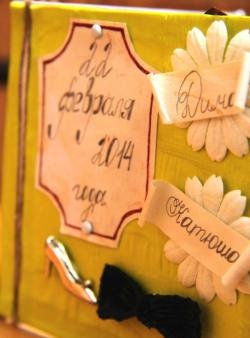
It remains to decorate the title side with a label. In this case, we have an envelope for wedding photos. The label is also printed on the printer.

It remains to make a tie on the back of the envelope. We take a piece of thin satin ribbon 1cm wide and 25cm long. We glue the label with the name of the photographer or simply with a beautiful strip of paper. With it we will close the ends of the tape.

And in the top cover we mark in the middle and dig a hole. If you have a hole punch, use it. If not, then an acceptable hole can be made with nail scissors.

Well, that’s all, we tie a cute bow and our creation is ready. Creative success!