To work, you will need:

• Tree branches
• Planter or any suitable flower pot
• Glue gun
• Spray can with white paint
• scissors
• Stationery knife
• Shreds of fabrics of different textures
• Threads
• Needle
• pins
• Sintepon or any other filler
• Accessories (ribbons, ruffles, beads, beads, rhinestones, buttons, etc.)
• Fantasy, patience, forever creating something hands and good mood.
Working process:
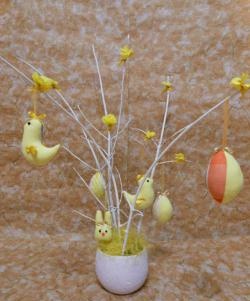
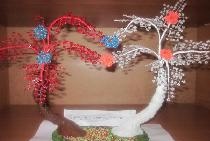
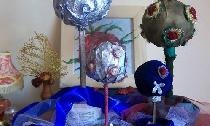
The first step is to make the main part of the art object, which in fact will represent a decorative stylized tree in a pot.
1. It is necessary to purchase and prepare the necessary basic material - planters and branches. The number and branching of branches is determined depending on the size of the pots and ideas. Trim off unnecessary branches that do not meet the design with a clerical knife;
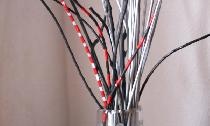
2. Now you can begin to stain the twigs in white using an aerosol spray can or acrylic paint. If you use a spray, you have to apply a tone in several layers with an interval of 10-15 minutes. But the coating process itself is quick and convenient. Unlike the use of acrylic paint, the branches do not have to constantly rotate, and even work longer with a brush;

3. Place the dried branches in a cache-pot, taking into account the composition. Here you can play enough, building a wide variety of compositional forms, giving the product "fluffiness" and dynamics, or vice versa laconicism, one-sided direction and statics;
4. Fix the branches in places of contact with the pots and, if possible, with each other. This will allow the art object to be in an unchanged perfect condition and be convenient in moving it or caring for it;
Next comes the turn to decorate the "tree" with various kinds of elements. In this case, these are hearts.
1. Heart parts are cut from the tissue. You can use a stencil or pattern. It is not possible to complete the parts with each other, leaving a filling hole for stuffing;
2. Unscrew the heart on the front side and fill it with padding polyester;

3. Sew the open edge with a “blind seam”. Do the same manipulations with the rest of the hearts;
4. Now you can embroider hearts around the edge with braid or ruffles, sew a ribbon-pendant. Ribbon bows need to be fastened on both sides. This condition is necessary, so there will be an opportunity to admire the craft from any angle;


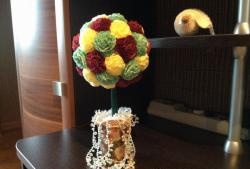
5. When all the hearts are ready, you need to distribute them on the branches, taking into account compositional balance and harmony. Then fix with glue at the attachment point. Also, do not forget that the art object should look equally aesthetically pleasing on each side.

If you wish, you can fill the soil in a pot, and put ordinary moss on top of the pieces.