To make it pleasant for us to pick up our decorative egg, we first grind it with sandpaper.

The second stage - with the help of a sponge we cover our blank with acrylic paint, always white. To keep the background smooth, cover several times. After each application of paint, in order to get the result as soon as possible, blow dry our billet. We are careful not to overheat our product, otherwise there may be irregularities due to uneven drying of the paint. But if this happens, it doesn’t matter. We take the sandpaper in our hands and carefully remove the unevenness.


When the white background is ready, proceed to the napkin. Gently pull out the fragment we need. It is we tear out so that there are no noticeable edges of the napkin after gluing. In order not to accidentally tear or tear off the excess, hold the napkin with your fingers close to the edge where the separation line should go. You can fix the edge with a fingernail. Then we apply the torn element to the workpiece - so we determine where it is better to stick the motive.


Now we proceed directly to gluing the motive. This can be done in two ways: in the dry way with a brush and glue, and in the wet way - after wetting our fragment in water. In this MK, the second method will be used.
We take the file with which we will stick the napkin (I use a very soft and stretching cellophane, it is very convenient for me). We put the torn element of the napkin face down, soak it with a spray bottle, carefully smooth out the folds, be sure to drain the excess water, take the file in our hands and apply a wet fragment to our workpiece. Through cellophane, align the fragment of the napkin, expel all the bubbles and carefully, very carefully remove the file from the workpiece. We make sure that the fragment of the napkin remains on the workpiece, and not on the file. After that, gently blot our product from excess water, then cover the fragment on the workpiece with decoupage adhesive. Sushim.


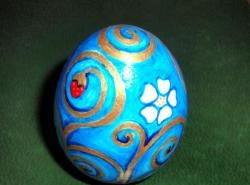
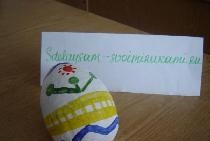
The next stage, if we finish painting our egg and polish, for this we cover the product with the first layer of varnish. When grinding pleats, it will protect our decor from accidental damage. I take a varnish construction. The main work is completed. Now - a flight of fancy. We finish the elements, which are either not enough or damaged during gluing. We focus on something, use contours, putties, stencils - who loves what is in decoupage. Be sure to varnish our work, at least three times. I cover my work with five layers, the appearance of the product is like glass covered.

Good luck in your work, my dears.