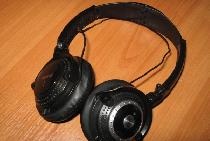
Training.
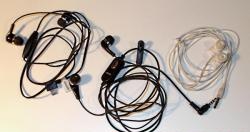
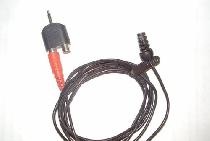
I removed the old pillows and microphone from the headphones, cut off the massive parts that seemed “redundant”, rang / soldered well and attached all the wires:

To create a new look you will need:
1. The frame of the old headphones
2. The skin is soft (suitable vinyl)
3. Sponge (synthetic winterizer, ... anything)
4. Thread
5. Plastic flexible (plastic from the folder for papers is suitable)
6. Dr. details - see below.
7. Tools: sewing machine, scissors, needle, ruler, pen (marker)
Making pillows for headphones.
1. First, determine the size of future pillows. I decided to make square pillows, despite the fact that the original case has a round shape. To do this, I took only one measure - the width of the speaker housing, and cut out an approximate pillow template from plastic - in the future it will find application:

2. Next is the most difficult part of the job, requiring high accuracy. We cut from the vinyl the front part for each pillow, and on the reverse side we mark out: the lines along which the seams go, and the borders of the sound channel. For further convenience, he suggested making a cutout in the form of the letter “H”, and to fill up the material area lost from the sides with additional pieces of material.

Two identical “lining” of each pillow.


Lining with finished cut-out and additional material on both sides. Stitched diagonals - sophistication that gives volume. Execution is optional.
3. Cut out the filler from the sponge in sizes 10% higher than the corresponding template parameters.

Facing, pattern and filler.
4. Sew narrow strips of leather on the sides of each product (lining) using a sewing machine, giving it the shape of a “box”:


5. Stitch the back of the boxes, increasing the excess material, allowing it to close around the speaker housing. The location of the seams affects the shape of the pillow. It is advisable to do the whole process by regularly comparing the dimensions of your own product with the dimensions of the speaker housing.
6. Turn the finished “boxes” inside out, apply the filler and a plastic template, making a copy of it:

Leather, filler and skeleton.
7. We push the surplus assigned to conceal the sound channel area (which is in the center, in the “H” cutout) into the hole of the sponge. Gently, with the help of a needle and thread, we tighten the edges of these strips with the edges of the internal "overhang" formed by seams:

At the same time, we try to take into account the elasticity of the pillows (the softer the better), and make sure that the frame is and is fixed in the same plane with the seams

8. We turn the “box” to its former position, with seams inward. To maintain their shape after attaching to the speaker enclosures, two more plastic frames were made, repeating not only the width, but also creating the shape of the sidewalls:

9. After we install the frames inside the “boxes”, we put them on the headphones themselves. Fill the free volume inside with a sponge

10. Again we take the needle and thread, and begin to pull the edges of the “boxes” of leather:

The pillow is made and attached!
Production of external cladding plates.
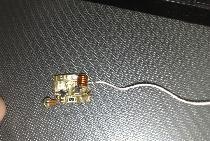
1. To "hide" this "beauty", you can use two pieces of material. Using imagination, you can come up with many ways to hide attachment points. In this case, two identical chargers from a mobile phone (S.E.) were found, the cases of which were useful for the manufacture of “covers”:

2. Using the internal irregularities of the panels - “covers”, they were easily able to attach them to the headphones (in different cases, you can use self-tapping screws, or glue).

Ready-made headphones.