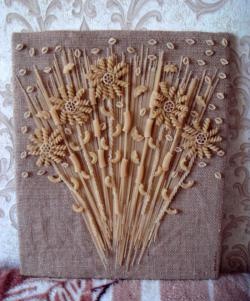
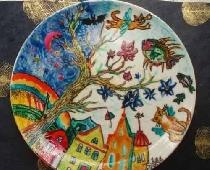
Motivated to create crafts a huge assortment of pasta on the shelves of supermarkets, diverse in shape and size. I saw in this a great scope for creativity.
Earlier, I saw how cereals were handled in a similar technique. A bottle or glass was stuck with plasticine, and then drawings from various cereals were laid out. It turned out very nice.
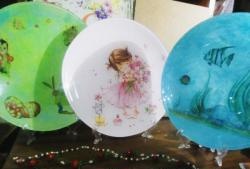
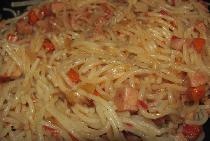
For my craft, I took a plate. It is better to use glass, ceramic or plastic dishes. It is not very convenient to work with disposable dishes or foam plates, and the look of the finished craft is worse. I picked up pasta, which, in my opinion, was most suitable for fish.

Prepared plasticine. I love improvisation, so the sketch was in my head, but you can pre-draw the outline with a glass marker on a plate.
Working process:
1. Lightly heated clay on the battery (you can warm and knead in your hands).
2. Then she fashioned a fish contour from plasticine on a plate about 5 mm thick. It is not worth doing thinner in this case, since large pasta will not hold well. Exactly following the sketch is not necessary. Excess plasticine is easy to remove, and if not enough, you can slightly smear it in the process.

3. Then proceeded to the “sticker” of pasta. They need to be pressed deeper to hold well. First she took large pasta, then filled the remaining space with small horns. Empty niches filled with rice to the maximum. I chopped off long pasta for the tail with my hands roughly to the size, in some places I folded 2-3 pieces. After painting and varnishing, the joints become almost invisible.

4. I painted the finished fish with gouache, and the eye and mouth with nail polish. Of course, it’s easier to pre-color pasta and use already painted ones, but in this case there is less room for creativity. It is important to paint clay with a thick brush in thick gouache at intervals, otherwise the craft will look messy.
5. Varnishing is an obligatory and final stage, as varnish not only gives shine and makes the appearance more aesthetic, but also reliably fixes the application on a plate. I used varnish for of furniture quick drying. It is important to apply a lot of varnish so that it leaks and fills the space between the pasta. In addition, I made a varnish edging 5 mm wide around the craft. I covered this craft with 5 layers, which I applied as it dried. It is enough to cover less relief applications with 2-3 layers of varnish.
After the varnish dries, the craft is ready. Few people, not looking at it closely, guessed that it was made from ordinary pasta. The technique is very simple and my children took an active part in the work. Even a 4-year-old daughter gladly stuck pasta and painted it with a brush.