Do it yourself
Life hacks, master classes, useful tips, recipes.
A pincushion is a useful thing in the house. In every family, there is often a need to mend something, sew on a torn button, or carefully patch up some loose seam. There is no need to talk about needlewomen; we simply cannot do without needle cases. Agree, it’s convenient when the necessary needles and pins are always at hand, they don’t fall anywhere, they don’t get lost, they’re all pinned into the soft pad of the pincushion, from where it’s very convenient to take them, and returning them to their place takes a matter of seconds.

So, I suggest you make an original pincushion, the materials for which you can easily find at home. The work is expected to be exciting, but not at all difficult. You can make a pincushion with your children.

Materials.

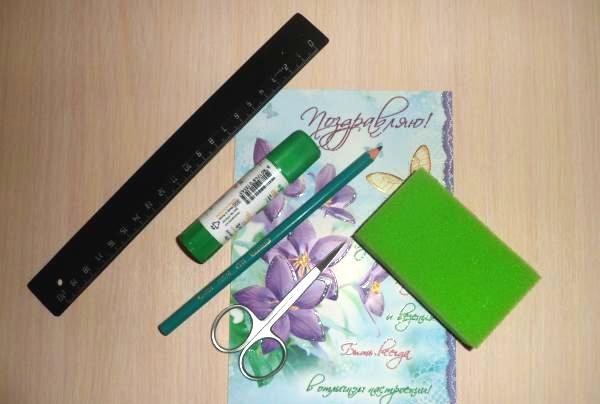
Check out the list of tools and materials we will need.

1. Postcard (you probably have a lot of beautiful postcards, choose one of medium size).
2. A new, unused kitchen sponge (found in every housewife's kitchen).
3. Ruler, pencil, scissors and glue (every schoolchild has it in his pencil case).

Materials


Have you prepared all the necessary materials? Then let's get to work!

Progress.

1.Measure the sponge and write down its dimensions (length, width and height).

In this master class, the sponge is of the following sizes:

length – 8cm
width – 4.5cm
height – 2cm

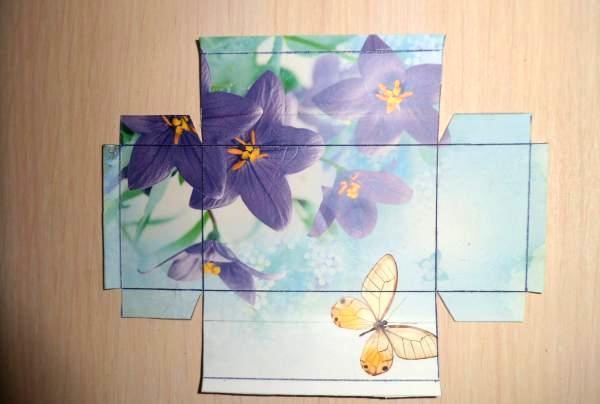
2. Take a card and draw a diagram of the box on the inside using the dimensions of the sponge. In the center, draw a rectangle with sides equal to the length and width of the sponge (to ensure that the sponge fits tightly in the box, you can draw a rectangle with sides 2-3mm smaller). The height of the sides can be made equal to the height of the sponge or a little higher, as you prefer. Don’t forget to draw allowances on the top and sides for gluing and assembling the box. Carefully cut out the resulting shape with scissors.

cut out the resulting shape with scissors


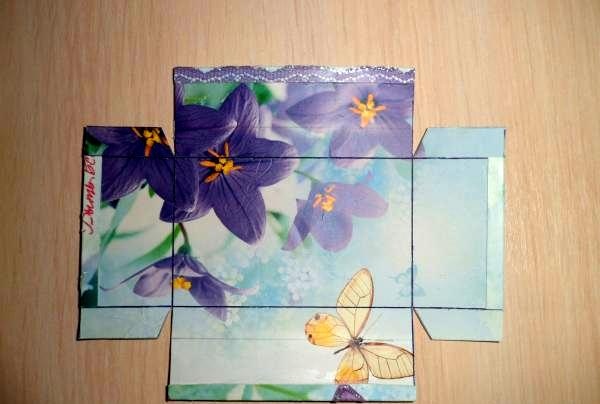
3. Fold the edges at the top along the line and glue them together.

glue them together


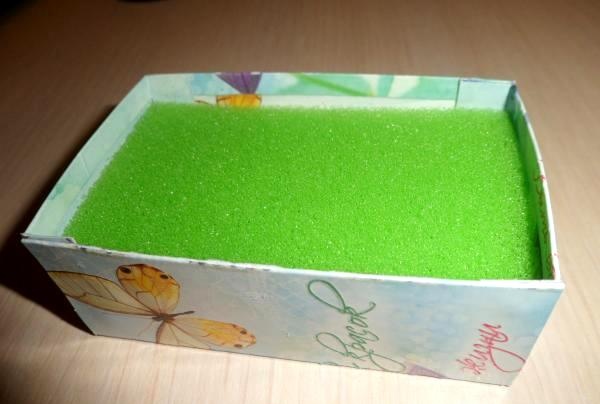
4. Assemble the box by bending it inward along the lines. Glue it together. Wait a while for the glue to dry.

Assembling the box


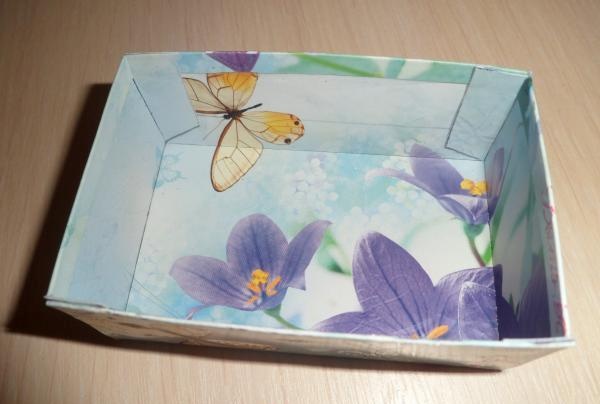
5. Place the sponge inside the box. Even if you turn it over, the sponge will not fall out.

Put a sponge


6. Stick needles and pins into the sponge. That's all, the pincushion is ready! Now it can be used for its intended purpose.

Pincushion


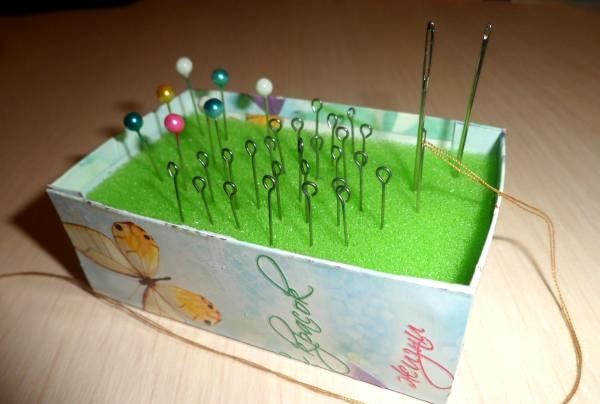
This is how you can quickly and easily make a beautiful, and most importantly, comfortable needle bed, for which there is a place in the room of any needlewoman.
come back
Comment
  • bowtiesmilelaughingblushsmileyrelaxed relaxedsmirk
    heart_eyeskissing_heartkissing_closed_eyesflushedrelievedsatisfiedgrin
    winkstuck_out_tongue_winking_eyestuck_out_tongue_closed_eyesgrinningkissingstuck_out_tonguesleeping
    worriedfrowninganguishedopen_mouthgrimacingconfusedhushed
    expressionlessunamusedsweat_smilesweatdisappointed_relievedwearypassive
    disappointedconfoundedfearfulcold_sweatperseverecrysob
    joyastonishedscreamtired_faceangryragetriumph
    sleepyyummasksunglassesdizzy_faceimpsmiling_imp
    neutral_faceno_mouthinnocent
5+two=
Comments (0)

Do it yourself - crafts and master classes | Page 71

Decoupage of New Year's balls | Do it yourself

Cheap heating for a greenhouse in spring

How to Make a Lightweight Small Garden Twig Shredder

«Do it yourself - with your own hands» - a site of interesting homemade products made from scrap materials and items at home. Step-by-step master classes with photos and descriptions, technologies, life hacks - everything a real master or just a craftsman needs for needlework. Crafts of any complexity, a large selection of directions and ideas for creativity.

We recommend reading

Washing machine error codes