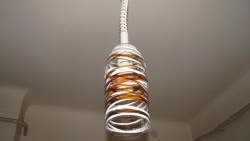
Lampshade made of threads
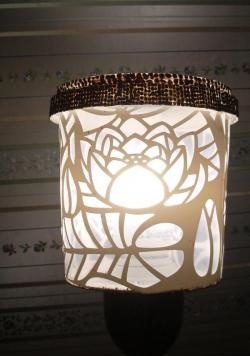
What can you do on a long winter evening? You can lie on the sofa with a remote control and seeds or popcorn, watch interesting films on TV. You can communicate with friends and just good acquaintances on the Internet, or read interesting and informative articles there, or you can spend this free time with benefit for yourself and your children if you involve them in this activity. What is its essence? It's no secret that something made with your own hands looks and is valued somehow differently. An interesting addition to the design of your apartment can be a beautiful handmade thread lampshade. An original, modern and unique lampshade will make your home even more cozy and unique. You can choose threads for work in any color, depending on the color scheme of the entire room and taste. Most of all, such a lampshade is suitable for a hallway.
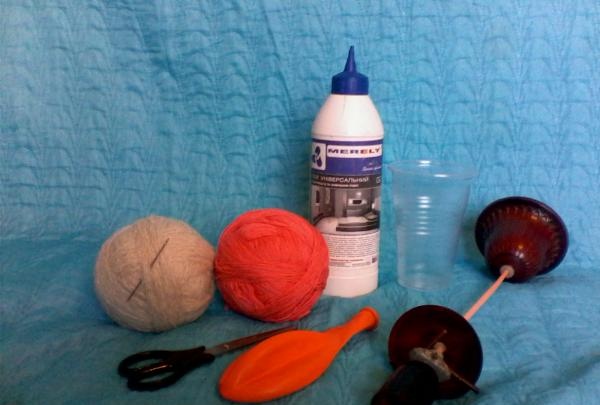
For work we will need:
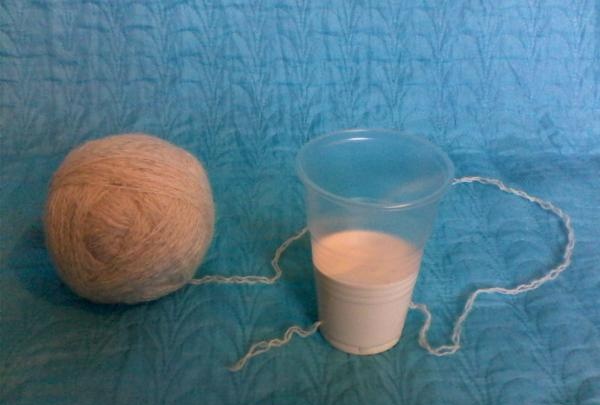
First you need to properly prepare the plastic cup. To do this, the side walls of the glass are pierced with a needle and thread, and a thread is passed through it.
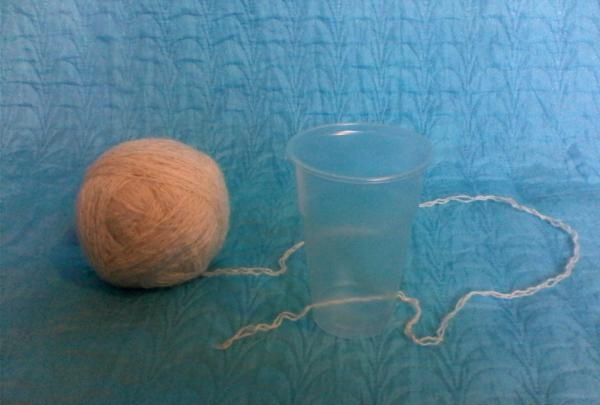
Then PVA glue is poured into the glass. When you pull the thread through the glass, it will become saturated with glue.
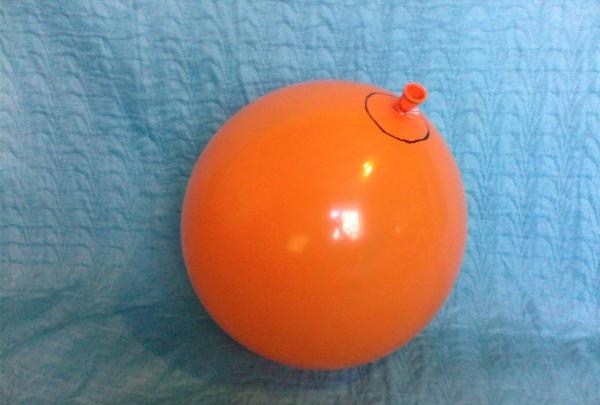
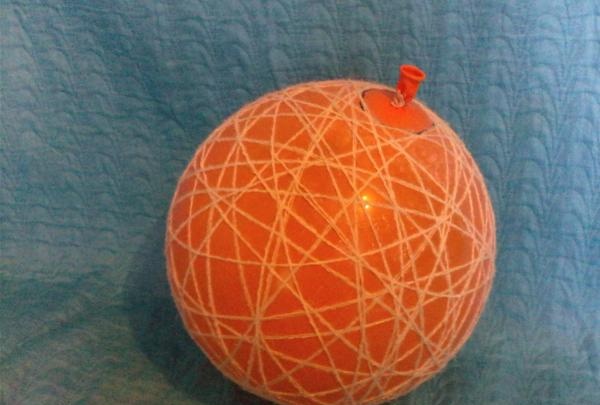
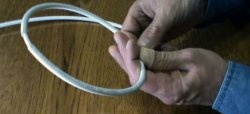
Now inflate the balloon to the required size. You need to draw a circle around the top of the ball with a marker - these are the boundaries of the future hole for attaching the lampshade to the socket.
We begin to wrap the ball with thread, gradually passing it through a glass of glue. Here you need to make sure that the thread does not go beyond the boundaries of the circle drawn on the ball.
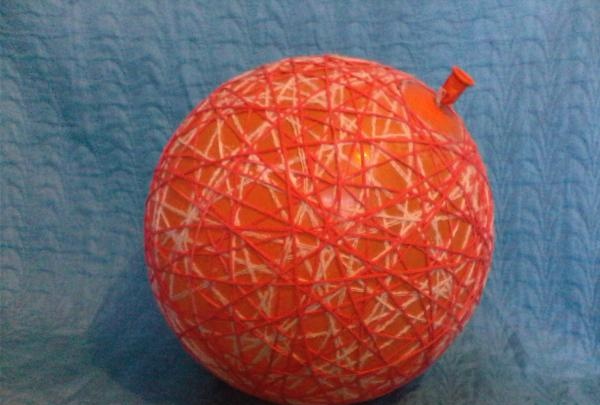
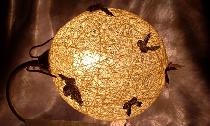
We do the same with a thread of a different color (in this case, red). We choose the number of turns ourselves, at our discretion. However, it should be taken into account that the more turns of thread, the worse the lampshade will transmit light from the light bulb and the room will be dark.
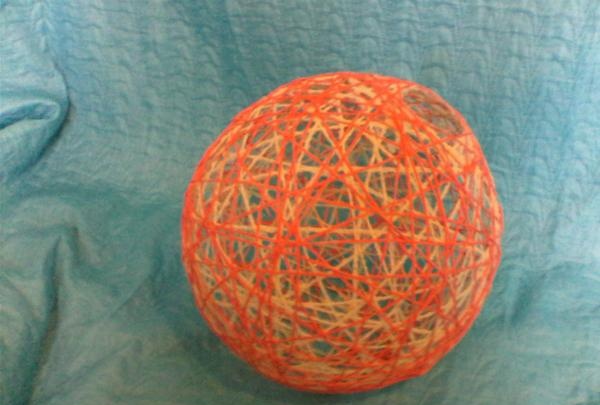
After we have finished wrapping the ball with threads, we need to hang it and let the glue dry completely. After drying, we untie the ball and slowly release the air, making sure that the resulting frame does not deform or bend inward, because the threads may stick to the ball. Having released all the air, we take the ball out of the cartridge hole.
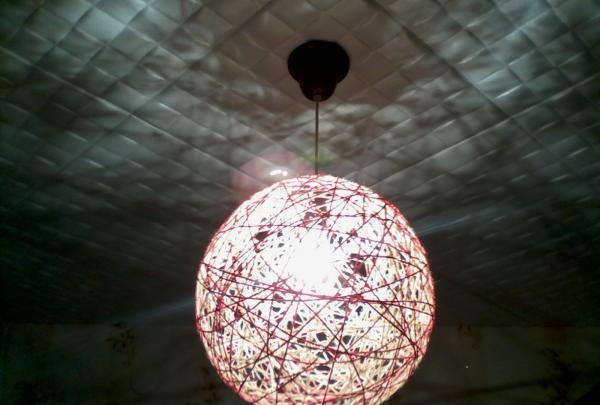
Now all that remains is to attach the lampshade to the socket with the wire and hang the resulting structure on the ceiling.
Threads for the lampshade can be taken in different colors. The more colors there are in it, the more fun it will be. For greater severity, you can use one of their colors, which is most suitable for your hallway. For this, it is better to buy PVA glue at a hardware store; it is stronger and more reliable than regular stationery glue. It is not necessary to buy a new cartridge with a wire. You can use it from an old lamp whose lampshade was broken, for example. It will be easier to do the work together, especially when winding the thread around the ball.
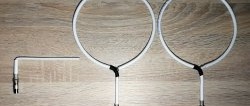
For work we will need:
- Threads (in this case white and red)
- Large "gypsy" needle
- Balloon (round)
- Plastic cup
- Scissors
- Wire with cartridge
- PVA glue
First you need to properly prepare the plastic cup. To do this, the side walls of the glass are pierced with a needle and thread, and a thread is passed through it.
Then PVA glue is poured into the glass. When you pull the thread through the glass, it will become saturated with glue.
Now inflate the balloon to the required size. You need to draw a circle around the top of the ball with a marker - these are the boundaries of the future hole for attaching the lampshade to the socket.
We begin to wrap the ball with thread, gradually passing it through a glass of glue. Here you need to make sure that the thread does not go beyond the boundaries of the circle drawn on the ball.
We do the same with a thread of a different color (in this case, red). We choose the number of turns ourselves, at our discretion. However, it should be taken into account that the more turns of thread, the worse the lampshade will transmit light from the light bulb and the room will be dark.
After we have finished wrapping the ball with threads, we need to hang it and let the glue dry completely. After drying, we untie the ball and slowly release the air, making sure that the resulting frame does not deform or bend inward, because the threads may stick to the ball. Having released all the air, we take the ball out of the cartridge hole.
Now all that remains is to attach the lampshade to the socket with the wire and hang the resulting structure on the ceiling.
Threads for the lampshade can be taken in different colors. The more colors there are in it, the more fun it will be. For greater severity, you can use one of their colors, which is most suitable for your hallway. For this, it is better to buy PVA glue at a hardware store; it is stronger and more reliable than regular stationery glue. It is not necessary to buy a new cartridge with a wire. You can use it from an old lamp whose lampshade was broken, for example. It will be easier to do the work together, especially when winding the thread around the ball.
Similar master classes
Particularly interesting

Comments (0)
