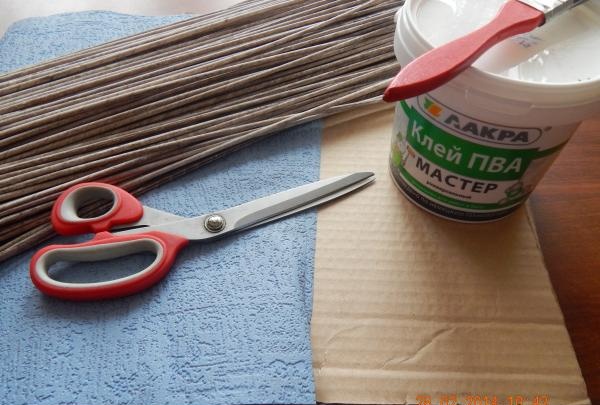
For this we need:
- cardboard (any kind, corrugated);
- wallpaper or paper for covering the bottom of the basket;
- paper tubes (in our case, from receipt tape, white and painted with walnut stain);
- PVA glue;
- colorless quick-drying varnish (preferably glossy acrylic);
- fabric for textile insert.
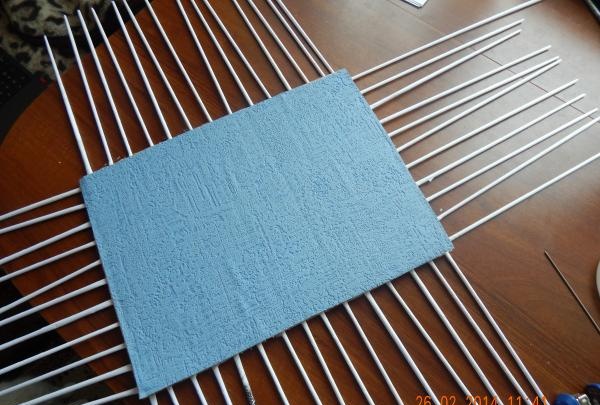
We start by cutting out the bottom of the future basket; we have a cardboard blank measuring 23 x 35 cm. We cut out 2 blanks from cardboard and 2 from finishing paper or wallpaper. We paste the wallpaper onto the photo cardboard, and start gluing the tubes onto one of them.

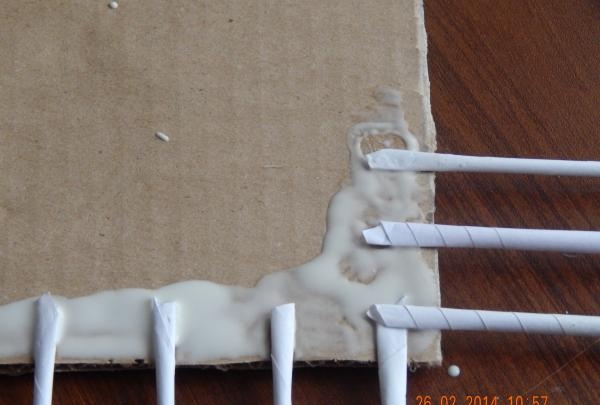
We glue them at intervals of 1.5 - 2 cm, then glue the sheets of cardboard together (photo), be sure to place a weight on them so that the tubes are well secured between the cardboard sheets.
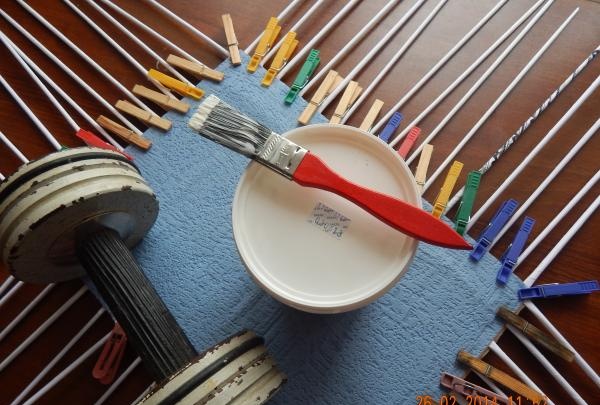
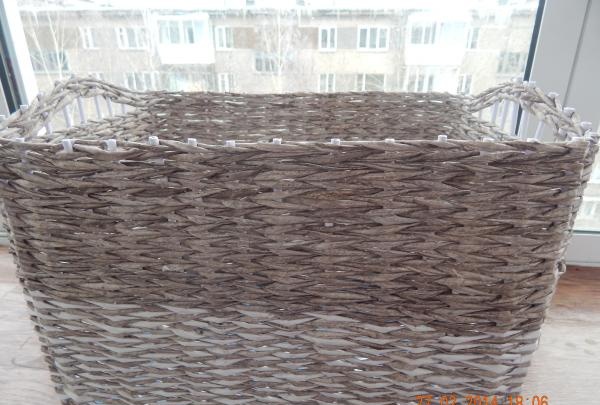
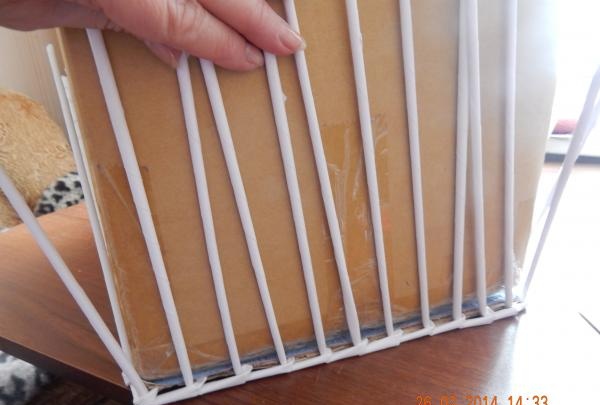
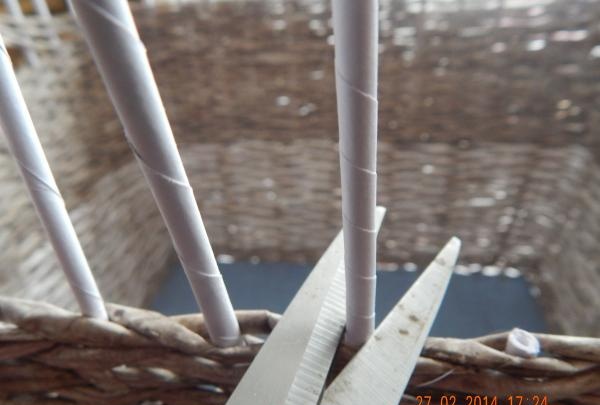
As soon as our future bottom is dry, we begin to form the walls of the basket. All glued tubes are racks and need to be placed perpendicular to the bottom.To do this, we place each tube under the next one from below and bend it upward.
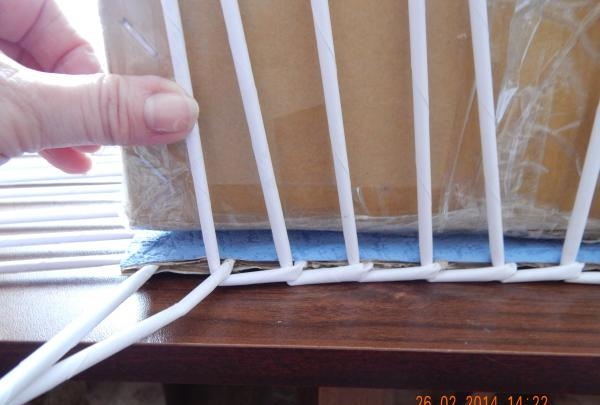
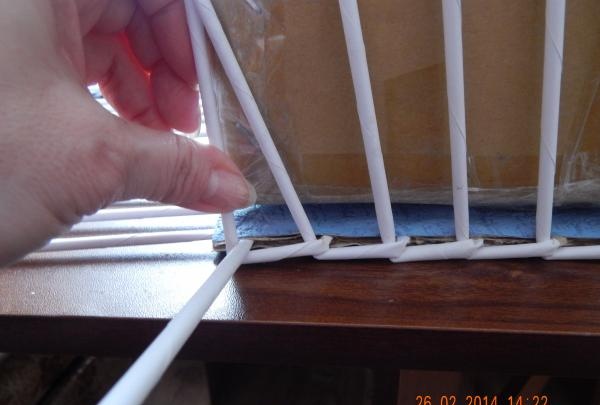
Having raised all the racks, we place a weight on the bottom (preferably a box that imitates the shape of a basket). It is convenient to control the racks; it is necessary that they stand straight and do not move to the side.
You can secure them with clothespins on the top of the box with the cargo. It is better to install this entire structure on a rotating “health disk” (produced back in Soviet times), it makes it possible to freely work with each side of the basket.
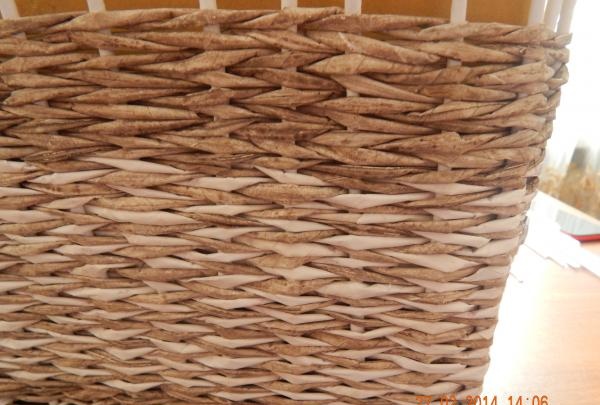
We begin to weave with a regular gray rope. We use 2 colors: gray and white, and the type of weaving is rope. The first 4 rows are one color. Next we weave a braided rope with gray and white tubes.
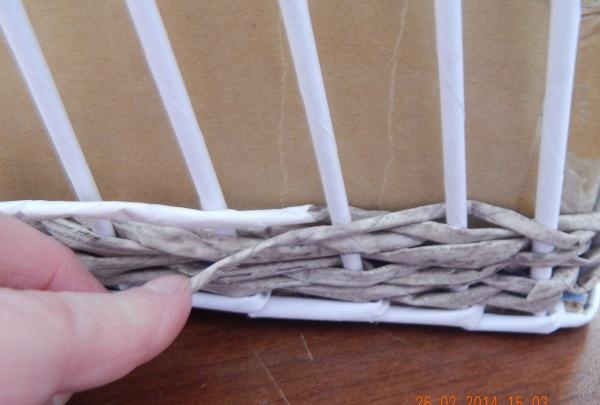
We have a two-color weave with a height of 16 cm, then we again weave with a single-color rope to a height that suits us.
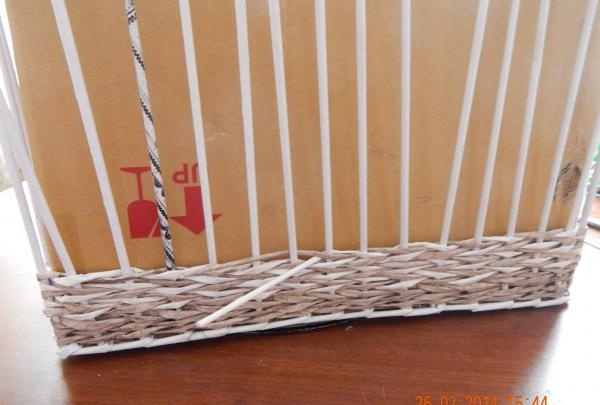
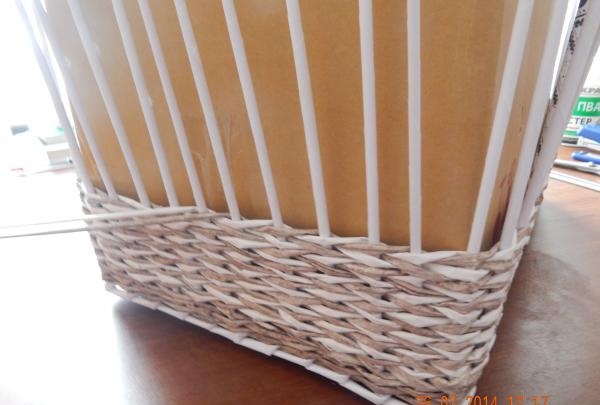
We make handles on the sides of the basket, raising the wicker rows on the racks to the desired height.
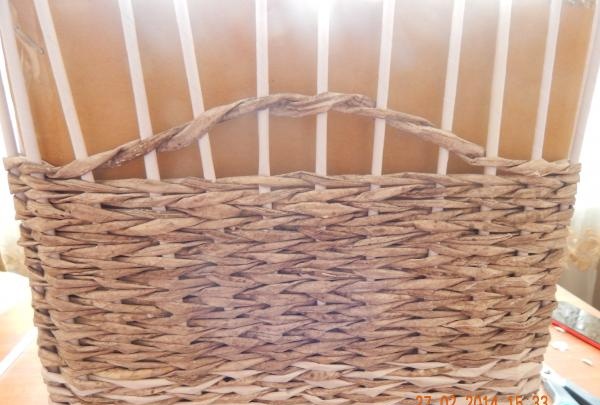
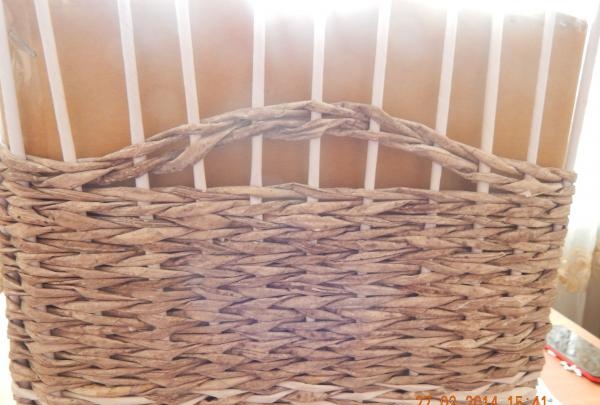
We finish the weaving by cutting the posts to the height of the basket.
Now we need to coat our workpiece well with glue diluted in half with water, wait until it dries, but does not harden at all. In this state, you can correct minor flaws and level the walls of the basket.
When our basket is dry, we begin to varnish it. It is better to use aerosol acrylic varnish; it dries quickly and has virtually no odor. The basket should be varnished in 2-3 layers.
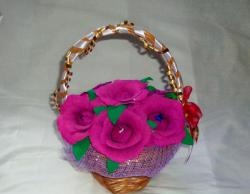
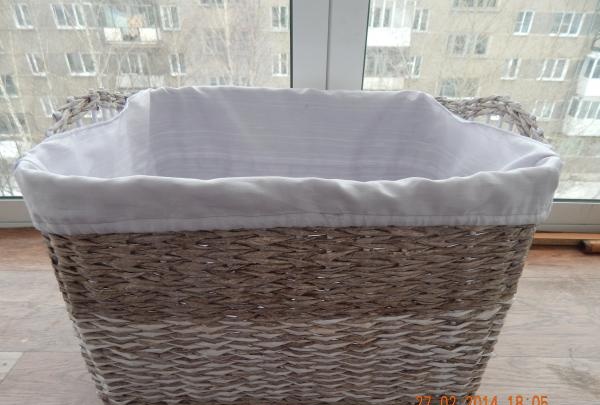
Now let's start decorating the basket. We cut out the textile liner. The pattern consists of 2 rectangles, the first is the size of the bottom, the second is the size of the basket and its perimeter. Don't forget to allow seam allowances in the second rectangle. We sew the liner, process the seams, and design it to your liking.On the sides you can slightly reduce the height of the liner. And now, our basket is ready.