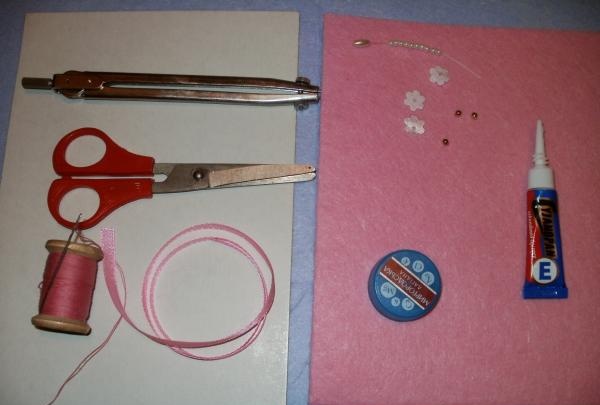
Materials and tools:
viscose;
threads, needle;
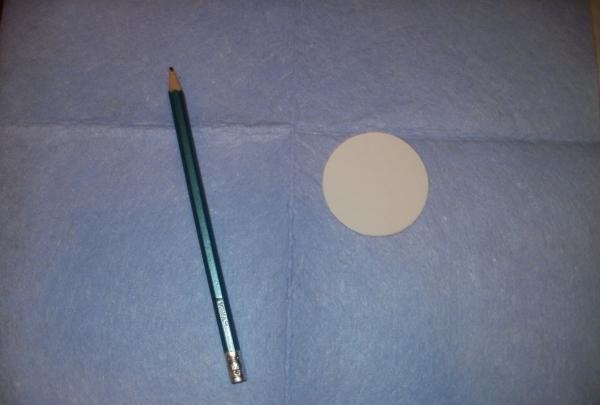
compass;
cap from a plastic bottle;
cardboard;
strong adhesive;
scissors.
For decoration:
beads (white and golden);
narrow tape;
fabric flowers.
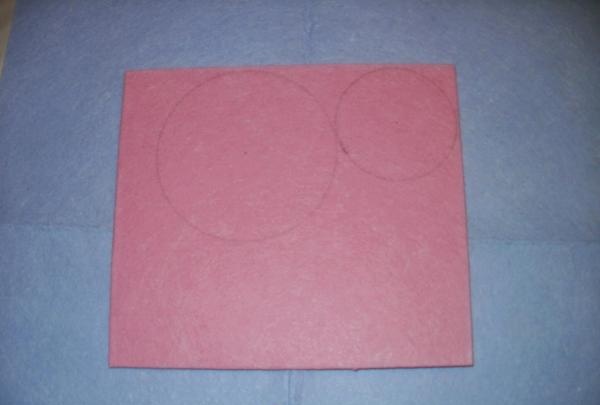
1. First, we make a circle from cardboard. To do this, use a compass to draw a circle with a radius of 2.5 cm. Cut out the circle. This is the basis - the brim of the future hat.
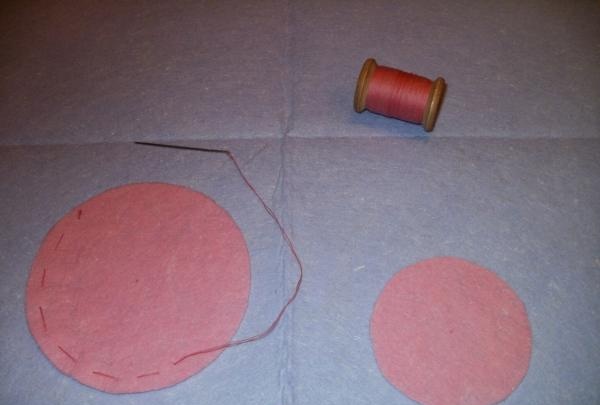
2. On viscose, draw two circles with a compass. The radius of the first is 3 cm, the second is 4.5 cm. If you can’t construct a circle using a compass, you can cut out two circles of given sizes from paper, and then trace them on viscose.
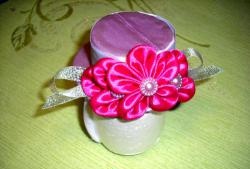
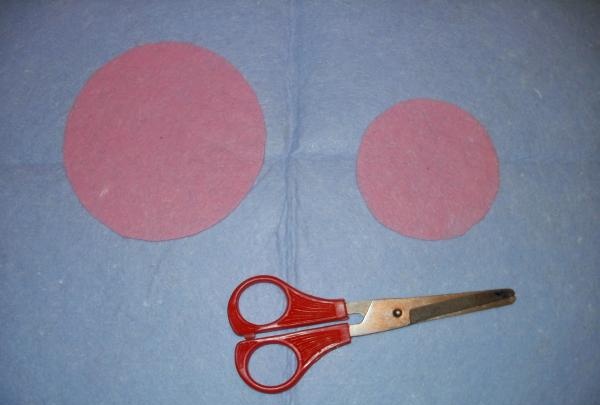
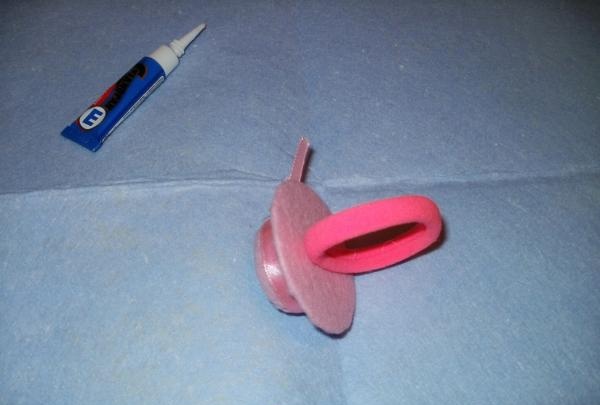
3. Using scissors, cut out two circles. On the larger circle, which will serve as the brim of the hat, we place a circle of cardboard.We place a bottle cap on the smaller circle - this is the future crown. You can use a cap of any color and with any inscriptions. They will not be visible through viscose. It is better to take a lid with rounded edges, then the fabric will lie more evenly.
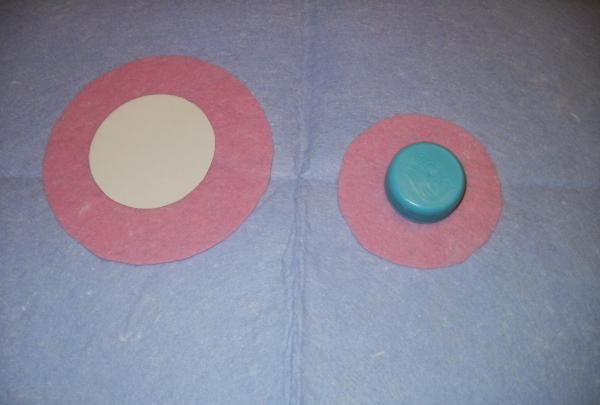
4. We sew viscose circles along the edge with a “thread forward” seam. We retreat from the edge approximately 0.3 - 0.5 cm. Having sewn the first circle to the end, we do not cut the thread. We insert the cardboard inside and tighten the fabric with thread, securing it. We do the same with the second viscose circle, inserting the lid inside.

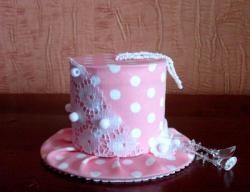
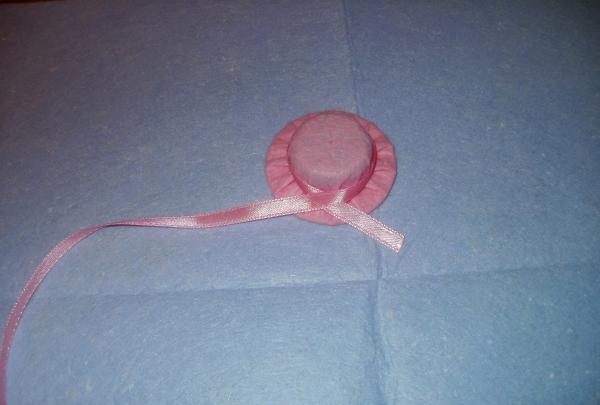
5. Next, place the circle with the lid on the larger cardboard circle and connect these two parts. You can glue it, or you can stitch it. This made a cute little hat.

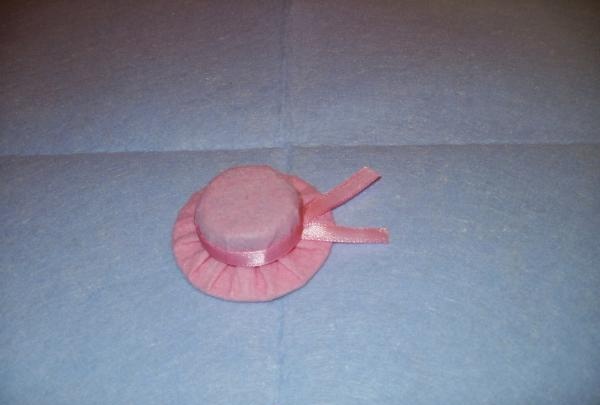
6. Let's start decorating the hat. First, we stretch a narrow pink ribbon around the crown and glue the ends. Attach the ribbon so that its ends extend beyond the brim of the hat.
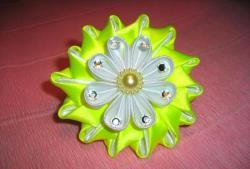
7. Now we make decorative elements. We glue golden beads onto white fabric flowers. This is the middle of the flower. You can use ready-made flowers, buy them in a store, or make them yourself.
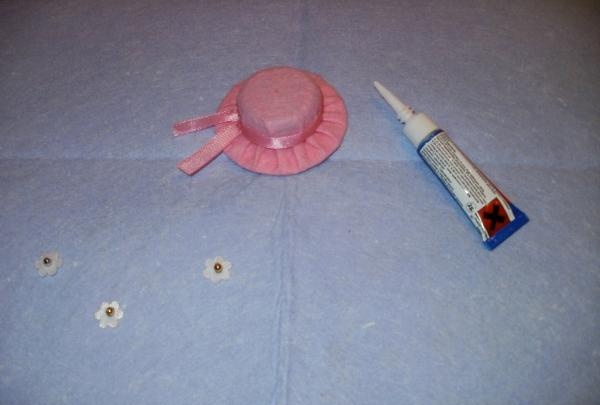
8. Using glue, attach the flowers to the crown of the hat. They not only serve as decoration, but also cover the place where the pink ribbon is glued.
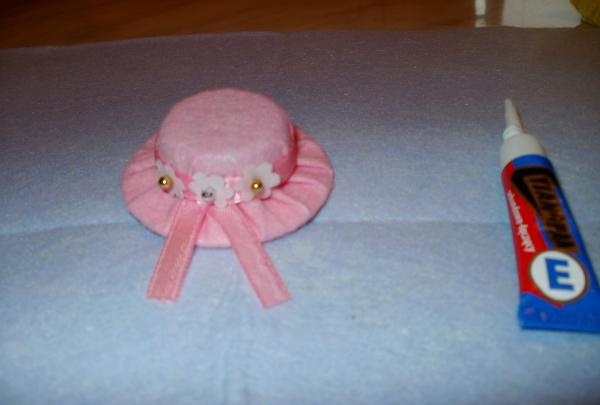
9. On the side of the flowers on the brim of the hat we glue white and golden beads, arranging them in random order. You can alternate colors.
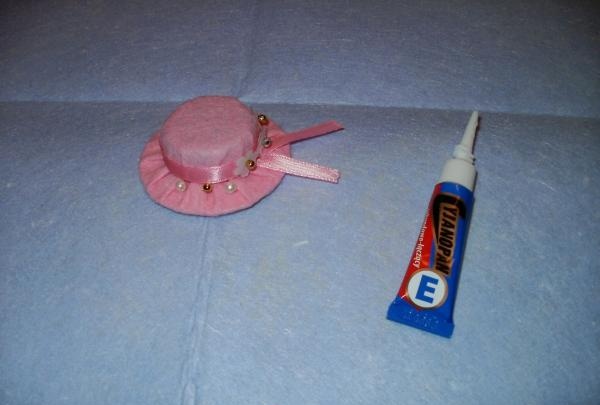
10. Since the hat will not only decorate the hair, but also support the hairstyle, we attach a hair elastic on the back side. We fix it in the middle of a larger circle. This can be done in two ways: sewn with threads, glued with strong glue.
11. Hair band The hat is ready!
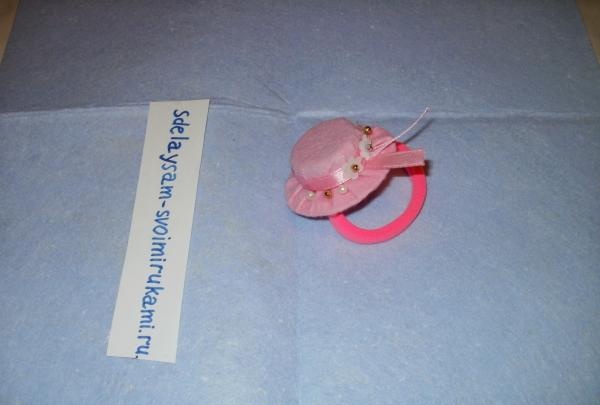
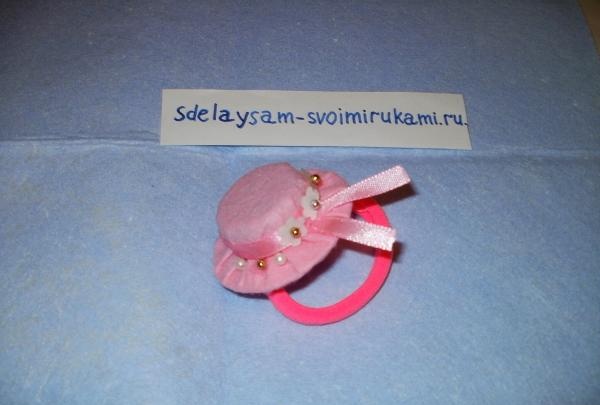
This pink and white hat will decorate the hair of any little fashionista! If desired, you can make several of these hats, different in color and decor.