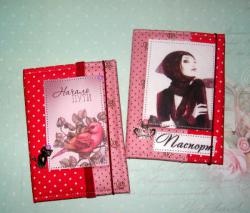
So, today we will make such youth passport covers, and we will need the following materials, accessories and tools:
• Pastel paper the color of wet asphalt, we need a landscape sheet;
• Two pieces of paper for scrapbooking, we take paper 15 * 15 cm in size and coated with glitter;
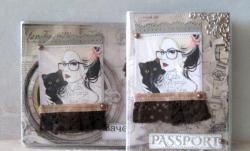
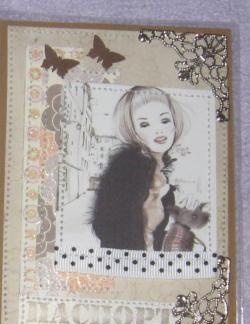
• Two pictures with fashionable girls;
• Two transparent covers for the passport;
• Beige and light brown rep ribbons, the width of both ribbons is 0.6 cm;
• Beige lace;
• Acrylic stamp “Passport” and two ink pads, one black and the other golden;
• A small piece of watercolor paper or thick cardboard;
• Four metal corners: two silver and two bronze;
• Metal pendant with a girl;
• Peach-colored pearl beads;
• Needle with thread;
• glue gun;
• Ruler;
• scissors;
• Pencil;
• Sewing machine.

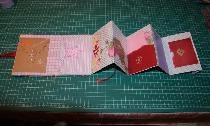
We apply the passport in an expanded form to a sheet of pastel paper and, making small margins of 2-3 mm on each side, cut out two bases for the covers. We get two bases of 12.6 by 18 cm.


Divide in half and add.


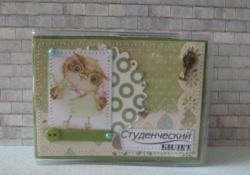
Now we are preparing the top cover design from scrapbook paper. We cut 8.5 * 12 cm from each sheet into a rectangle, and from the remaining pieces we also form rectangles so that they also turn out to be 8.5 * 12 cm. We glue the fragments with double-sided tape. We attach ribbons and lace to the pictures below, cut it off, wrap it and glue it on the back.


On cardboard we stamp “Passport” in black ink, cut out two inscriptions, round off the edges and tint with gold.


On a sewing machine we sew glued rectangles from scrapbook paper and ribbons and lace to the pictures.


We glue the pictures on one-piece blanks and sew each picture in a circle.


Use double-sided tape to glue the blanks onto the base of the covers.


Sew front and back covers separately. It remains to stick decor and decorations. First we glue the metal corners in pairs on each of the covers with a glue gun, then the half beads, on one we sew the metal pendant and at the bottom we glue the inscriptions "Passport".


Covers decorated, insert them into transparent and done! Such covers are also very suitable as a gift. Thank you all and good luck in the needlework process.