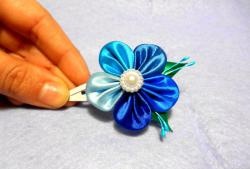
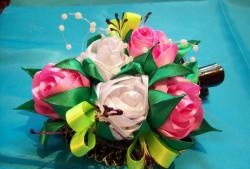
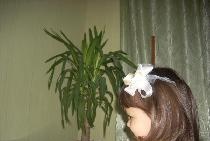
As a result, we get just such a beautiful brooch, as in the photo. What kind of materials do we need for this:
• A wide blue satin ribbon, 4-5 cm wide, approximately 0.5 meters will be needed;
• Satin ribbons pink and white ribbon width 2.5 cm, and a length of about 25 cm each;
• Acrylic blue cabochon;
• Preparation of a clip hairpin;
• scissors;
• glue gun;
• Lighter;
• Ruler;
• Pencil;
• Thread with a white needle;
• Tweezers.

So, let's get started. We take satin ribbons, a ruler, a pencil and scissors. We will measure the base squares for the petals. From a blue tape we measure squares measuring 5 * 5 cm, and from pink and white squares measuring 2.5 * 2.5 cm. Cut from about 10 to 15 squares of each color. It all depends on how many petals you want in your flower.


Now we take the lighter and burn all the squares with it. The basics for the petals are ready.

Take the blue square and fold it diagonally.


Now again we fold diagonally and so also the third time.


We take tweezers, insert a petal into it and cut off with sharp scissors from below and from the side. Lighter hold along the cut edges.


We straighten the petal. Now we take the pink square, we also fold it diagonally.


Then we fold it again. It turns out not three, but two times. And also fold two times and a white square.


We apply a white square 2-3 mm lower than the pink petal and fold them together again. The petal is thick, so it’s better to immediately take it with tweezers. Cut the bottom and one edge with scissors.


We burn the cut edges with a lighter. Expand and level the petal. Thus, we get a white-pink double petal, only it is half the size of a blue petal.


We make in such a sequence the required number of both those and other petals. Now with a glue gun we glue the blue and white petals of blue, we get here such a flower petal, as in the photo.


I get a flower of ten such petals, so we do ten, respectively. Then we sew them with a needle and thread together, forming a flower. Now cut a small square from the blue ribbon, then round it and process it with a lighter. This circle will be the bottom of the flower. Turn the flower over and glue the substrate with the gun.


The bottom of the flower is ready. Turn it over and glue the blue cabochon in the center.


It only remains for us to glue the flower on the hairpin-clip and you're done. This is how we independently made an accessory that perfectly complements any dress of a little princess. Thank you all and good luck in the process!