To work, you will need:

- a wooden casket (such caskets can be purchased in the department of goods for needlework and scrapbooking);
- acrylic art paints. The work will require several colors: dark brown to create the basic shade, white for the primer and golden metallic for decorating the finished product;
- napkins with a pattern. You can choose any motive for decorating the box, but it is the “vintage” style that involves the use of delicate colors and compositions, floral patterns, sentimental plots and retro portraits;
- special glue for decoupage. It is worth giving preference to water-based decoupage glue, which creates a dense coating and dries quickly;
- synthetic brushes of different sizes. When working in this technique, it is better to give preference to artificial brushes, since natural brushes can crumble and leave fibers on the surface of the product;
- a candle that will be used to “age” the casket;
- sponge for applying paint;
- sandpaper;
- metal figures, frames, flowers, lace - all this will be used to decorate and decorate the chest.
Let's move on to making a vintage chest.
1. At the beginning of work, it is necessary to clean all the bumps on a wooden surface with sandpaper. Thus, the box will be ready for application of paint.

2. The first layer is applied brown paint. Acrylic dries quickly enough, so after 30 minutes you can not apply the following coating: water-based varnish.


3. After the varnish has dried, all sides of the box are thoroughly smeared with wax candles. Wax will not allow coatings to adhere tightly to each other, so that the product can be given the effect of "scuffing", scraping off the paint in those places where the wax is applied.

4. In the next step, cover the casket with a layer of acrylic white. It is preferable to apply the paint with a paralon sponge, as this will help to avoid streaks and uneven coverage. When the light layer is completely dry, it is necessary to clean the edges and corners of the chest with sandpaper until a brown tint appears.


5. Now you can start sticking the images. Carefully separate the topmost color layer from the napkin and determine how the drawings will be arranged on the box. Having put a napkin to the workpiece, with a wide flat brush, begin to apply glue for decoupage, while smoothing the formed folds. When the glue dries, fix the result with water-based varnish.


6. When the varnish is dry, shade the edges and edges of the box with dark brown paint to enhance the effect of "scuffing".After the brown paint has dried, we apply acrylic with a metallic golden sheen on top of it, thanks to which the aged edges of the box will look interesting and natural. Fix a layer of paint with decoupage varnish.


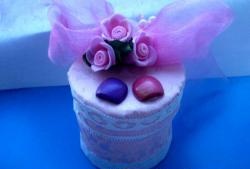
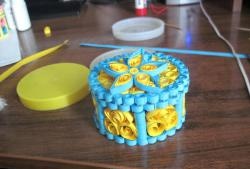
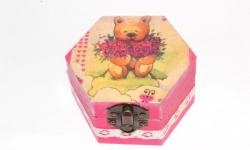
7. Now proceed to decorating the casket: fix the composition of artificial flowers, metal pendants and any other decor elements on the lid.

The original box made using the decoupage technique is ready!