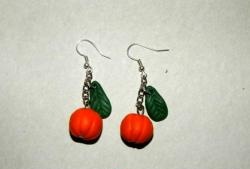
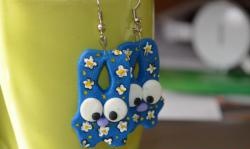
This article will detail the process of creating unique earrings that will be made using the "translation" technique.
This technique consists in transferring any image to polymer clay, which at the same time does not lose its brightness and clarity. This technique allows you to create amazing jewelry and souvenirs, but pendants with photos of people who are dear to its owner look especially impressive.
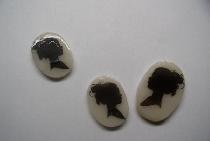
From plastic using the "translation" technique, amazing giftsthat are remembered for a lifetime.
Let's move on to the creation of earrings.
We will need:
- a small bar of white plastic
- image printed on a laser (!) printer in mirror image
- fittings (2 shvenzy, 2 pins and 2 connecting rings)
- blade
- water
- cotton wool
- a rolling pin or any item that can be used for rolling
- modeling board
These objects are clearly visible in the photo:


Step 1.
If the plastic is still cold, then it is hard and flexes very poorly, so you need to warm it up in your hands and knead, then it will become malleable. First you need to cut off two small pieces from the plastic bar and, after stretching them, give the shape of a ball.


Step 2
Now you need to roll these balls into a layer with a uniform thickness of 2-3 mm. Professionals use special paste machines for this purpose, but we will use a rolling pin in the old fashioned way.

Tip 1: so that the clay does not stick and does not tear, it must be moistened with water.
Tip 2: plastic, especially white, “collects” all the smallest dust from hands and tools, so before you take it, you need to thoroughly wash your hands, because even the smallest mote will be visible on clay.
Step 3
When the plastic is rolled into a “pancake”, you can go directly to the process of transferring the prepared picture to it. It should be noted that the size of the clay layer should be slightly larger than the image.
How to translate a drawing? To do this, take a picture printed and cut along the contour and apply it with the front (!) Side to the plastic and roll it a little with a rolling pin.

To translate the image, you need to moisten it with water and wait until it saturates the top layer, so that we can take it off, leaving only the picture on the “pancake”. To speed up the impregnation process, it is necessary to gently roll the workpiece with a rolling pin.

When the paper becomes transparent and a pattern is visible through it, it's time! To remove the top layer of paper, you need to draw on it with your fingers, rolling the top layer into "spools". This is the most crucial moment - after all, along with the paper, you can remove the drawing itself, which will ruin the work. What should the blank look like in the end:


Step 4
Now you need to carefully trim the excess clay with a blade, without damaging the product itself.

Step 5
Next comes the turn of accessories: first, carefully screw the pins into the upper part of the product

Step 6
Now you can go to the stove! The oven should be preheated to 160-180 degrees and keep the product there for about 10-15 minutes.
When the earrings are baked and cooled, you can proceed to the final assembly - the fasteners fasteners.
As a result, we got unique earrings that no one else has!
The manufacturing process took 30 minutes.