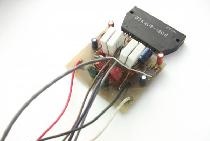
There was no printed circuit board for it and decided to assemble it on another circuit board from the radio, where there was a microcircuit that has 16 legs. And so, first we remove all the details from the board, then carefully remove the microcircuit so that the tracks remain intact. Install TDA7496SA (it has 15 legs) in the place where the micro was from the receiver. We’ll have to tinker a bit, because the tracks go in different directions. The case of the microcircuit should be connected to the minus.

And of course, you cannot leave without a radiator, otherwise it heats up very quickly, and may fail. As for the transformer, I took it from the old power supply and the output is 21.22 volts and not less than 0.6 amperes. If the voltage is, somehow below 16 volts you will have to put 220 microfarad capacitors at the output, otherwise the sound quality will be worse than we thought. Follow the ampere, the same is very important. If more than 22 volts, then you can replace it with 470 microfarads and 1000 microfarads, and then there is no sense anymore.
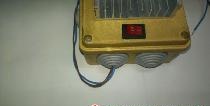
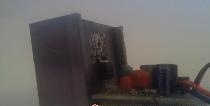
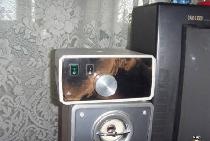
Here I already put the board in the case from the old doorbell. The transformer did not fit and decided to assemble separately with a diode bridge. For the audio input, I put a headphone jack and I think it can not be replaced with anything and in other devices the same. She has three conclusions inside, one is a common minus, and the other two can be said as if pluses (this is for a stereo system).

And for the audio output I decided to use a DVD jack, and I can also use a TV. For power, I put a socket and a plug from an old 70s electronic microphone. Such things can be found in old televisions and tape recorders.

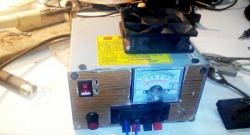
As for the diode bridge, when I assembled on the KD202 they showed the worst side, the sound was not clear, although these diodes are used in audio equipment. Put D226 there is no problem. The power supply decided not to show, because it was the size of a fist. D226 diodes are the same for any self-respecting radio amateur.

This is a ready-made amplifier. Capacitors must be supplied after the diode bridge at least 1000 microfarads. Try to at least connect two of them in parallel. The more capacitors, the less noise (background) of alternating voltage will be, and it is very important that there is a high-quality and clear sound. I wrote all this for beginners ...