Do it yourself
Life hacks, master classes, useful tips, recipes.
home » Different » Jewelry and costume jewelry » New Year's candlestick
A bright and shiny candlestick will suit any New Year's interior. It will be appropriate as a decorative element when decorating a room. This wonderful candlestick looks great on the holiday table. It creates an atmosphere of comfort and magic and will help brighten up any dinner. In conclusion, I would like to note that you can make such a cute candlestick not only easily, but also very quickly. Our detailed photo report will help you make this amazing magical thing with your own hands. This candlestick was made by a 2nd grade student. Therefore, you can make such a craft together with your child, which will bring a lot of pleasure to yourself and your baby.

New Year's candlestick


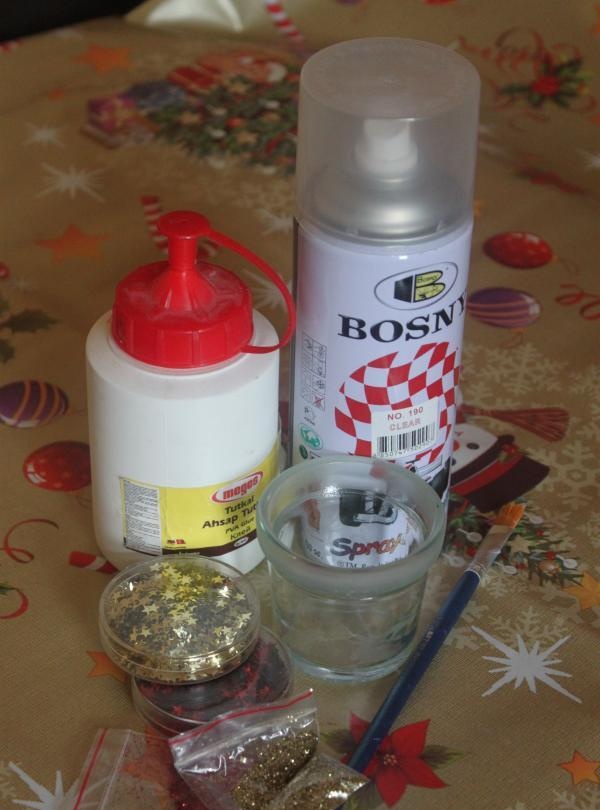
1. To make a candlestick we needed:

• A simple cup.
• PVA glue.
• Fixing varnish.
• Brush.
• Stars.
• Glitter sprinkles.

To make a candlestick


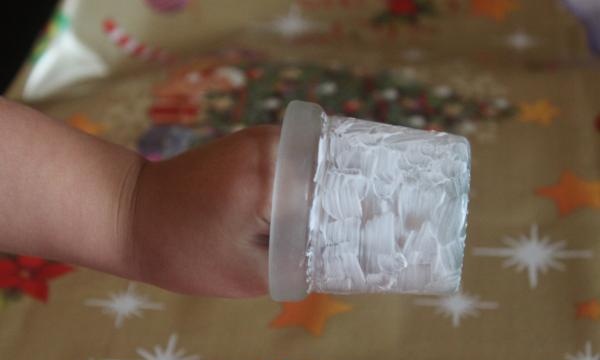
2. Using a brush, carefully apply glue to the outside of the glass.

apply glue


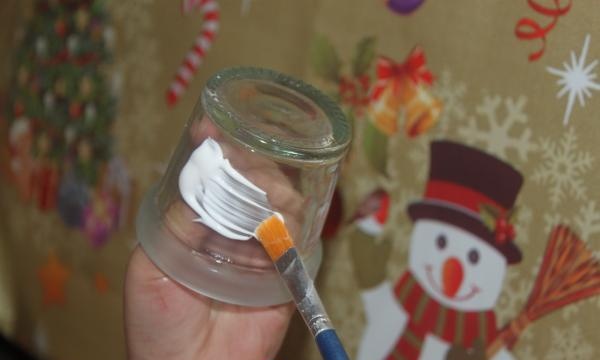
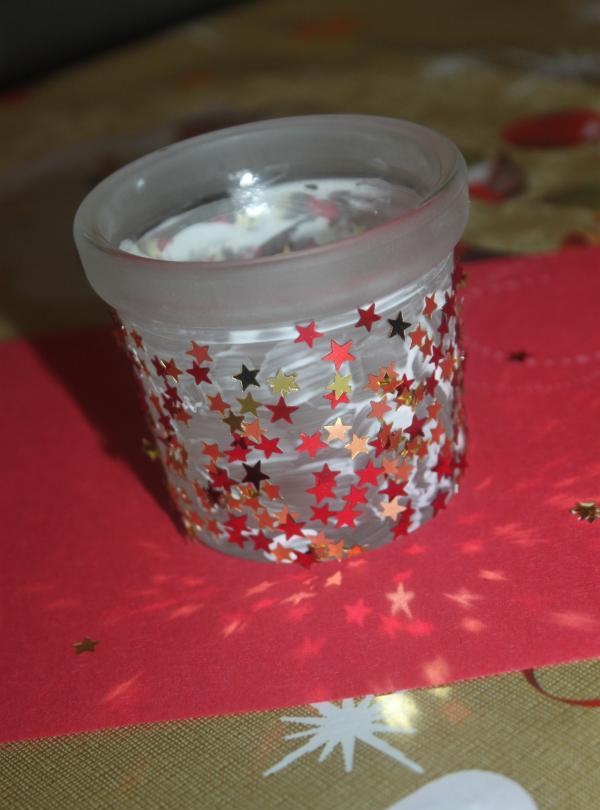
3. Coat the entire surface of the glass with glue, except for the rim.

Apply glue to the entire surface


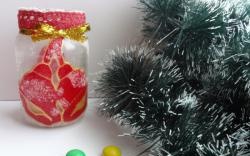
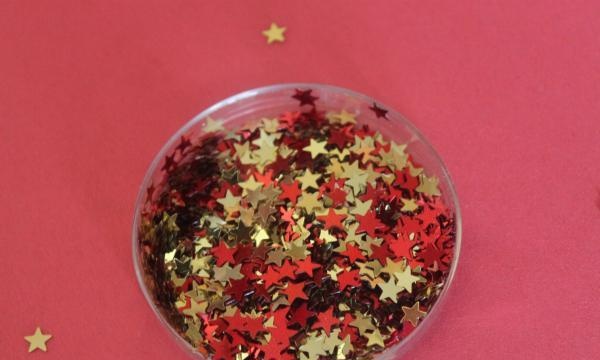
4. Take shiny stars of two colors: red and gold.

take shiny stars


5. We sprinkle them on our future candlestick.

Let's sprinkle them


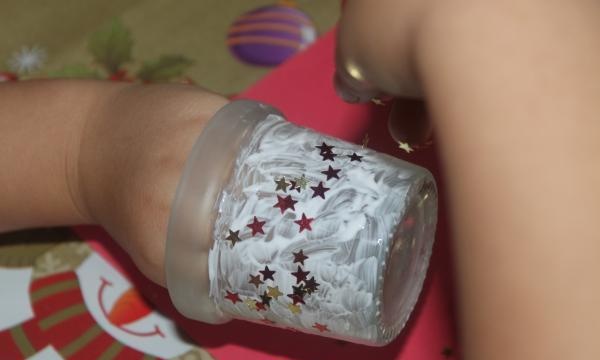
6. Let the glue dry a little and our decorative elements stick.

Let it dry a little


7.Coat the rim of the glass with glue and sprinkle it with small glitter. We also decorate the glass itself with a small amount of shiny particles. In this work, glitter of two colors was used: gold and red.

sprinkle with small glitter


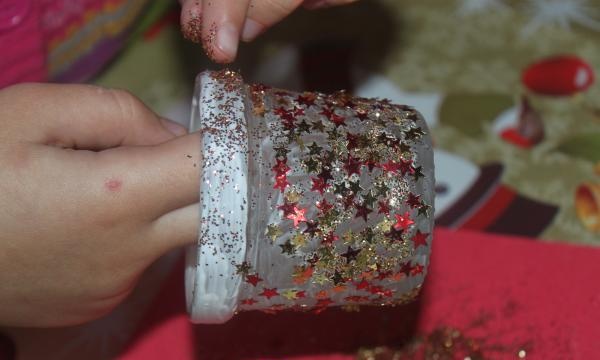
8. To apply a thick layer of glitter, you can simply roll the glass over the paper on which they are scattered. We are waiting for the PVA glue to dry. Then we fix everything with a fixative varnish.

thick layer of glitter


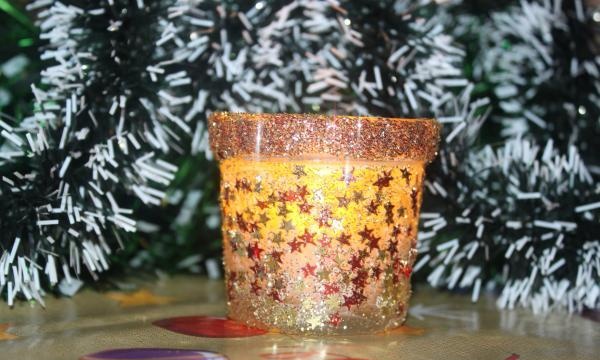
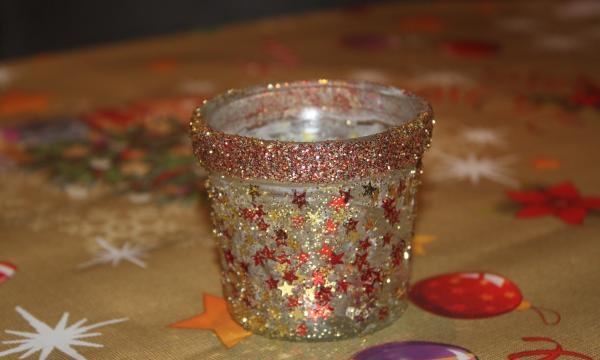
9. The result is such beauty. We admire the result.

shiny candlestick


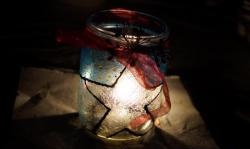
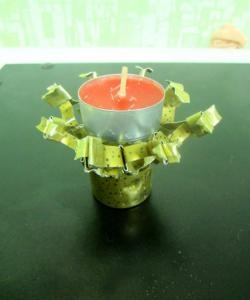
10. This is what a shiny candlestick with a lit candle looks like.
come back
Comment
  • bowtiesmilelaughingblushsmileyrelaxed relaxedsmirk
    heart_eyeskissing_heartkissing_closed_eyesflushedrelievedsatisfiedgrin
    winkstuck_out_tongue_winking_eyestuck_out_tongue_closed_eyesgrinningkissingstuck_out_tonguesleeping
    worriedfrowninganguishedopen_mouthgrimacingconfusedhushed
    expressionlessunamusedsweat_smilesweatdisappointed_relievedwearypassive
    disappointedconfoundedfearfulcold_sweatperseverecrysob
    joyastonishedscreamtired_faceangryragetriumph
    sleepyyummasksunglassesdizzy_faceimpsmiling_imp
    neutral_faceno_mouthinnocent
5+two=
Comments (0)

3 ideas for organizing kitchen storage

Do it yourself - crafts and master classes | Page 170

We sew a bow tie for a gentleman | Do it yourself

A method for learning to weld without consuming electrodes with your own hands

«Do it yourself - with your own hands» - a site of interesting homemade products made from scrap materials and items at home. Step-by-step master classes with photos and descriptions, technologies, life hacks - everything a real master or just a craftsman needs for needlework. Crafts of any complexity, a large selection of directions and ideas for creativity.

We recommend reading

Washing machine error codes