Do it yourself
Life hacks, master classes, useful tips, recipes.
home » Computer homemade products » Let's clean the laptop cooler from dust
Most often, after buying a laptop, we don’t even think about its condition - once you buy it, it means you can use it as much and as you like! Place a carpet, a blanket on your knees, sit the cat next to you and enjoy watching a movie with a cup of coffee/tea.
But it's not that simple. Literally after six months of such use, the laptop begins to make noise, crackle, hum, knock and make other alarming noises. And not only to emit noise, but to overheat or even turn off. What happened to the computer?
The fact is that there is a cooler inside the laptop, thanks to which the entire internal system is cooled. And when the computer is forced to stand on a soft surface, its ventilation is simply covered with a blanket, rug, etc. Dust is drawn inward, after which the color becomes clogged. Let's take a step-by-step look at how to clean your laptop from dust yourself.

Step one.
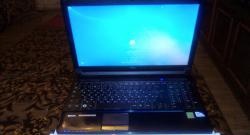
Let's look at reading on a Lenovo laptop. In fact, there is no fundamental difference, except that the lid may be offset or located in the middle of the laptop. In my case, the upside down computer looks like this:

Consider reading on a laptop


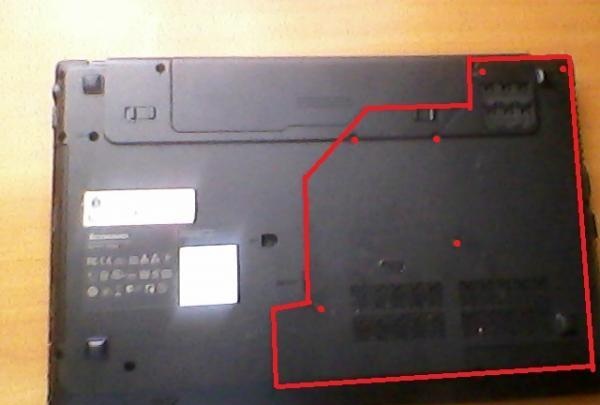
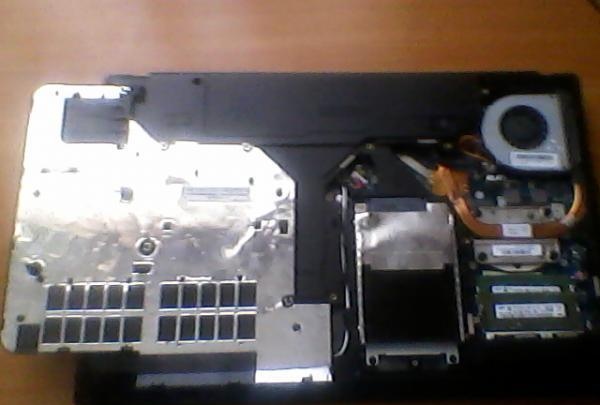
And here is the cover itself with 6 small screws that we need to unscrew.This is what the laptop looks like with the lid unscrewed.

laptop without cover


Step Two.
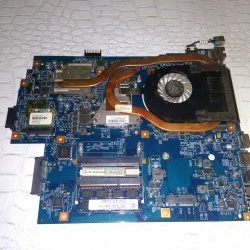
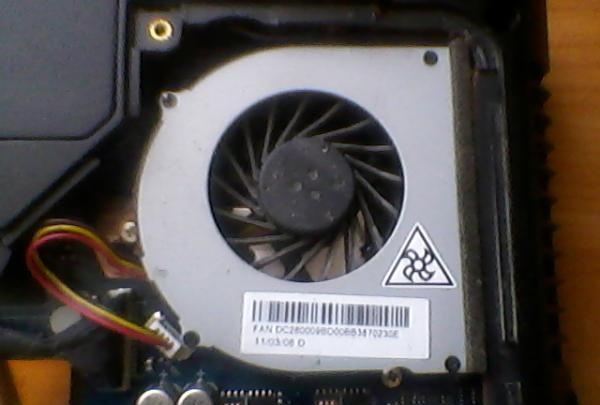
So we got to the cooler itself. As you can see in the figure, the cooler is protected by a small plate held on by 4 screws, which we also need to carefully unscrew. Attention! Don't lose the screws, they are very small, but if you lose them, we won't be able to work with the laptops.
Before:

laptop cooler


After:

carefully unscrew


Now that the cooler is open, we can directly begin cleaning.

Step Three.
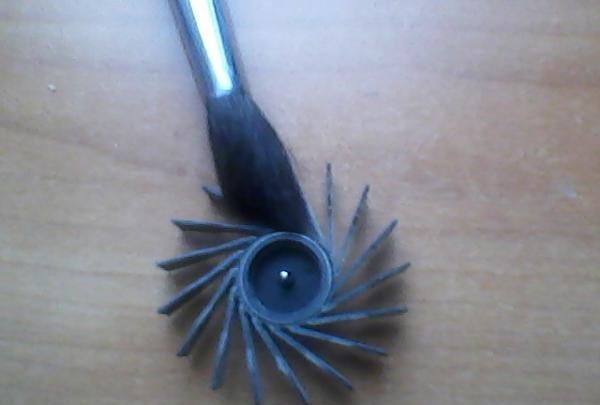
We carefully take out the fan, and, using the most ordinary brush, begin to clean each of its blades from dust:

clean the blades


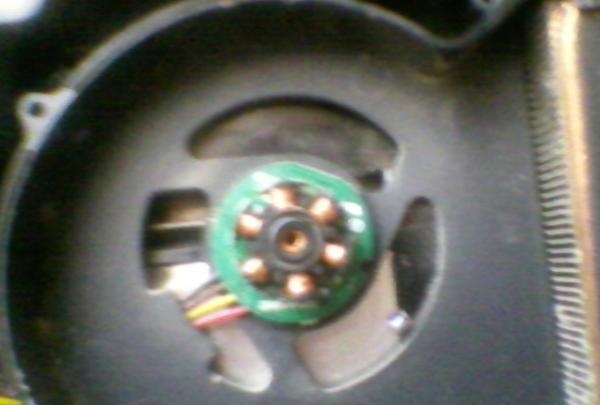
After cleaning, pay attention to the place where the fan was located:

there was a fan


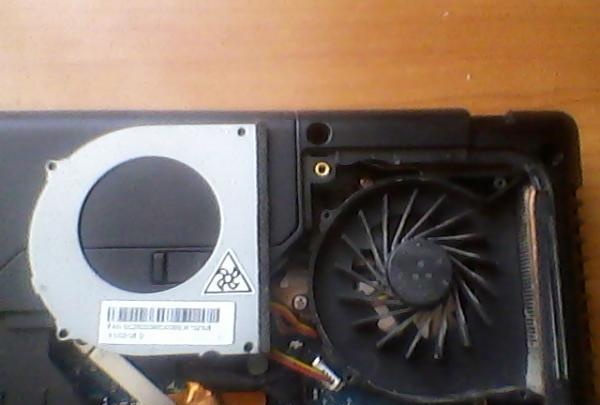
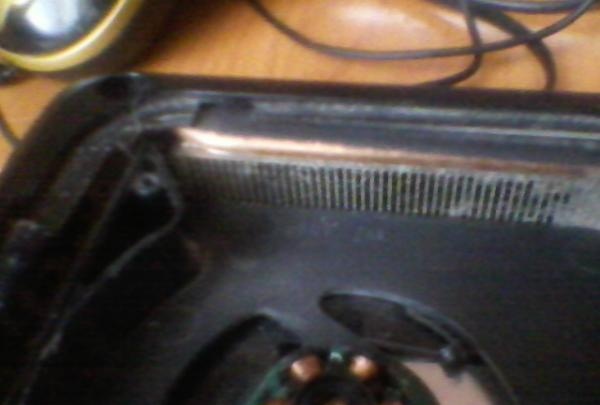
And here is the grill itself, through which the laptop is cooled.
Before cleaning:

before cleaning


After:

after cleaning


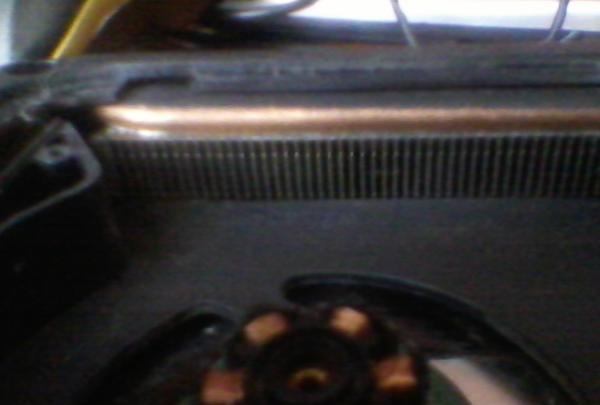
Clean the grate using the same brush.
Step Four
And finally, the last step before assembling the laptop is to lubricate the fan axis:

lubricate the fan axis


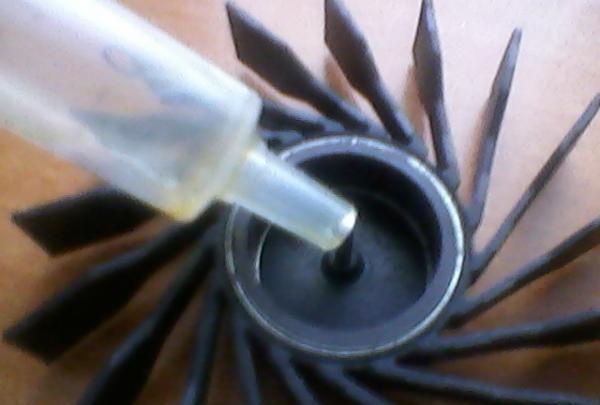
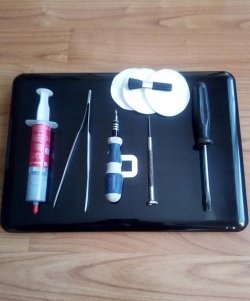
Regular machine oil, for example, from sewing machines, is suitable for this. I had purified oil specially purchased for cleaning the cooler, which was almost gone. But a couple of drops is enough for us.

Step Five, Final.
Now all that remains is to return everything to its place - insert the fan, tighten the plate and cover. Now your laptop will delight you with its quiet operation for at least a month. Even if after this period there is no noise, we recommend cleaning it every two months. Good luck!
come back
Comment
  • bowtiesmilelaughingblushsmileyrelaxed relaxedsmirk
    heart_eyeskissing_heartkissing_closed_eyesflushedrelievedsatisfiedgrin
    winkstuck_out_tongue_winking_eyestuck_out_tongue_closed_eyesgrinningkissingstuck_out_tonguesleeping
    worriedfrowninganguishedopen_mouthgrimacingconfusedhushed
    expressionlessunamusedsweat_smilesweatdisappointed_relievedwearypassive
    disappointedconfoundedfearfulcold_sweatperseverecrysob
    joyastonishedscreamtired_faceangryragetriumph
    sleepyyummasksunglassesdizzy_faceimpsmiling_imp
    neutral_faceno_mouthinnocent
3+three=
Comments (6)
  1. ALPom
    #1 ALPom Guests 18 November 2013 15:41
    4
    Not everything is so rosy in this world. Some laptops are much more difficult to clean. For example, Dell Vostro A160. To get to the radiator and cooler, you need to remove the keyboard, the display assembly, the Wi-Fi module, disconnect the very fragile cables and connectors, and separate the case in half. Then you can unscrew the cooler. And in the HP g62 plus laptop you still need to remove the motherboard. The first time I cleaned my Dell, when I assembled it, I was afraid that it wouldn’t turn on. But it worked out.
    Therefore, before cleaning, look for disassembly instructions for your model.
  2. Veent
    #2 Veent Guests 30 November 2013 16:58
    2
    Who will change the thermal paste?
  3. Graw
    #3 Graw Guests January 2, 2014 03:38
    2
    I clean beech once every 3-4 months, since disassembling it is a hassle... so there is an easier option: using a regular vacuum cleaner, covering the floor of the pipe with your finger, “pull” all the dust and “moss” through the radiator grille, clean not 100%, but by sound and temperature noticeably better.

    and it is not advisable to replace thermal paste more than once a year, because The warranty period is 2-5 years. But for myself, I’ll say that in 4 years I changed it once and that was to no avail, the old one was quite satisfactory.
  4. Ketat
    #4 Ketat Guests 10 August 2014 14:17
    2
    And after such cleaning, feel free to take the laptop to a service center to replace the cooler
  5. Konstantin
    #5 Konstantin Guests 5 March 2015 22:04
    1
    And I clean with compressed air! I tried to disassemble it, but I need to completely disassemble it to get to the cooler, so there were only 2 steps left to remove the keyboard and you can start cleaning, because they made such short wires that the hand post was not left to the plug, and it is also micro, so that’s how it broke 1 eyelet for fastening the cable from the touchpad, quickly twisted everything back and took it forever about Complete disassembly and cleaning.... And to hand it in for service for 3000 rubles is a toad, now I blow it with compressed air from the back side, while the flight is normal!
  6. Sej
    #6 Sej Guests May 25, 2018 11:20
    1
    Did you take pictures using the iron from the next article? wink

Lie detector. | Do it yourself

DIY drill stand

How to easily make a precise cut in a pipe

How to make a wood stove from a gas cylinder with your own hands

«Do it yourself - with your own hands» - a site of interesting homemade products made from scrap materials and items at home. Step-by-step master classes with photos and descriptions, technologies, life hacks - everything a real master or just a craftsman needs for needlework. Crafts of any complexity, a large selection of directions and ideas for creativity.

We recommend reading

Washing machine error codes