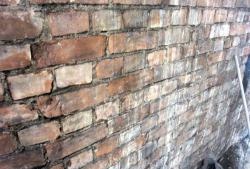
Russian craftsmen are cunning in their invention. There is a way to decorate the interior with a brick-like finish using regular gypsum plaster. It turns out quite inexpensive and very original. Moreover, the size of the bricks, their shape and texture can be made to any size. Using this simple technology, you can perfectly disguise protruding beams, stylishly design doorways, and hide unevenness and defects in walls.
To work you will need:
- gypsum plaster;
- water;
- Master OK;
- putty knife;
- stick;
- rags.
First you need to decide which section of the wall will be decorated, and what shape and size of bricks are needed. The first time is to try on a small surface.
Preparing the wall for applying plaster.
Before decorating the wall with homemade decorative bricks, standard work is carried out to prepare the surface for applying gypsum plaster. The wall is freed from old finishing (wallpaper, paint, tiles, etc.), all peeling fragments are removed. There is no need to level the surface, because the bricks will well disguise even significant unevenness of the walls. The main thing is that the wall is clean and dry. After cleaning, the surface is impregnated with a primer.
Main job.
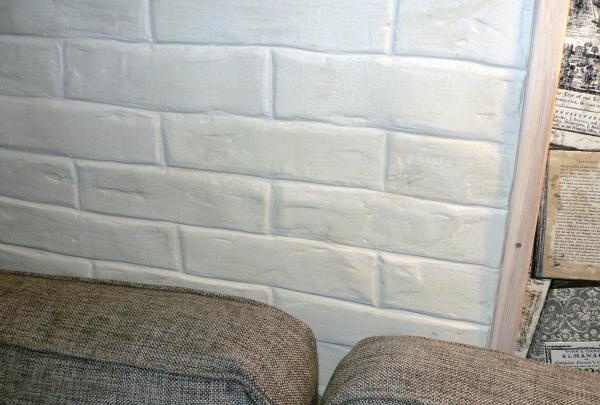
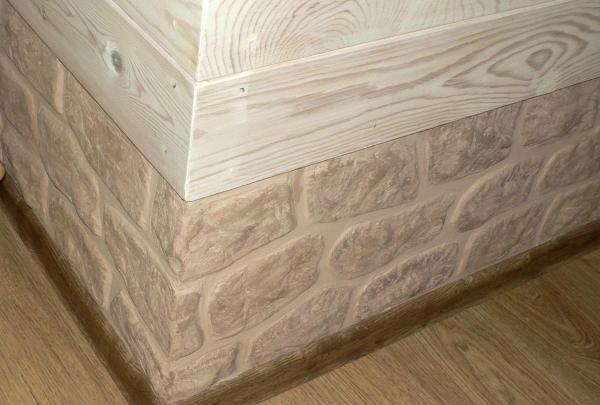
Gypsum plaster is diluted to the consistency of a not too stiff dough. The work is performed in small fragments, approximately 0.5 square meters. meters. A 1 cm thick layer of plaster is applied to the wall using a trowel. The surface is slightly smoothed with a spatula (it is important not to overdo it here, because the texture of the stone should be slightly uneven). After which the creative part of the work begins - using a stick, a “brick-like” pattern is applied. To do this, first draw two horizontal lines, which will indicate a row of brickwork. Then this row is divided into individual bricks by vertical lines.
The thickness of the stick is selected depending on the planned distance between the bricks. If the gap is intended to be large, you can draw with your own finger.
Having finished drawing one fragment, move on to the next section and repeat all the steps described above again.
Brick finishing stage.
When all the necessary bricks have been painted, you need to let the plaster dry. Dry areas of “brickwork” are first treated with a spatula. Using this tool, large irregularities are removed and seams are cleaned.Then the entire surface is intensively cleaned with a piece of rags (or an ordinary cotton glove), this way minor roughnesses are smoothed out.
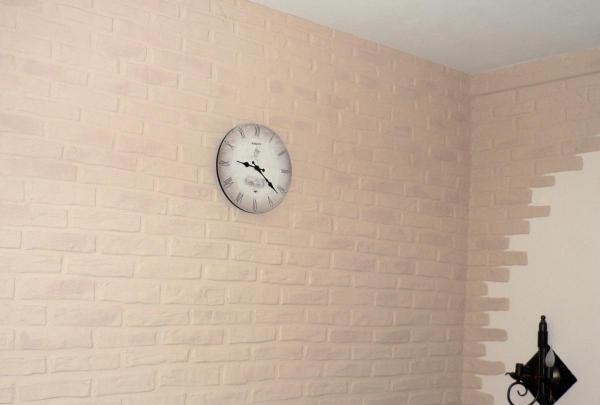
All that remains is to coat the bricks with a primer intended for gypsum plaster and paint the finished brick wall in the desired color.
To get a more natural effect, you need to use paint of several shades. First, the main color is applied to the entire surface, then strokes of a darker or lighter shade are added with a dry brush.
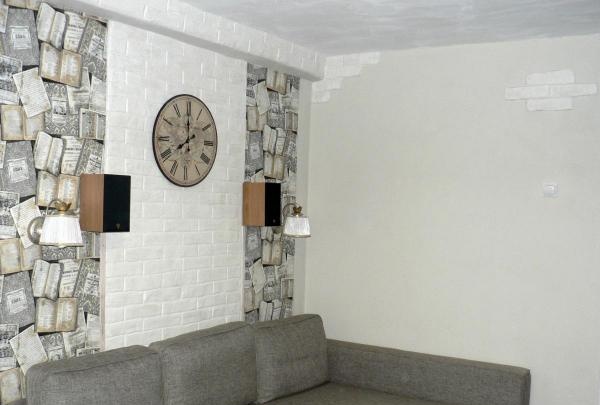
Of course, store-bought bricks are good, they look expensive and stylish. But the method described here has every right to exist. After all, it allows you to achieve an interesting decorative effect using very inexpensive materials. You just need a little practice, and a real brick wall will delight its owners even in “economy class” housing.